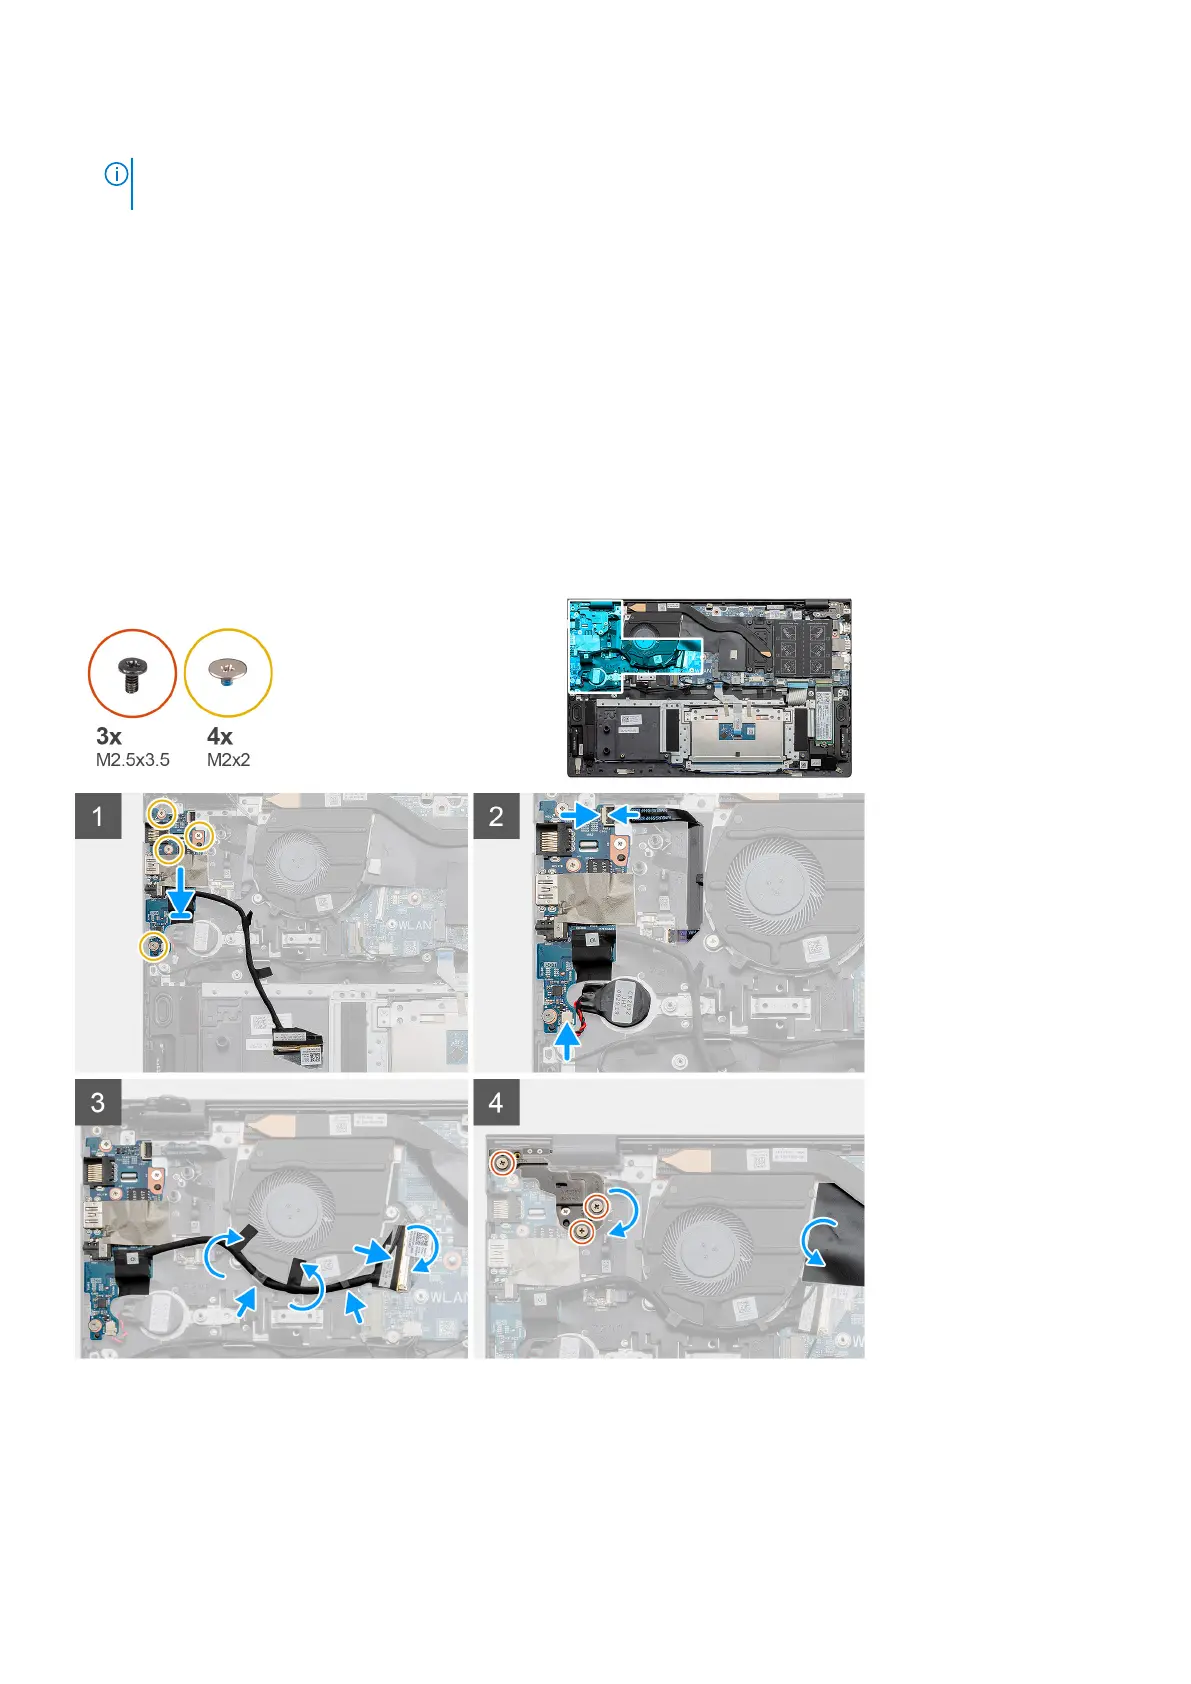
5. Open the latch, and disconnect the I/O-board cable.
NOTE: The original cable has to be transferred to the new I/O board when ordering for a warranty part as the new I/O
board does not include a cable.
6. Open the latch, and disconnect the fingerprint reader cable from the I/O board.
7. Disconnect the coin-cell battery cable from the I/O board.
8. Remove the four screws (M2x2) that secure the I/O board to the palm-rest and keyboard assembly.
9. Lift the I/O board off the palm-rest and keyboard assembly.
Installing the I/O board
Prerequisites
If you are replacing a component, remove the existing component before performing the installation procedure.
About this task
The figure indicates the location of the I/O board and provides a visual representation of the installation procedure.
Steps
1. Place the I/O board on the palm-rest and keyboard assembly.
2. Align the screw holes on the I/O board with the screw holes on the palm-rest and keyboard assembly.
3. Replace the four screws (M2x2) that secure the I/O board to the palm-rest and keyboard assembly.
4. Connect the fingerprint reader cable to the I/O board and close the latch to secure the cable.
Disassembly and reassembly
43