TellerScan
®
TS240 User Manual
Rev 122013
Page | 11
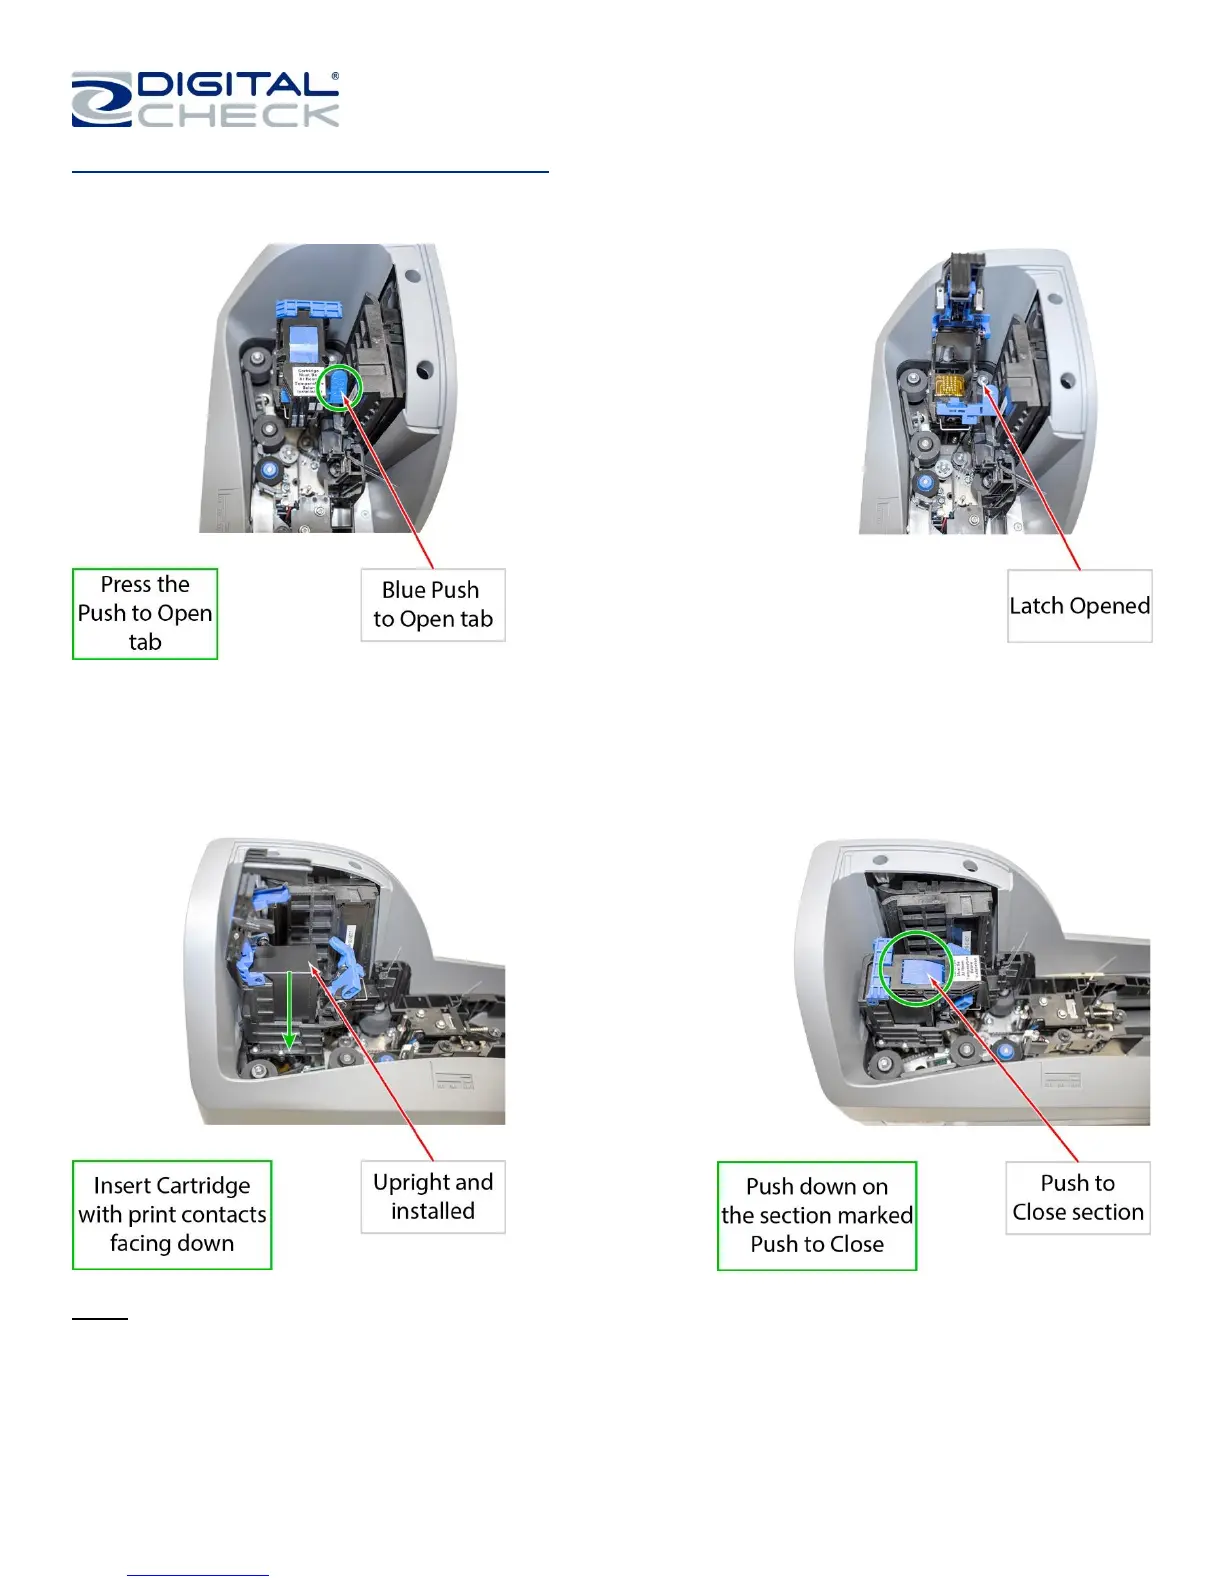
Installing the Ink Cartridge (continued)
Step 3: Press on the ‘Push to Open’ blue tab on the side of the inkjet platform to open the latch.
Step 4: Carefully insert the cartridge into the platform from the top with the contacts facing down. Make sure
that the cartridge is fully seated by pressing on the top of the cartridge.
Step 5: Close and secure the top latch. Press down on the ‘Push to Close’ section of the latch. Replace the
‘Center Cover’ by setting it back on the unit vertically.
Note: If the scanner has to be transported by common carrier from one place to another or will experience
extended periods of inactivity, it is advisable to remove the ink cartridge from the scanner and seal it in an
airtight bag. If the cartridge has not been used for an extended period of time, it might be necessary to clean
the inkjet nozzles by gently blotting them with a towel dampened with water or using Digital Checks Inkjet
Cleaning Swabs (PN: IS0032 – available at www.digitalcheck.com).