EasyManuals Logo

Digital Check TellerScan TS240 User Manual

Digital Check TellerScan TS240
26 pages
To Next Page IconTo Next Page
To Previous Page IconTo Previous Page
Page #12 background imageLoading...
Page #12 background image
TellerScan
®
TS240 User Manual
Rev 122013
Page | 12
Installing the Franker Roller
Note: This step only applies to TellerScan TS240s that have the optional franker configuration. Follow these
instructions when installing the franker roller for the first time, or when replacing an empty franking roller.
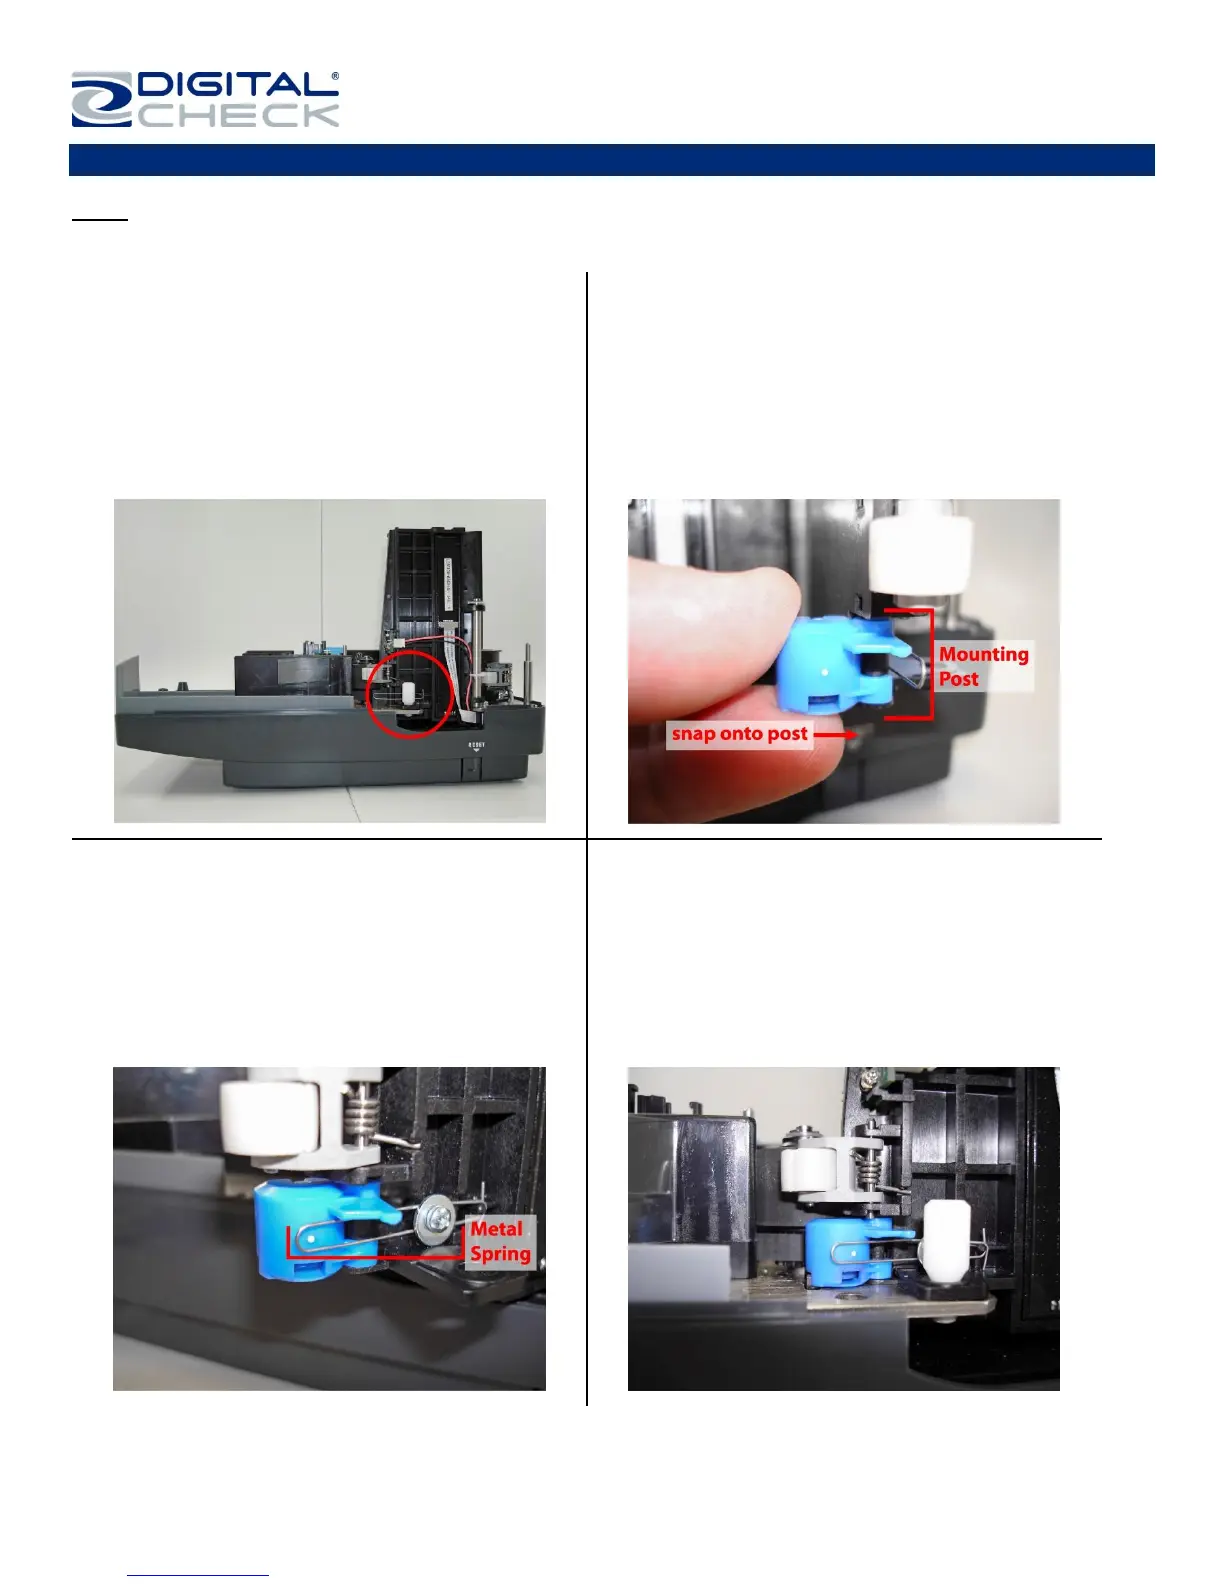
Step 1: Remove the Center and Outer scanner
covers. Locate and remove the White Nylon
Thumbscrew.
Step 2: Swing out the outer Camera Door. Locate
the Franker Roller Mounting Post.
Hold the Franker Roller with the tab facing out
and lined up with the Metal Spring. Snap the
Franker Roller onto the Mounting Post.
Step 3: Rotate the Franker Roller until it touches
the Metal Spring (as shown).
Step 4: Close the Camera Door and screw the
White Nylon Thumbscrew back in place.
Replace the Center and Outer scanner covers.

Table of Contents

Other manuals for Digital Check TellerScan TS240

Questions and Answers:

Question and Answer IconNeed help?

Do you have a question about the Digital Check TellerScan TS240 and is the answer not in the manual?

Digital Check TellerScan TS240 Specifications

General IconGeneral
ModelTellerScan TS240
CategoryScanner
InterfaceUSB 2.0
Operating System CompatibilityWindows 7, 8, 10
Power Supply100-240 VAC, 50/60 Hz
SpeedUp to 100 documents per minute
Resolution300 dpi
Feeder Capacity100 documents
Image TypeGrayscale
MICR Read Rate99%

Related product manuals