EasyManuals Logo

Digital Check TellerScan TS240 User Manual

Digital Check TellerScan TS240
26 pages
To Next Page IconTo Next Page
To Previous Page IconTo Previous Page
Page #8 background imageLoading...
Page #8 background image
TellerScan
®
TS240 User Manual
Rev 122013
Page | 8
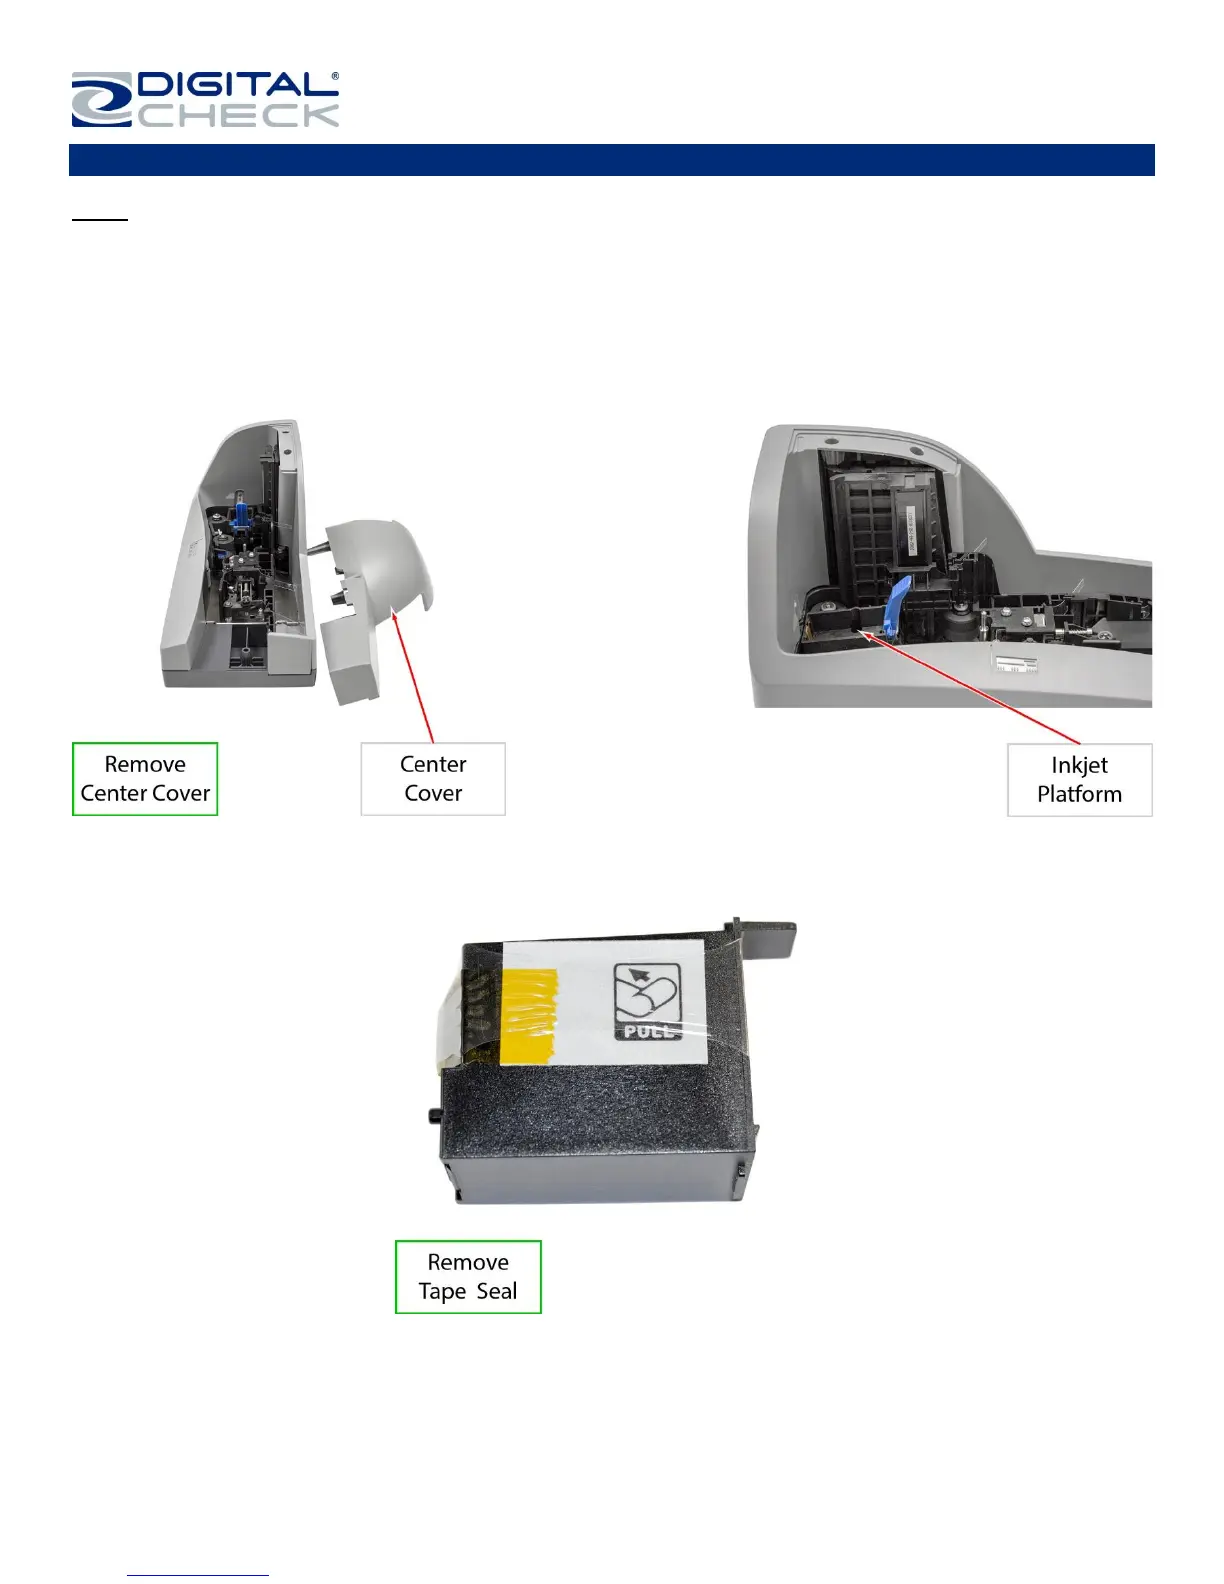
Installing the 1 Line Printer Ink Cartridge
Note: This step only applies to TellerScan TS240s that have the optional inkjet configuration. Follow these
instructions when installing the ink cartridge for the first time, or when replacing an empty cartridge.
Inkjet platform style might vary based on production. The cartridges are installed the same way for all TS240 1
line platform styles.
Step 1: Lift up on the Center Cover’ to remove it and provide access to the ‘Ink Cartridge Platform.
Step 2: Open the ink cartridge pouch and remove the protective tape covering the ink nozzles. Be careful not
to touch the ink nozzle with your fingers or allow it to come in contact with anything else.

Table of Contents

Other manuals for Digital Check TellerScan TS240

Questions and Answers:

Question and Answer IconNeed help?

Do you have a question about the Digital Check TellerScan TS240 and is the answer not in the manual?

Digital Check TellerScan TS240 Specifications

General IconGeneral
ModelTellerScan TS240
CategoryScanner
InterfaceUSB 2.0
Operating System CompatibilityWindows 7, 8, 10
Power Supply100-240 VAC, 50/60 Hz
SpeedUp to 100 documents per minute
Resolution300 dpi
Feeder Capacity100 documents
Image TypeGrayscale
MICR Read Rate99%

Related product manuals