EasyManuals Logo

Digital Check TellerScan TS240 User Manual

Digital Check TellerScan TS240
26 pages
To Next Page IconTo Next Page
To Previous Page IconTo Previous Page
Page #18 background imageLoading...
Page #18 background image
TellerScan
®
TS240 User Manual
Rev 122013
Page | 18
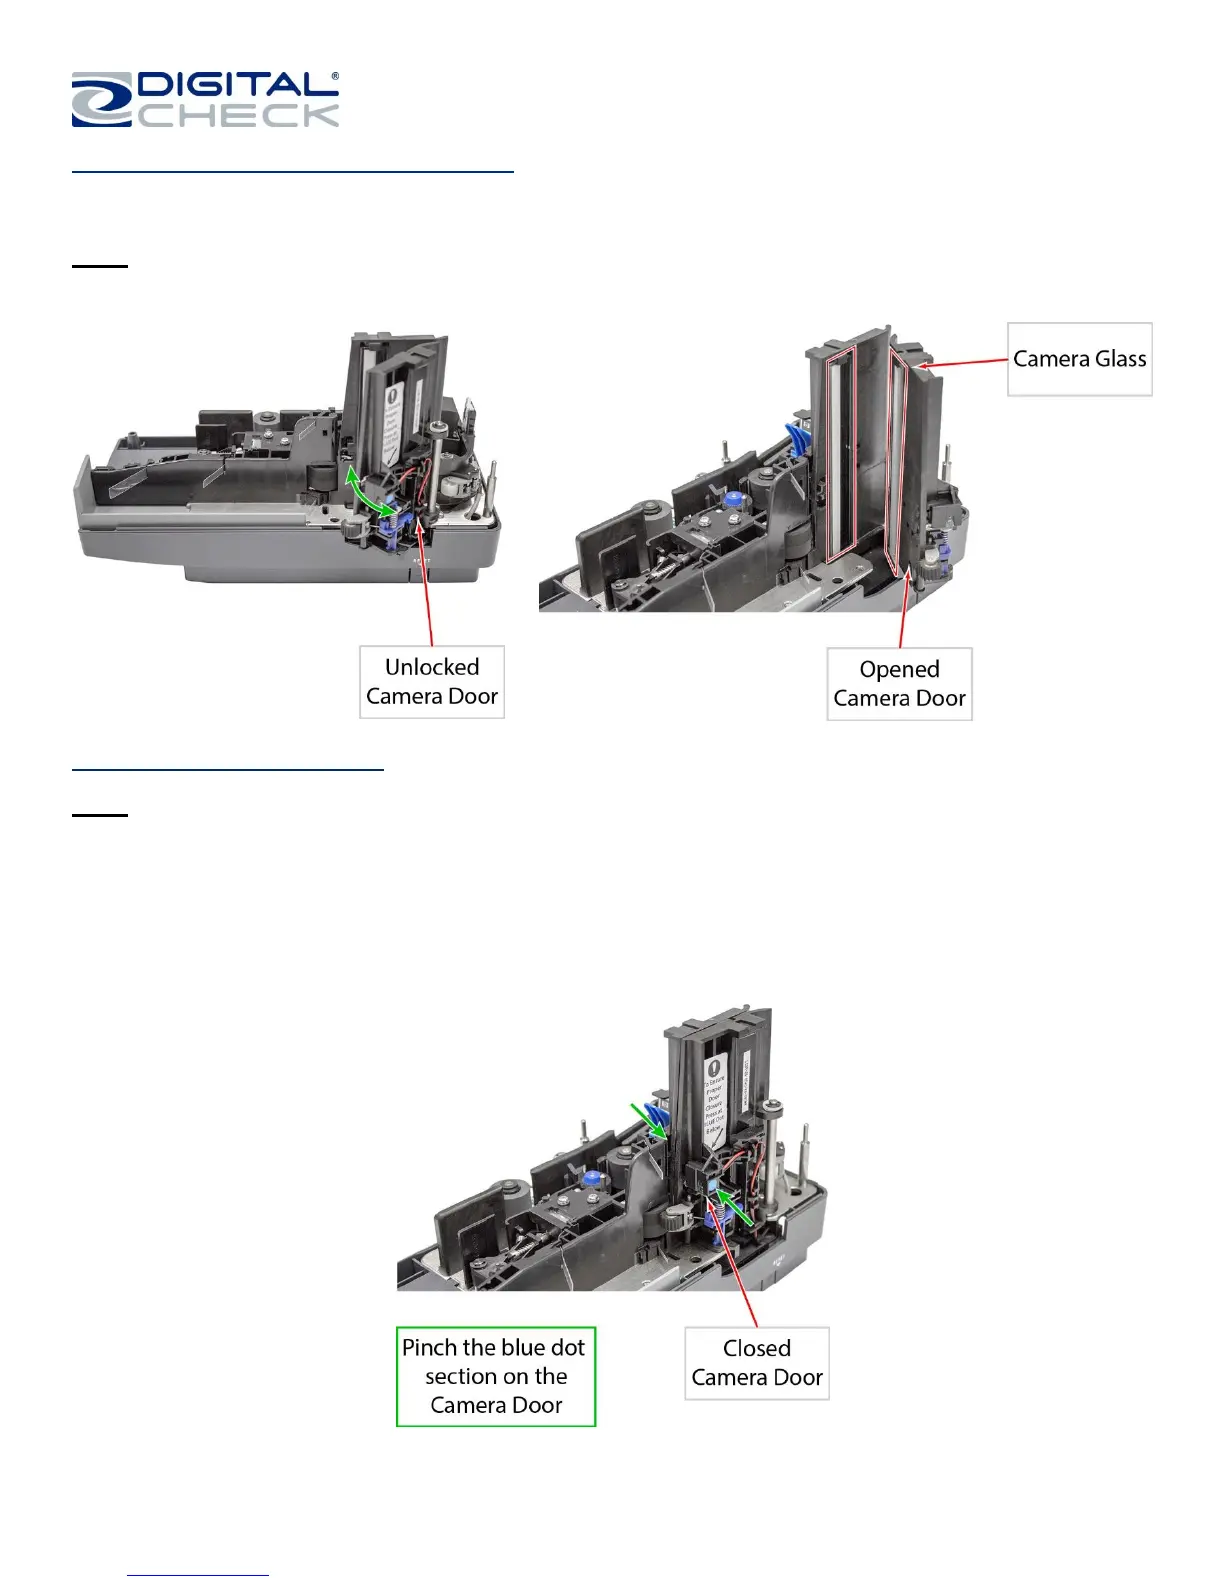
Accessing the Cameras (continued)
Step 2: Carefully swing open the camera door once it is unlocked.
Note: Look for the white strip behind the glass, which is the camera. Be careful not to scratch the glass when
cleaning or accessing the camera for any reason.
Closing the Camera Door
Note: Verify that the ‘Camera Door’ is locked or closed all of the way after opening or if experiencing document
jams in this section of the scanner.
Step 1: Close the ‘Camera Door by swinging it back into its original position.
Step 2: Lock the ‘Camera Door’ by pinching the lower part of the camera assembly together. Press on the area
of the door that has the blue dot. The ‘Camera Door’ will “click” into place and should not move or feel loose.

Table of Contents

Other manuals for Digital Check TellerScan TS240

Questions and Answers:

Question and Answer IconNeed help?

Do you have a question about the Digital Check TellerScan TS240 and is the answer not in the manual?

Digital Check TellerScan TS240 Specifications

General IconGeneral
ModelTellerScan TS240
CategoryScanner
InterfaceUSB 2.0
Operating System CompatibilityWindows 7, 8, 10
Power Supply100-240 VAC, 50/60 Hz
SpeedUp to 100 documents per minute
Resolution300 dpi
Feeder Capacity100 documents
Image TypeGrayscale
MICR Read Rate99%

Related product manuals