7
© 2015 Directed. All rights reserved.
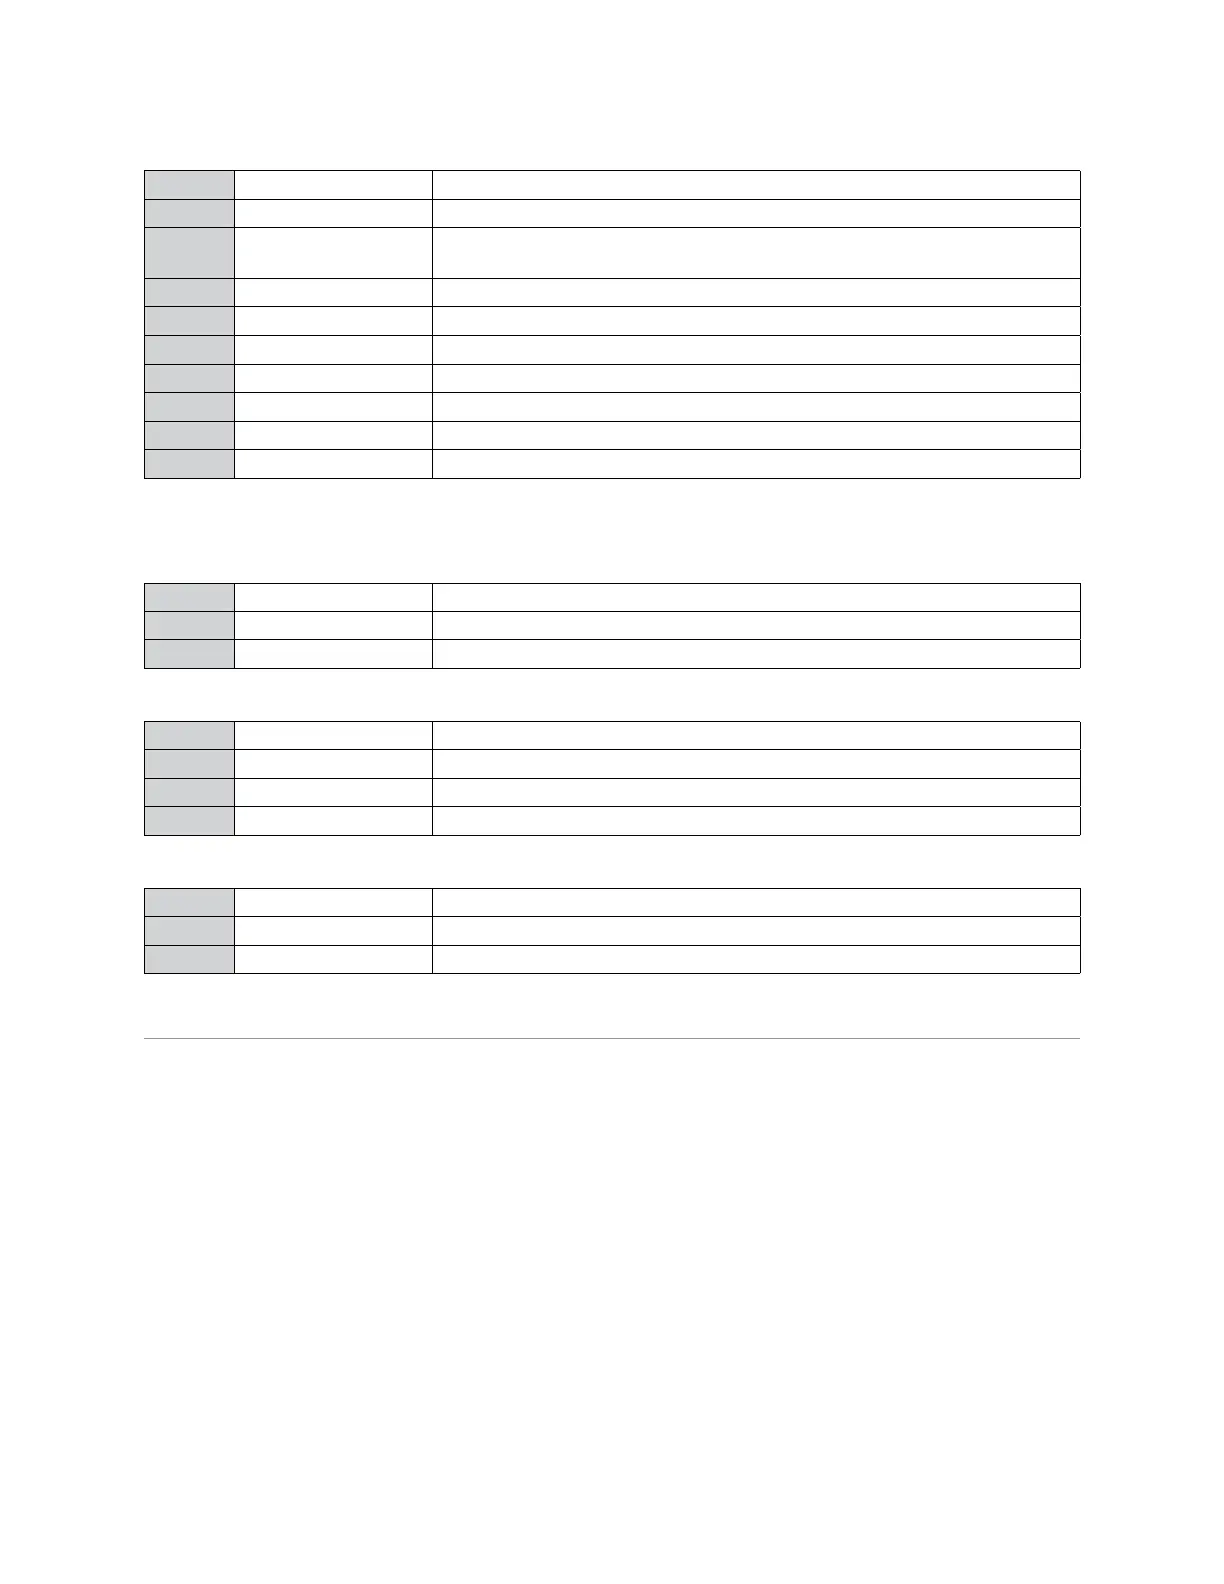
Remote Start, White 10-pin heavy gauge connector
1 No Connection
2 RED/BLACK (+) FUSED 12V ACCESSORY/STARTER INPUT
3 PINK/BLACK* (+) IGNITION 2/ACCESSORY ISOLATION WIRE # 87A key side (if required) of IGNITION
2/ACCESSORY
4 PINK/WHITE (+) IGNITION 2 / ACCESSORY RELAY OUTPUT
5 RED (+) FUSED 12V IGNITION 1 INPUT
6 GREEN (+) STARTER INPUT (KEY SIDE OF THE STARTER DISABLE)
7 VIOLET (+) STARTER OUTPUT (CAR SIDE OF THE STARTER DISABLE)
8 ORANGE (+) ACCESSORY OUTPUT
9 RED/WHITE (+) FUSED 12V IGNITION 2 / FLEX RELAY INPUT 87
10 PINK (+) IGNITION 1 INPUT/OUTPUT
* This wire is only used in applications that require a specific circuit at the ignition switch to be isolated during
the remote start sequence.
Door Lock, White 3-pin connector
1 BLUE (-) 500mA UNLOCK OUTPUT
2 EMPTY NOT USED
3 GREEN (-) 500mA LOCK OUTPUT
D2D Harness, Red 4-pin connector
1 BLUE D2D - TX
2 BLACK (-) GROUND
3 GREEN D2d - RX
4 RED (+) 12V
Bitwriter/Directed SmartStart Harness, Black 3-pin connector
1 RED (+) 12V
2 ORANGE ESP 2 - RX/TX
3 BLACK (+) 12V
Wire Descriptions
Main Harness, White 5-pin connector
Black: (-) CHASSIS GROUND
This wire is the unit’s source of ground. DO NOT connect this wire to any factory ground points; they can
cause noise and/or voltage drops which can affect system performance. Ground the unit and any accesso-
ries to the same point in the vehicle (preferably the kick panel). Scrape away any paint and make your own
ground with a screw and a star washer.
Brown: (+) SIREN OUTPUT
This wire is the (+) output for the siren. This wire connects to the (+) input of the siren.
Red: (+) 12V CONSTANT INPUT
This wire supplies power to the unit’s micro-controller. Remove the supplied fuse before connecting to the (+)
terminal of the battery or another constant +12V supply. Make sure to replace the fuse when all connections
have been made.
Note: Always use a fuse within 12 inches of the point from which you obtain (+) 12V. Do not use the 15A
fuse in the harness for this purpose. This fuse protects the module only.