XT30/XT50 Installation Guide Digital Monitoring Products
13
INSTALLATION
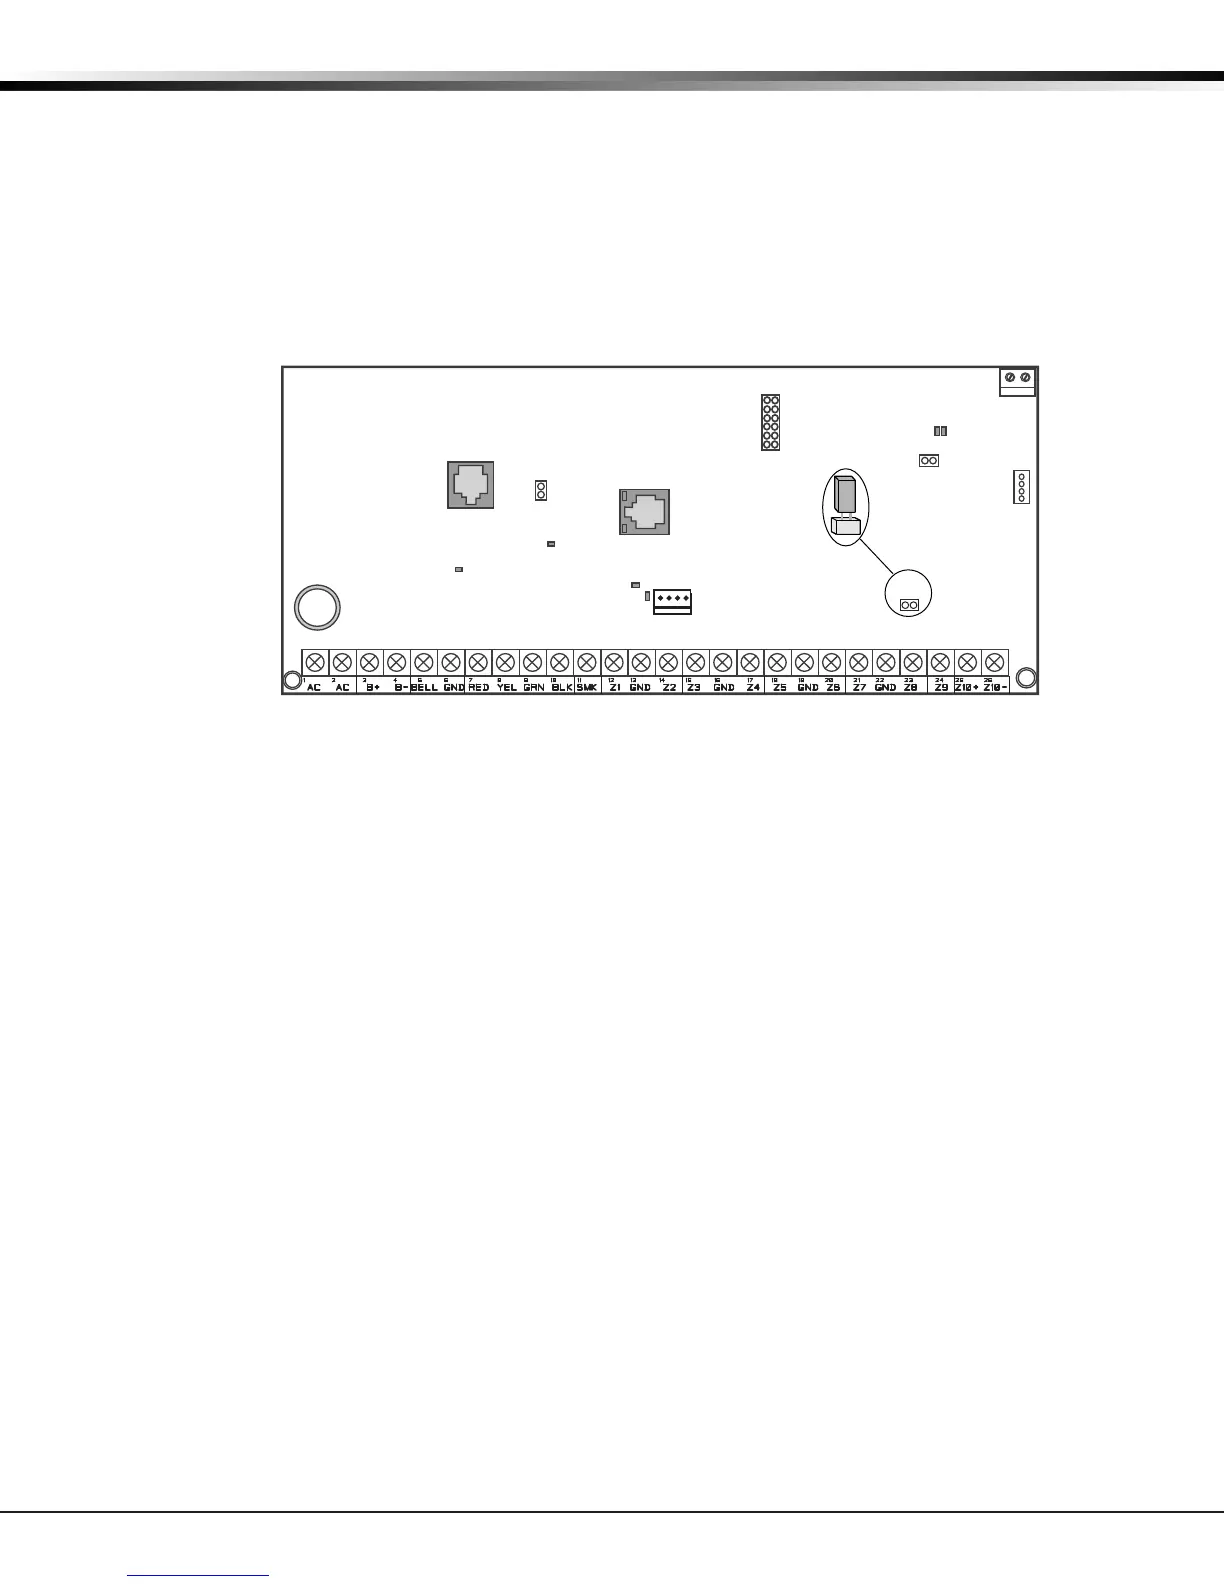
RESET Header
15.1 Description
The RESET header is located just above the terminal strip on the right side of the circuit board and is used
to reset the XT30/XT50 microprocessor. To reset the panel when rst installing the system, install the reset
jumper before applying power to the panel. After connecting the AC and battery, remove the reset jumper.
To reset the panel while the system is operational, for example, prior to reprogramming, install the reset
jumper without powering down the system. Remove the reset jumper after one or two seconds.
After resetting the panel, begin programming within 30 minutes. If you wait longer than 30 minutes, reset
the panel again.
XT30/XT50 Panel
PHONE
LINE
OUTPUTS
J11
1
2
3
4
Wireless
Antenna
(ANT)
connection
J7 RJ
Supervision
J24
Momentarily place
the Reset jumper
over both of the
RESET pins to
reset the panel.
J16
RESET
LOAD
ETHERNET
OVC LED
Power
LED
TX RX
Wireless LEDs
PROG
J8
XMIT
RCV
CELL MODULE
J20
J18
J1
J3
Flash LOAD Jumper
16.1 Description
The XT Series panel software can be updated via the panel’s Programming (PROG) header. To update the
panel with a new software version, complete the following steps at the protected premise:
Model 399 Cable
1. Place a jumper across the RESET header and then remove the yellow and green wires from keypad bus
terminals 8 and 9.
2. Connect a DMP update Cable from the PROG header to the serial port of your PC operating Remote Link
and containing the XT RU le. Requires Remote Link 1.43 or higher.
3. Start Remote Link and create or open the XT Series control panel account that matches the panel to be
updated.
4. Set the Connection Information Type to Direct with a baud rate of 38400 and choose the appropriate
COM port.
5. Select Panel>Remote Update, then select the correct RU le for the XT panel model.
6. While placing a short across the LOAD header, remove the jumper from the RESET header. Click
<Update> in Remote Link.
7. After the software version is updated, remove the short from the LOAD header. Place the jumper across
RESET then remove the 399 cable.
8. Replace the yellow and green wires to terminals 8 and 9.
9. Remove RESET jumper to resume normal panel operation.
Figure 8: Panel Showing the RESET Header