(3) Remove the weatherstrip along the front edge
of the cowl plenum cover/grille panel and the cowl
plenum panel (Fig. 89).
(4) Remove the four plastic nuts that secure the
cowl plenum cover/grille panel to the studs on the
cowl top panel near the base of the windshield (Fig.
90).
(5) Remove the one plastic rivet that secures the
front corner on each side of the cowl plenum cover/
grille panel to the cowl plenum panel.
(6) Remove the one plastic push-in retainer that
secures the rear corner on each side of the cowl ple-
num cover/grille panel to the windshield reveal mold-
ing.
(7) Unsnap the slotted center hole on each side of
the cowl plenum cover/grille panel from the adhesive-
backed snap fastener. (If equipped: This feature
may not be on all models).
(8) Lift the cowl plenum cover/grille panel from the
cowl top far enough to access the windshield washer
nozzle and vacuum plumbing near the right end of
the cowl plenum.
(9) Disconnect the windshield washer supply hose
at the in-line connector.
(10) Disconnect the vacuum supply hose from the
vacuum reservoir, which is secured to the underside
of the right end of the cowl plenum cover/grille panel
(Fig. 91).
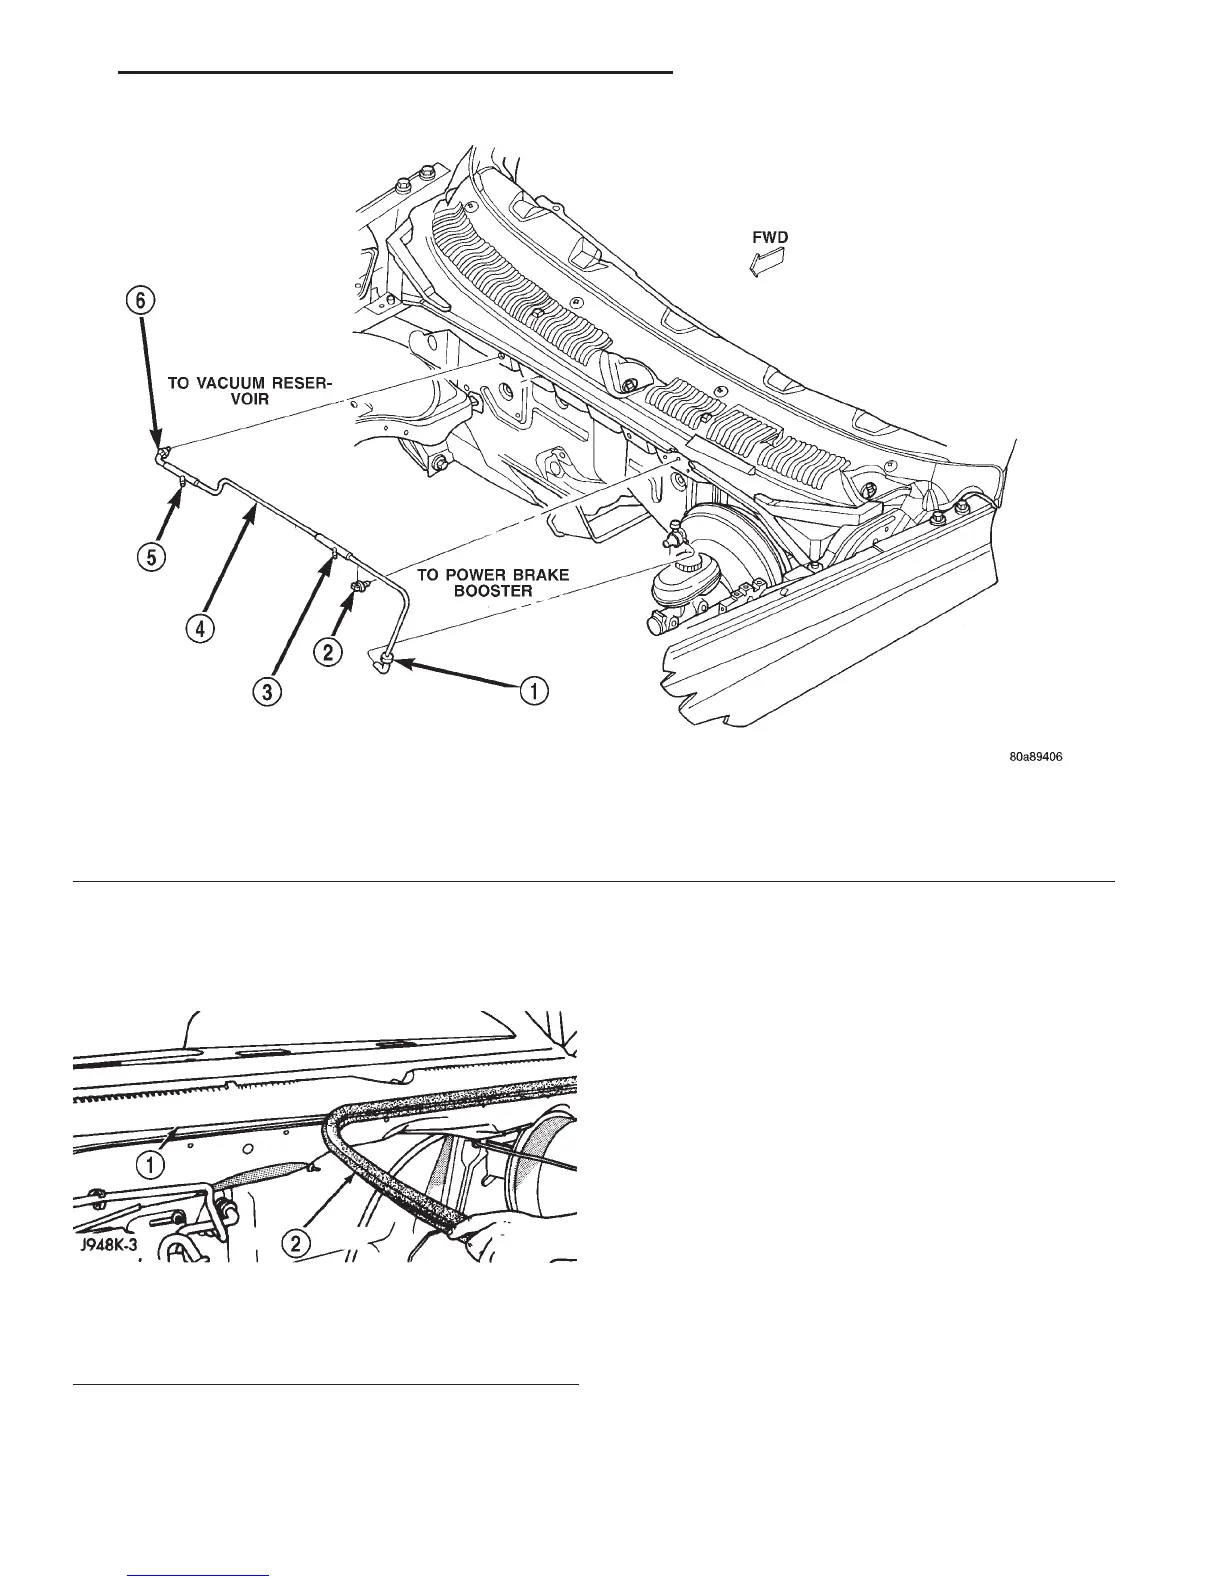
Fig. 88 Vacuum Supply
1 – VACUUM CHECK VALVE
2 – CLIP
3 – TO HEATER-AC CONTROLS
4 – VACUUM SUPPLY LINE
5 – TO SPEED CONTROL SERVO
6 – GROMMET
Fig. 89 Cowl Plenum Cover/Grille Panel
Weatherstrip
1 – COWL GRILLE
2 – WEATHERSTRIP
DN HEATING AND AIR CONDITIONING 24 - 71
REMOVAL AND INSTALLATION (Continued)