WASHER NOZZLE
FRONT
(1) Remove the cowl plenum cover/grille panel
from the cowl top. See Wiper Motor in the Removal
and Installation section of this group for the proce-
dures.
(2) From the underside of the cowl plenum cover/
grille panel, disconnect the washer hose from the
nozzle fitting.
(3) From the underside of the cowl plenum cover/
grille panel, compress the retaining tabs of the
washer nozzle and push the nozzle out through the
top of the panel.
(4) Reverse the removal procedures to install.
REAR
(1) Using a trim stick or another suitable wide
flat-bladed tool, pry gently at each side of the rear
washer nozzle to release the snap clips that secure it
to the liftgate outer panel.
(2) Pull the nozzle out from the liftgate outer
panel far enough to access and disconnect the washer
supply hose from the nozzle nipple.
(3) Reverse the removal procedures to install.
CHECK VALVE
A check valve is located in the washer supply hose
near the top of the right liftgate opening pillar.
(1) Remove the right upper D-pillar trim. Refer to
Group 23 - Body for the procedures.
(2) Disconnect the washer supply hoses from the
barbed nipples on each end of the rear washer sys-
tem check valve.
(3) Remove the check valve from the vehicle.
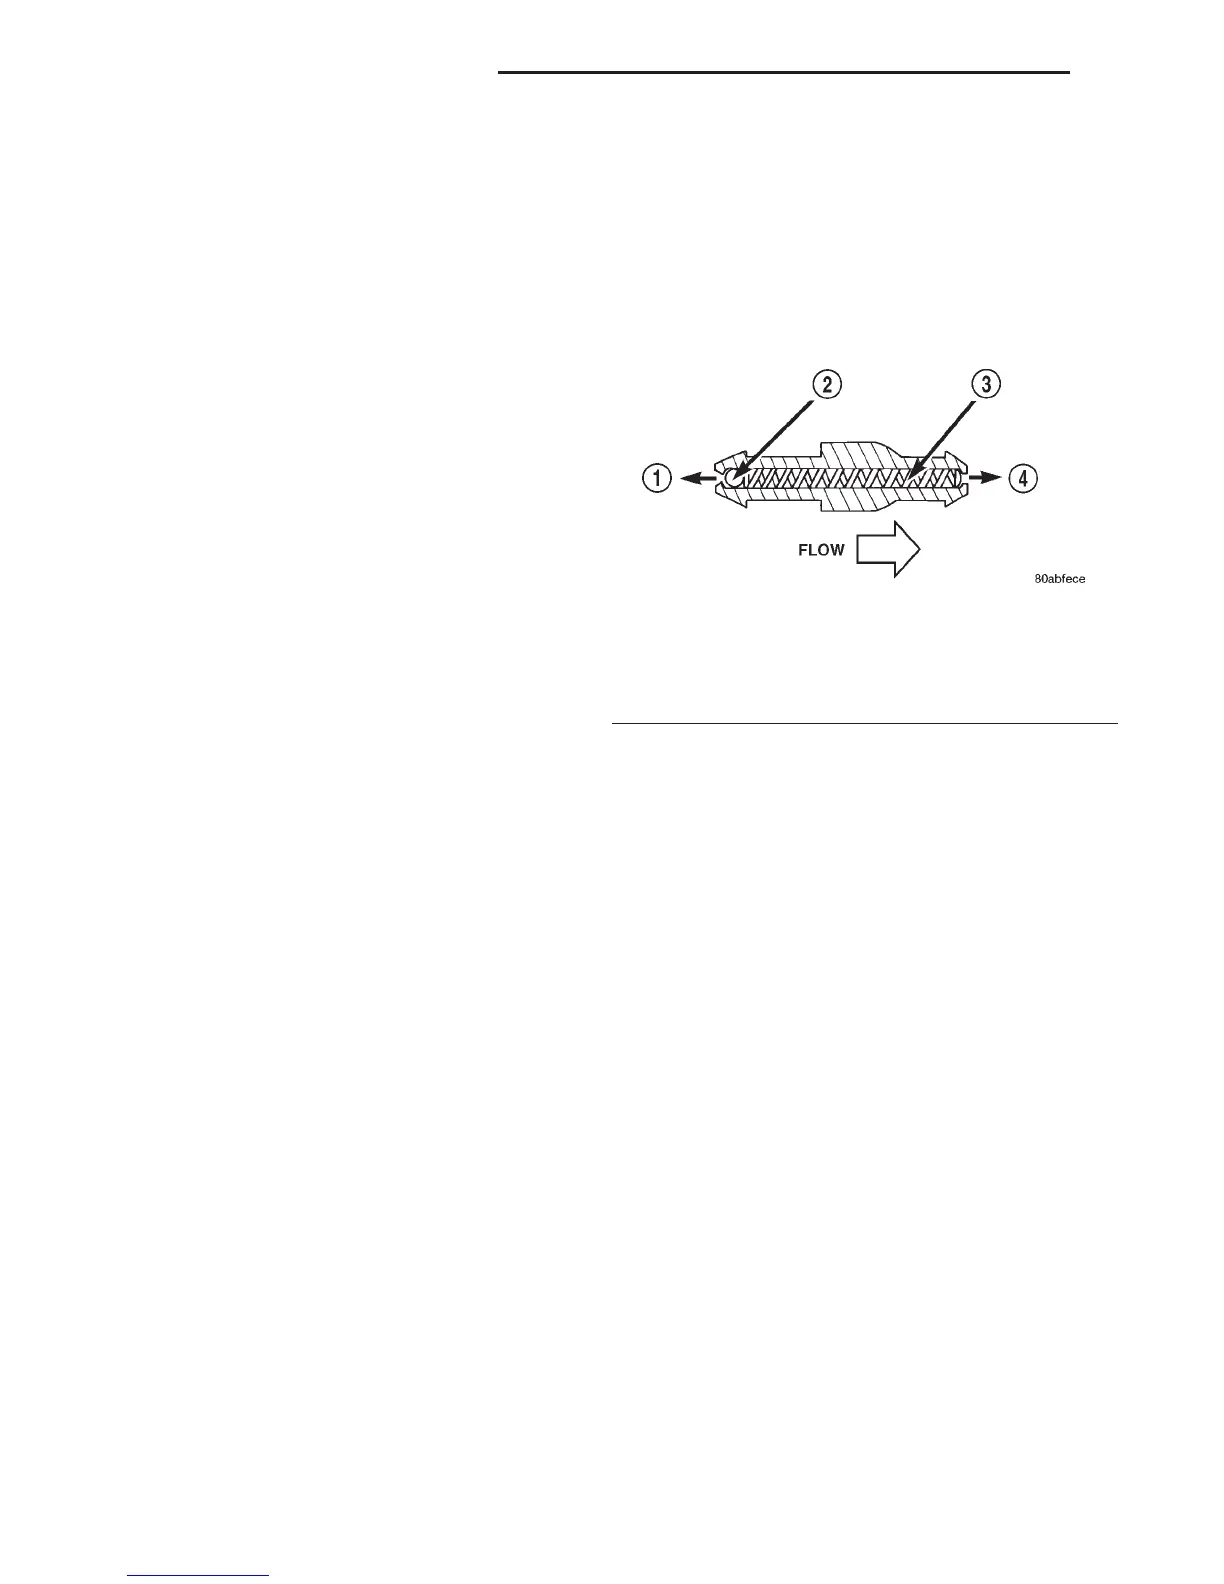
(4) When reinstalling the check valve, be certain
the valve is properly oriented within the system flow
(Fig. 22).
(5) Reverse the remaining removal procedures to
complete the installation.
Fig. 22 Rear Washer System Check Valve
1 – TO RESERVOIR
2 – CHECKBALL
3 – SPRING
4 – TO NOZZLE
8K - 18 WIPER AND WASHER SYSTEMS DN
REMOVAL AND INSTALLATION (Continued)