GARAGE DOOR OPENER STORAGE BIN DOOR
REMOVAL
(1) Disconnect and isolate the battery negative
cable.
(2) Remove the overhead console from the head-
liner. Refer to Overhead Console in the Removal
and Installation section of this group for the proce-
dures.
(3) Remove the two screws that secure the garage
door opener storage bin door pivot and bumper block
to the overhead console housing (Fig. 9).
(4) Remove the garage door opener storage bin
door pivot and bumper block from the overhead con-
sole housing.
(5) Unlatch and remove the garage door opener
storage bin door from the overhead console housing.
INSTALLATION
(1) Position the garage door opener storage bin
door into the overhead console housing.
(2) Engage the latch of the garage door opener
storage bin door with the latch striker on the rear of
the storage bin opening in the overhead console hous-
ing.
(3) Be certain that both garage door opener stor-
age bin door pivot pins are located in the two pivot
receptacles in the overhead console housing just
behind the sunglasses storage bin.
(4) Position the garage door opener storage bin
door pivot and bumper block onto the overhead con-
sole housing.
(5) Install and tighten the two screws that secure
the garage door opener storage bin door pivot and
bumper block to the overhead console housing.
Tighten the screws to 2.2 N·m (20 in. lbs.).
(6) Install the overhead console onto the headliner.
Refer to Overhead Console in the Removal and
Installation section of this group for the procedures.
(7) Reconnect the battery negative cable.
AMBIENT TEMPERATURE SENSOR
REMOVAL
(1) Disconnect and isolate the battery negative
cable.
(2) Locate the ambient temperature sensor, on the
right side of the radiator yoke behind the grille (Fig.
10).
(3) Disconnect the wire harness connector from the
ambient temperature sensor connector receptacle.
(4) Remove the one screw that secures the ambient
temperature sensor bracket to the radiator yoke.
(5) Remove the ambient temperature sensor from
the radiator yoke.
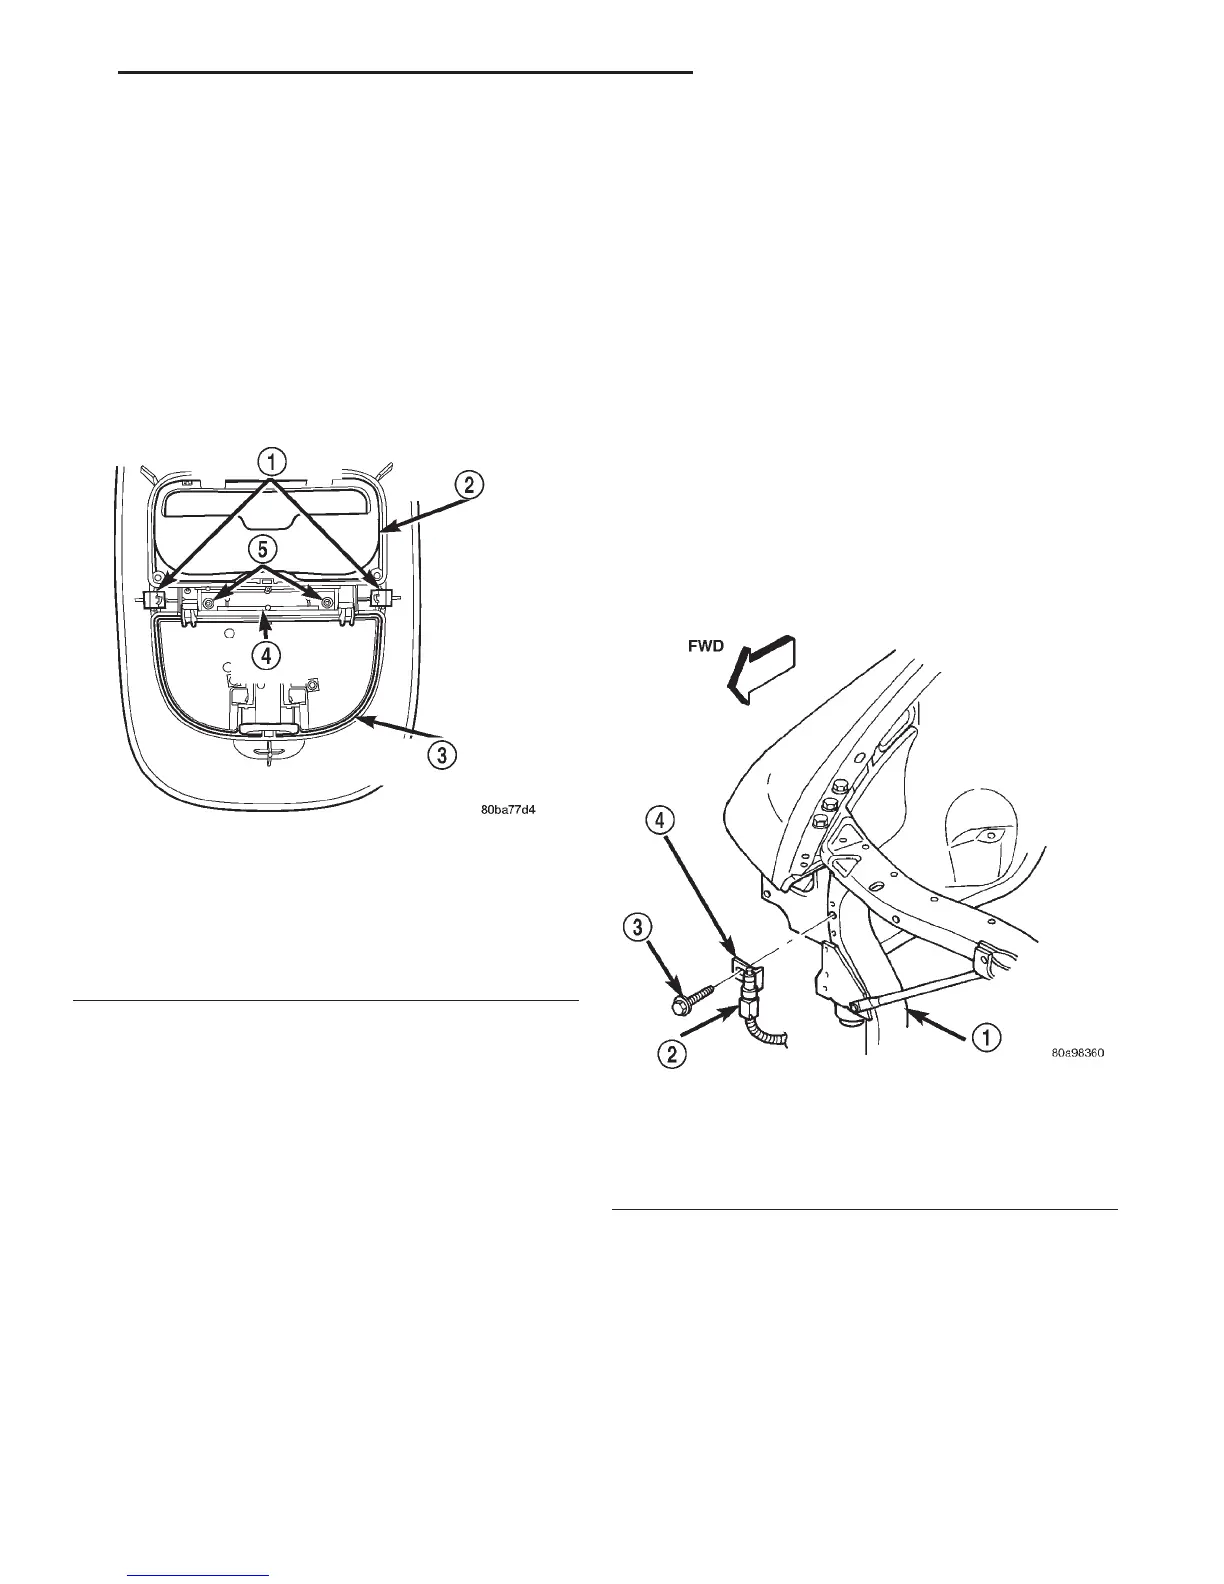
Fig. 9 Garage Door Opener Storage Bin Door
Remove/Install
1 – SPRING CLIPS
2 – SUNGLASSES STORAGE BIN
3 – GARAGE DOOR OPENER STORAGE BIN DOOR
4 – PIVOT AND BUMPER BLOCK
5 – SCREW (2)
Fig. 10 Ambient Temperature Sensor Remove/Install
1 – YOKE
2 – CONNECTOR
3 – SCREW
4 – SENSOR
DN OVERHEAD CONSOLE SYSTEMS 8V - 13
REMOVAL AND INSTALLATION (Continued)