APPENDIX A Mortise Models
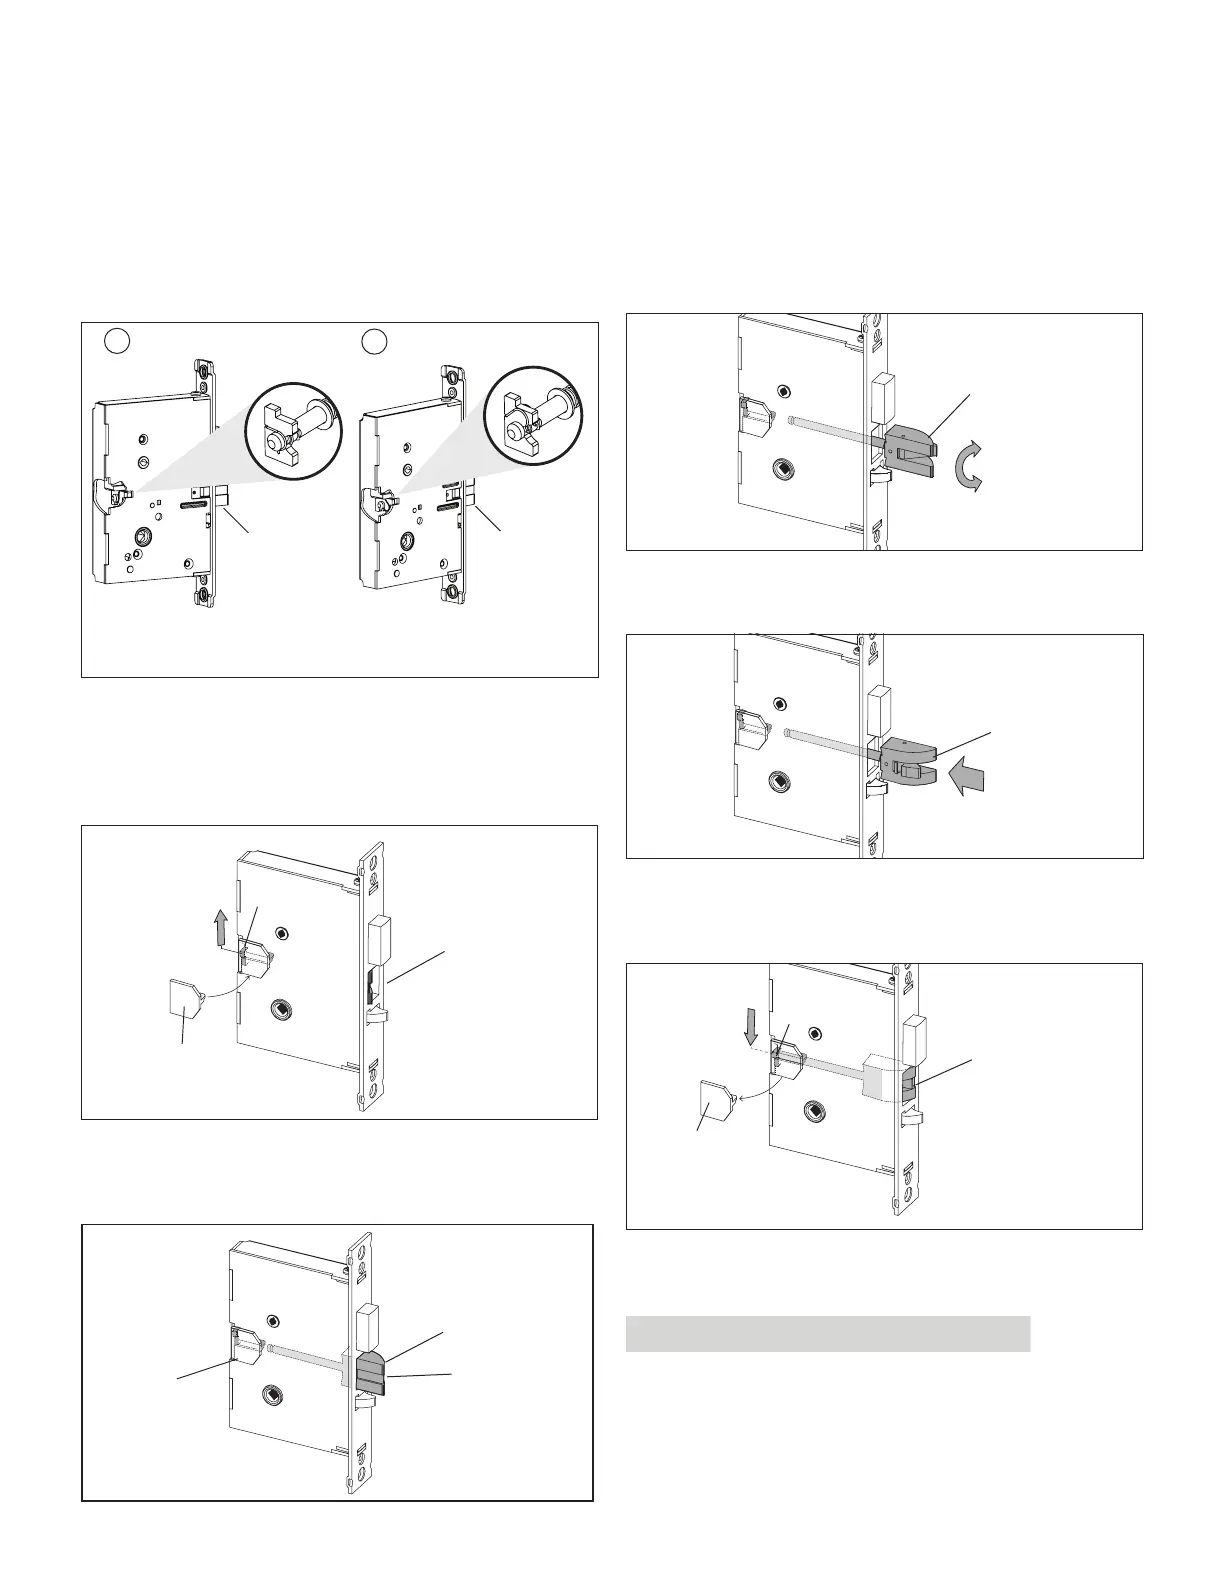
A.1.1 Reversing the Mortise Handing ASM
3. Push in the latch bolt (L) to the middle of its stroke, and
hold it there. ( Continue Step 1 and 2)
1
2
Use a small screwdriver
to lift unlock mechanism.
Unlock Position
Lock Position
Push in the latchbolt to
the end of the stroke,
and hold it there.
L
L
Hold the latch (L) inside the mortise, and insert the tailpiece
retaining tool (S, part #027-510382 available separately) so
that the tailpiece (T) will not drop inside the mortise case.
Hold the tool and the latch with one hand, and slide up the
tailpiece using a small screwdriver.
L
T
S
(part #027-510382)
Continue to hold tool (S). Release the latch bolt (L) and keep
the anti-friction latch (F) toward the flat side of the latch
bolt so that the bolt extends fully.
L
F
S
4. Pull out the latch bolt (L), until it just clears the front
plate. (Note: If you remove the bolt completely, you must
turn it 90° to re-insert it.)
L
180°
Rotate the latch bolt (L) 180°. Re-insert it to the end of its
stroke.
L
Holding tool (S) in place, re-engage tailpiece (T) with latch
bolt (L) (slide tailpiece down). There may be some play
required to align the parts. Remove the tool (S).
L
T
S
Release the latch to the middle of the stroke and hold it
there. Use a small screwdriver to push the lock mechanism
back on lock position (see step 1 and 2) .
IMPORTANT
The lock mechanism has to be horizontal on lock position
APPENDIX A Mortise Models
43
E7900 Series
KD10114-E-1122
 Loading...