21
VAPOR-LOGIC
®
VERSION 6 INSTALLATION AND OPERATION MANUAL
WEB INTERFACE COMMUNICATION
Utilizing the Vapor-logic Web interface is optional. The humidifier can be
operated using the touchscreen display and/or the Web interface. When
using the Web interface, the humidifier can be accessed by a computer either
directly or through a network. Each Vapor-logic controller ships with the static
IP address of 192.168.1.195. This allows users to locate the Web interface
upon start-up. After initial start-up, the IP address can remain as is, be re-
assigned as another static address, or configured to Auto Obtain Address,
and find an IP address on the network using DHCP. See the steps below for
information about connecting to the humidifier using the Web interface.
CONNECTING WEB INTERFACE DIRECTLY TO A COMPUTER NOT ON A NETWORK
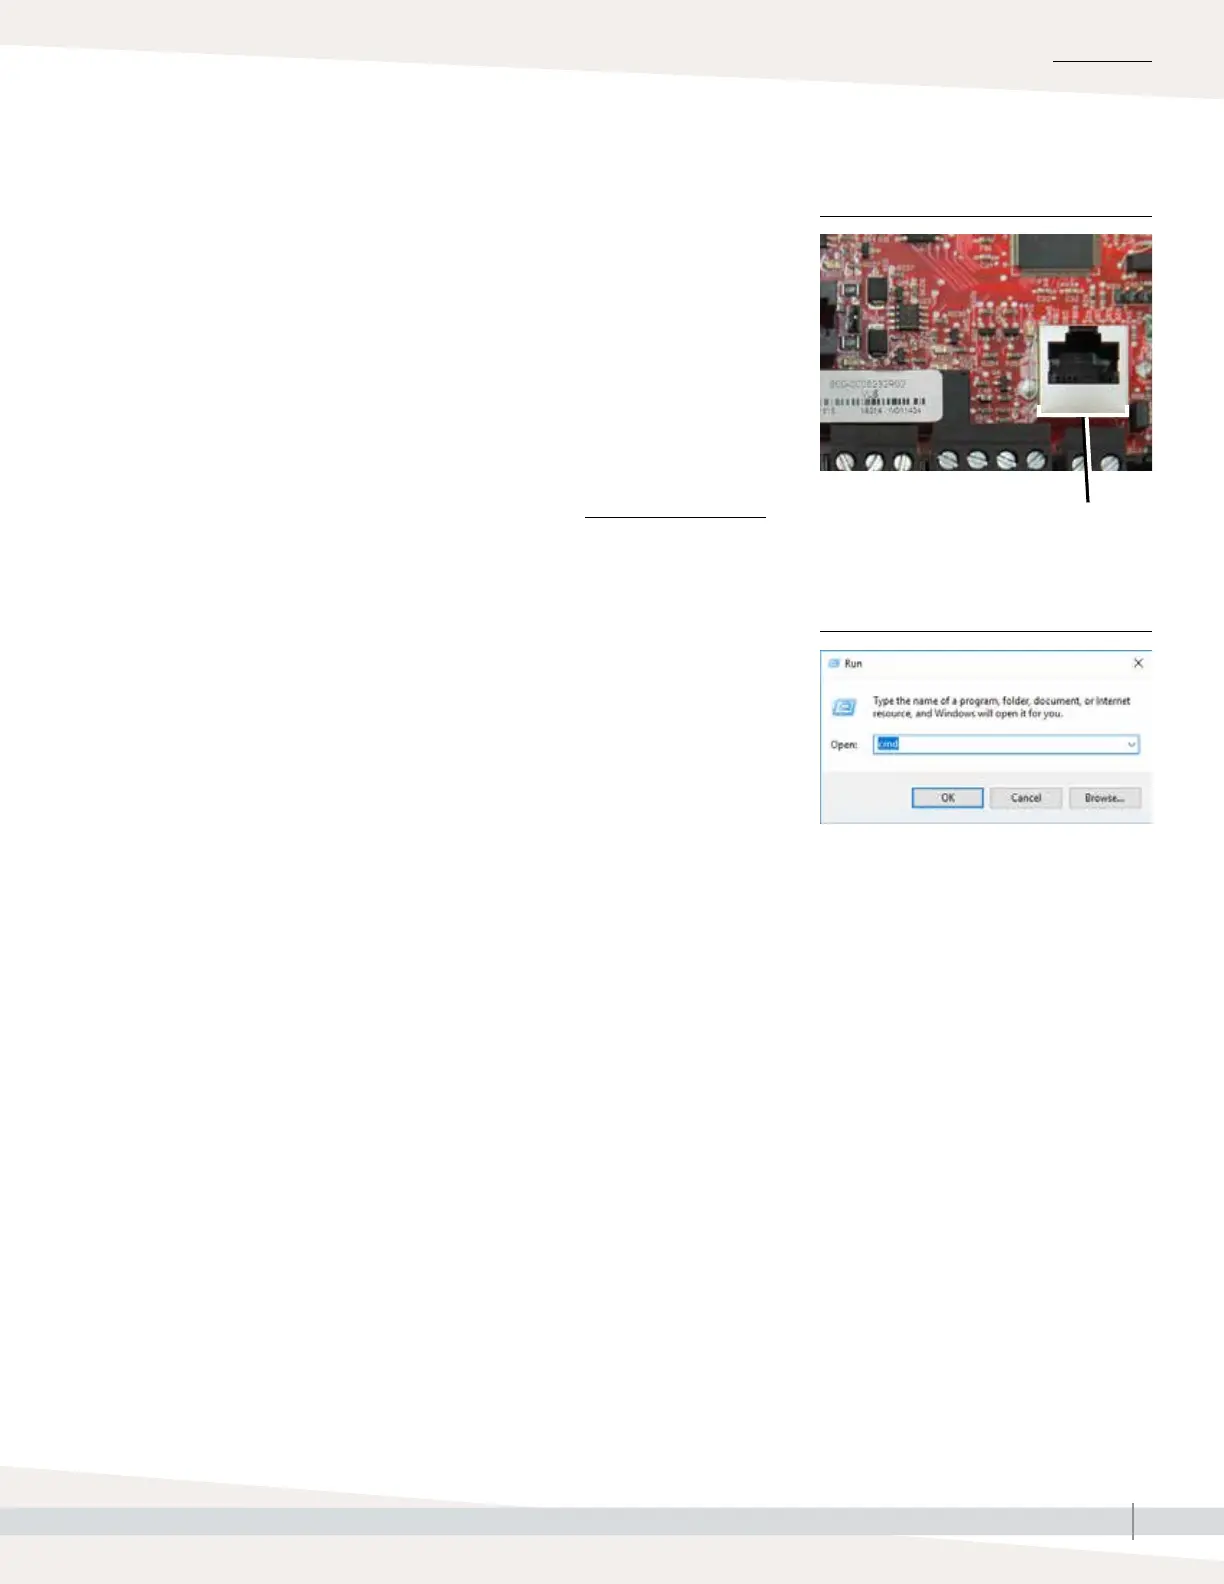
1. Connect the Ethernet cable.
Insert one end of an RJ45 Ethernet cable into the Vapor-logic board at
P9 (labeled Ethernet; see Figure 21-1) until you hear a click sound. Insert
the other end of the cable into a computer. Since the Ethernet port on the
Vapor-logic board is auto-sensing, either a straight-through or crossover
cable will work.
2. Check the current IP address of your computer.
Connecting a computer to the humidifier requires that the computer being
used has the same network address range as Vapor-logic. In order to
validate this, check the IP address of the computer being used by going to
the computer’s Start menu and pull up a search window. In the search box
type cmd.
Terminal P9:
Ethernet
Vapor-logic default IP address
192.168.1.195
INSTALLATION
Step 1 – Field wiring: Communication connections
FIGURE 21-1: TERMINAL P9
FIGURE 21-2:
CHECKING YOUR IP ADDRESS