35
9 of 35
FLEXIBLE BATCH BROILER
EQUIPMENT
MANUAL
April 1, 2007
D. Adjustments at Installation
Each broiler section and all its component parts
have been tested thoroughly and inspected
before your broiler was shipped from the factory.
However, it is sometimes necessary to further
test or adjust the broiler once it has been
installed. Such adjustments are the responsibility
of the Dealer or Installer. These types of
adjustments are not considered defects, rather a
normal and routine part of the proper installation
of the equipment.
These adjustments include but are not limited to:
• Adjustments to the gas pressure regulator
• Broiler height adjustment (if required)
No installation should be considered complete
without proper inspection and, if necessary, any
adjustments by qualified service or installation
personnel.
It is also important not to obstruct the natural flow
of combustion and ventilation air if the broiler is to
operate properly. This broiler should not be
installed on a curb base or sealed to the wall.
Either condition can restrict the flow of air to the
combustion compartment or prevent proper
ventilation of the unit. Before making any
connections to the broiler, check the ratings plate
to be sure the broiler specifications concur with
the type of gas and voltage to be supplied to the
broiler.
The rating plate is located on the back of the
control compartment cover panel on the right end
of the unit.
The plate bearing the broiler’s model number and
serial number is attached to the back side of the
unit.
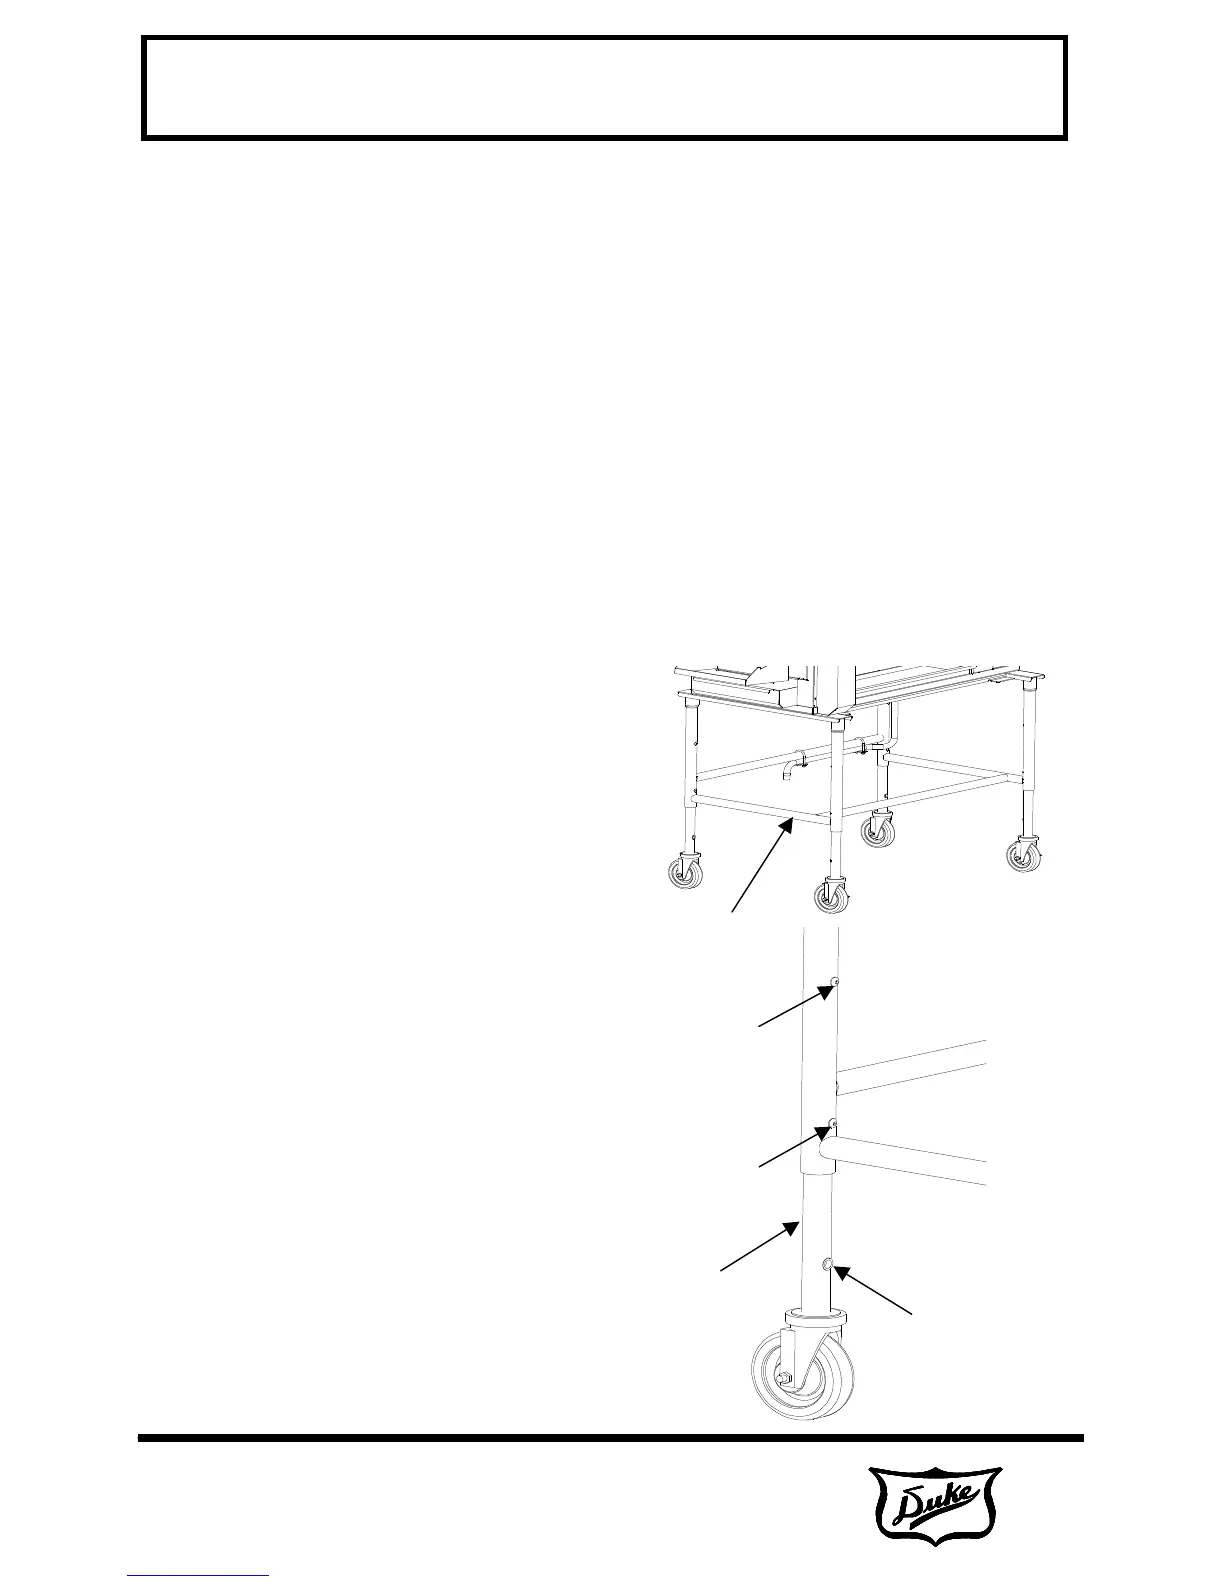
Raise or Lower Broiler
The broiler height can be adjusted via two
screws on each leg.
Caution: The Broiler is very heavy! Use
adequate help for lifting.
1. Lift one end of the broiler onto a wide,
sturdy stand (not supplied).
2. Remove (2) screws per leg and
raise/lower to threaded holes. Reinstall
screws.
3. Remove stand and safely raise/lower
broiler.
4. Place plastic hole plugs (supplied attach
to stand) in any unused holes.
Screw
Screw
Plastic Hole
Plug
Support broiler here
Slide Leg.
Reinstall screws.