20
20
20
20
....... if you have connected at least one expansion module to xLogic Basic:
1.Remove the connection bridge
2. Slide the expansion module off towards the right.
3. Insert a screwdriver into the eyelet at the bottom of the slide interlock and lever it
downward.
4. Swing the expansion module off the profile rail.
Repeat steps 1 to 4 for all other expansion modules.
2.1.2
2.1.2
2.1.2
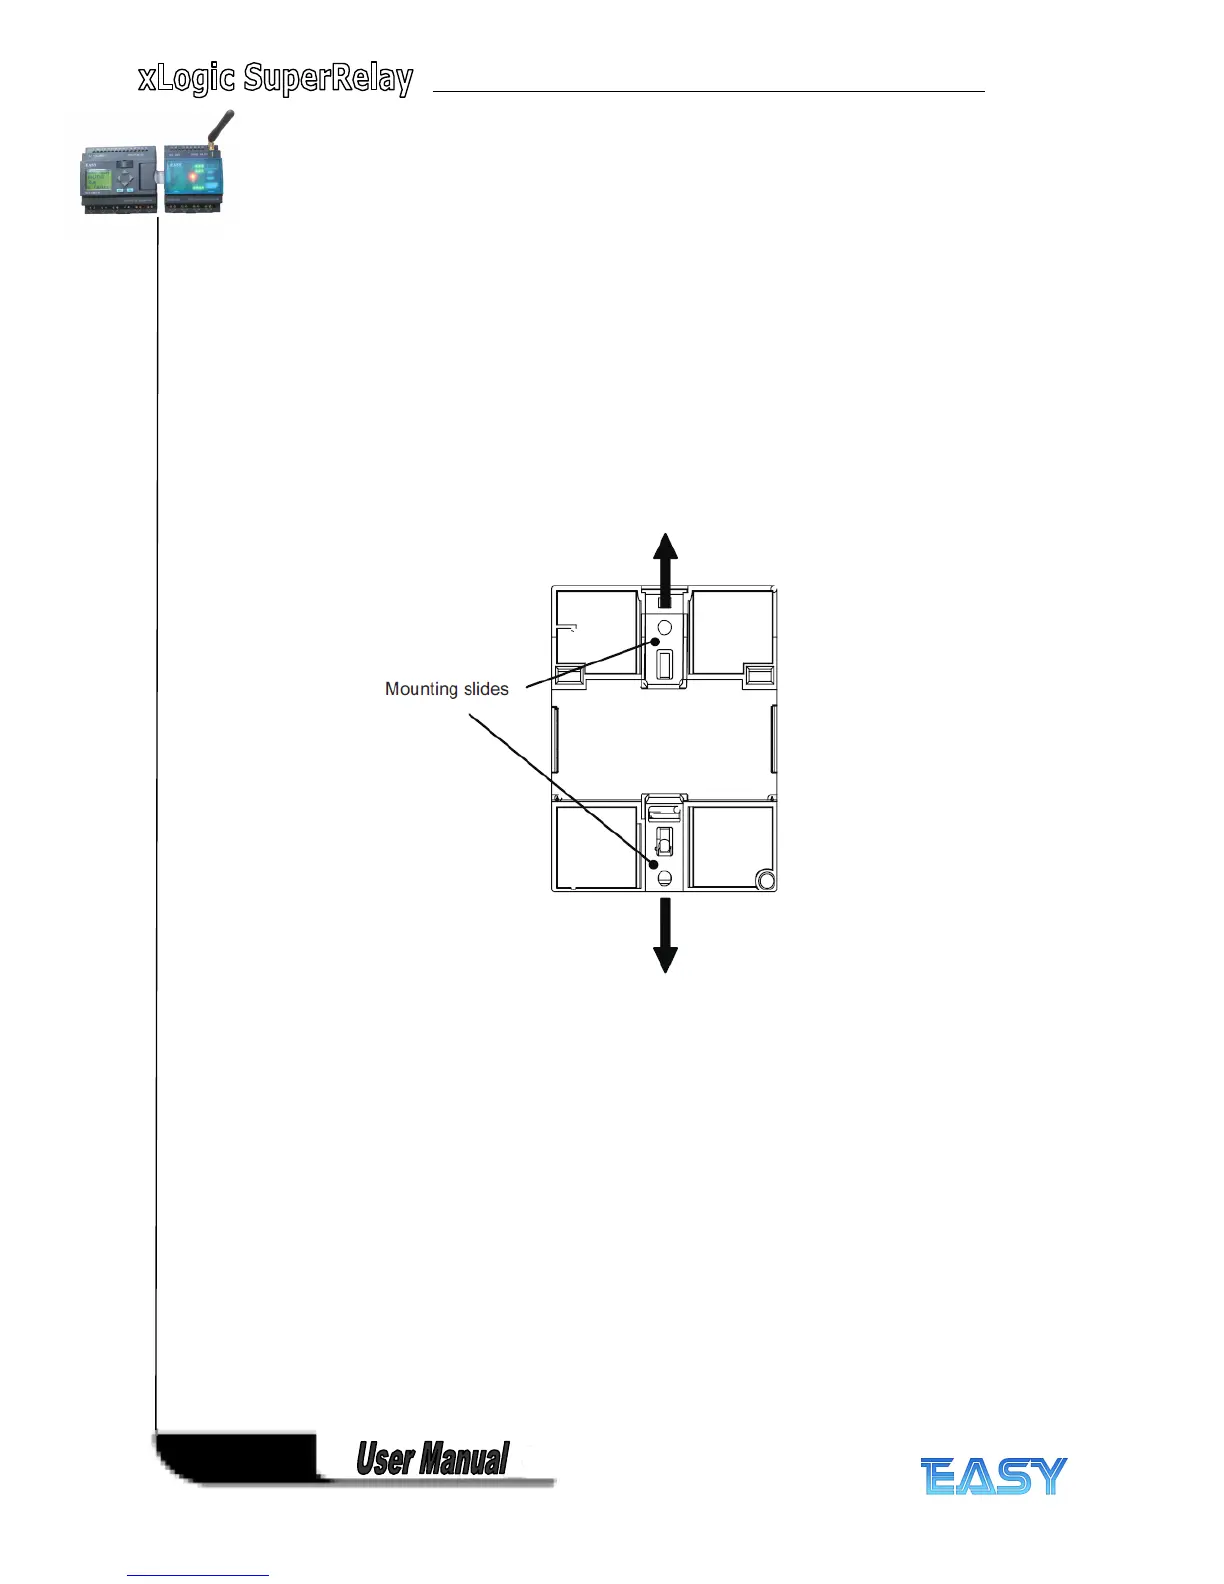
2.1.2 Wall-mounting
Wall-mounting
Wall-mounting
Wall-mounting
For wall-mounting, first slide the mounting slides on the rear side of the devices towards the
outside. You can now wall-mount xLogic by means of two mounting slides and two Ø M4
screws (tightening torque 0.8 to 1.2 Nm).
Drilling
Drilling
Drilling
Drilling template
template
template
template for
for
for
for wall-mounting
wall-mounting
wall-mounting
wall-mounting
Before you can wall-mount xLogic , you need to drill holes using the template shown below.
ELC-12
ELC-12
ELC-12
ELC-12 series:
series:
series:
series: