48
48
48
48
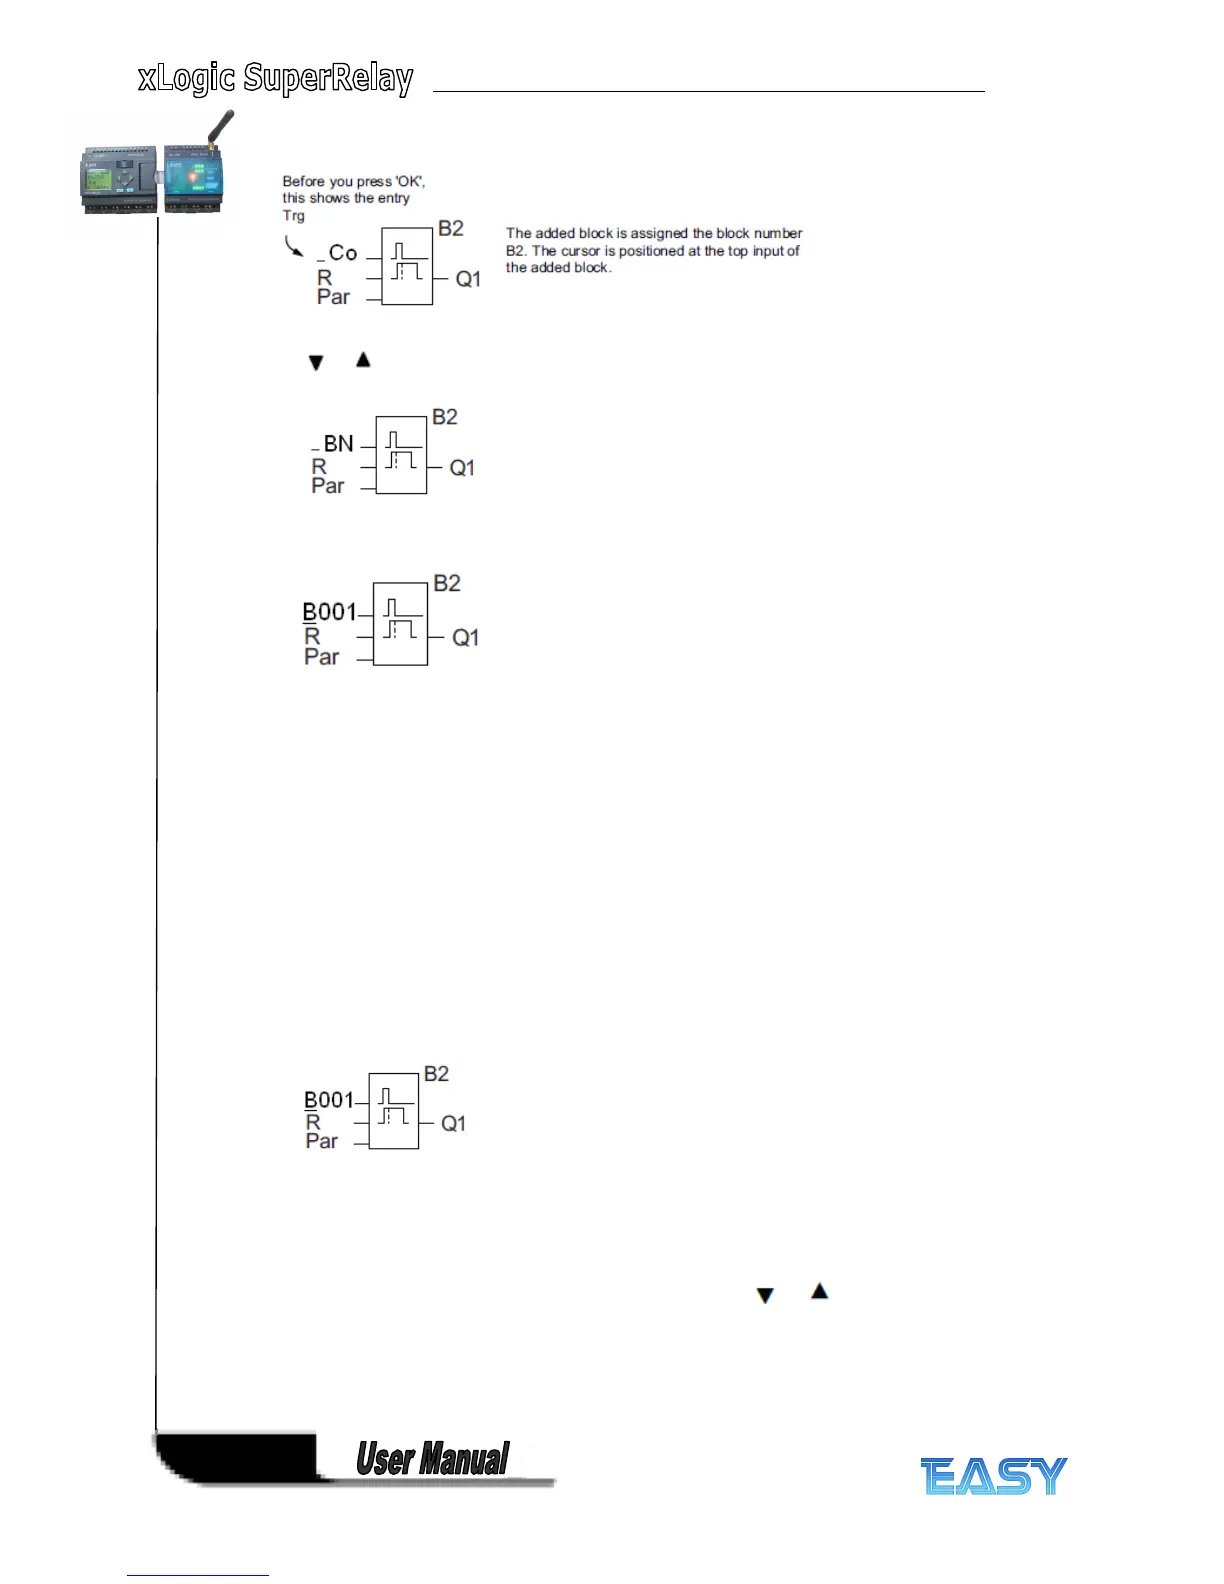
Press or to select BN option .
Press “ OK
”
.
The B1 block previously connected to Q1 is automatically connected to the uppermost input of
the new block. Note that you can only interconnect digital inputs with digital outputs or analog
inputs with analog outputs. The 'old' block will otherwise be lost.
The off-delay block has three inputs. At the top is the trigger input (Trg) you use to start the
off-delay time. In our example, the OR block B1 triggers the off-delay. You reset the time and
the output with a signal at the reset input. Set the off-delay time at parameter T of the input
Par.
In our example we do not use the reset input of the off-delay function .
This is what the display should now show.
Assigning
Assigning
Assigning
Assigning block
block
block
block parameters
parameters
parameters
parameters
Now you set the off-delay time T:
1. Move the cursor to Par, if it not already at this position: Press or
2. Switch to editing mode: Press OK
xLogic shows the parameters in the parameter assignment window: