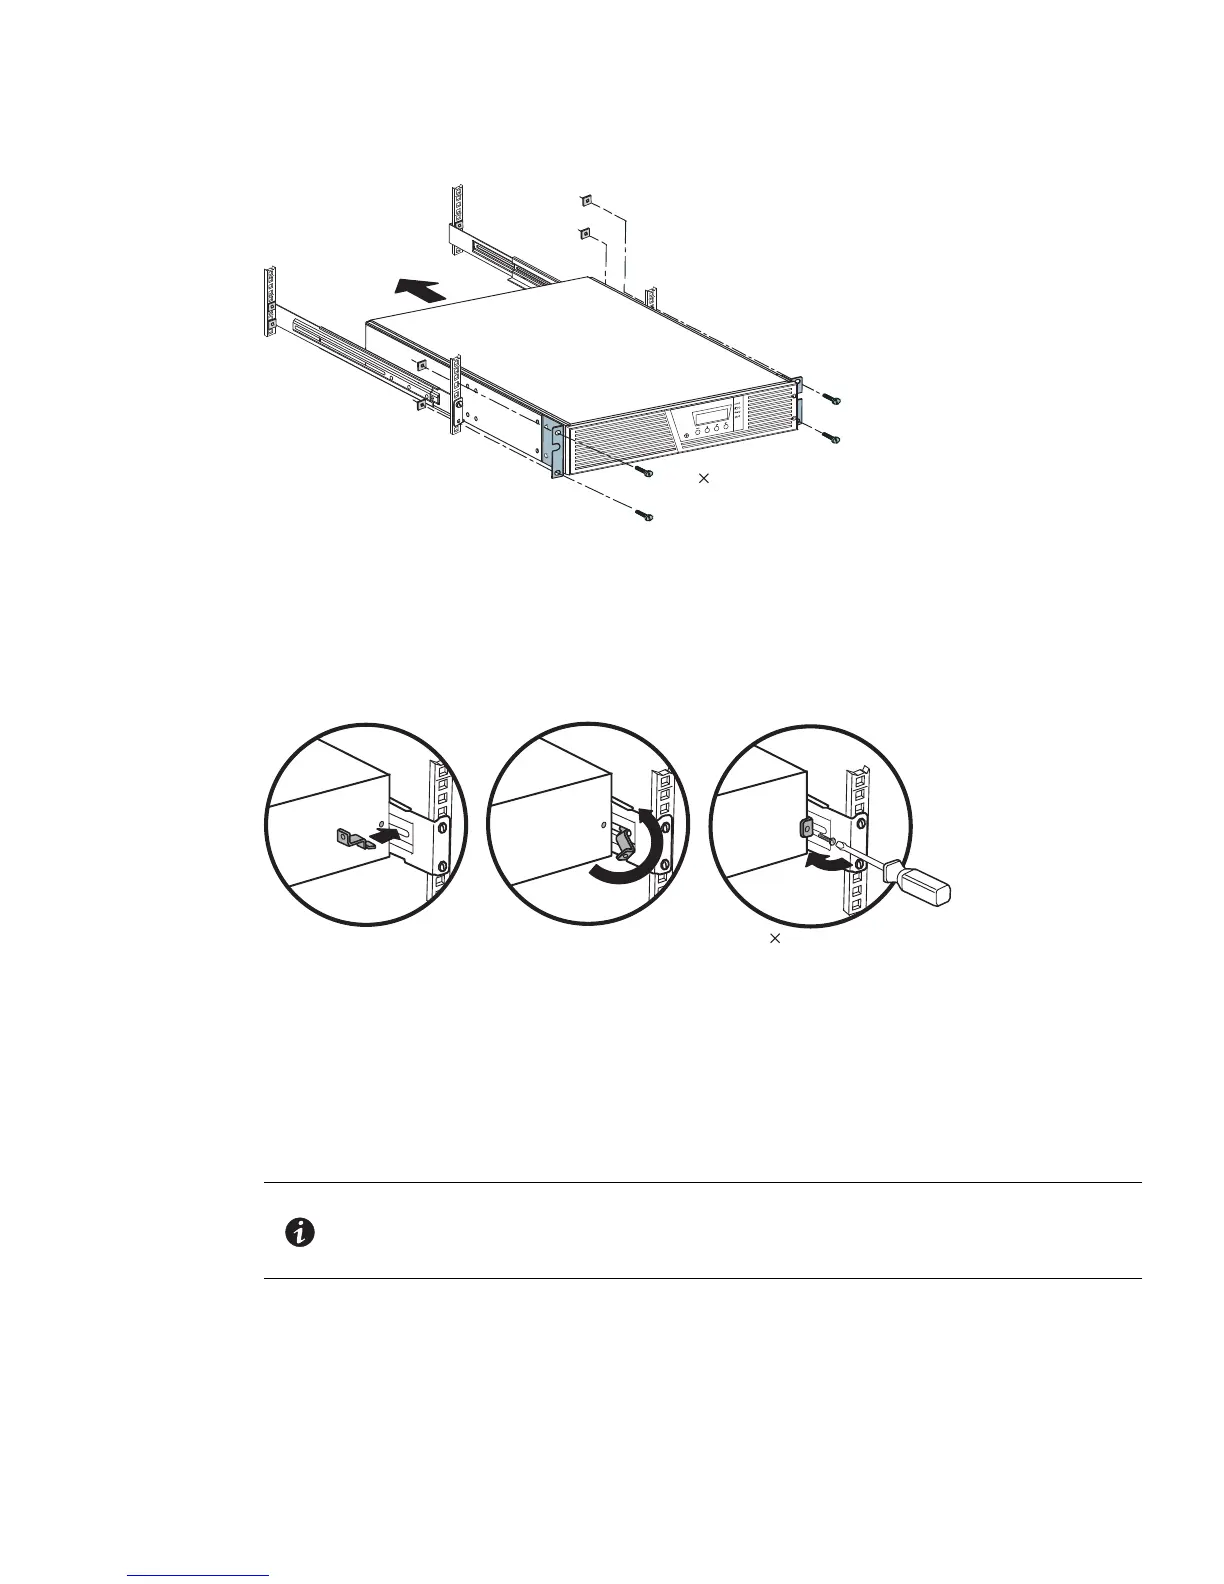
M6 16 Pan-Head
Screws (4 places)
M6 Cage Nuts
(4 places)
Installation
Eaton 9130 700/3000 VA UPS User’s Guide 164201718—Rev 7 www.eaton.com/powerquality 16
Figure 7. Securing the Front of the Cabinet
13. Optional. Insert a rear stop bracket through the inside of each rail behind the UPS. Rotate each bracket
and slide the bracket until it fits tightly against the UPS's rear panel. Secure each bracket to the UPS with
one M3x8 pan-head screw. See Figure 8.
Repeat for any optional cabinets.
14. Continue to the following section, “Rackmount Wiring Installation.”
3MtekcarB potS raeR
8 Pan-Head Screw
Figure 8. Securing the Back of the Cabinet (Optional)
Rackmount Wiring Installation
This section explains:
l
Installing the UPS, including connecting the UPS internal batteries
l
Connecting any optional EBMs
Installing the UPS
NOTE 1 Do not make unauthorized changes to the UPS; otherwise, damage may occur to
your equipment and void your warranty.
NOTE 2 Do
not connect the UPS power cord to utility until after installation is completed.
To install the UPS:
1. Remove the UPS right front cover (b
ehind the LCD control panel). See Figure 9.
To remove the cover, remove and retain the two screws o
n the right side of the cover. Grasp the top and
bottom of the cover and slide the cover to the right.