SAW CHAIN LUBRICATION SYSTEM
CS-2510TES
250Ts, 250TCs
50
7-3 Inspecting and replacing oil line
{Inspecting and removing oil line}
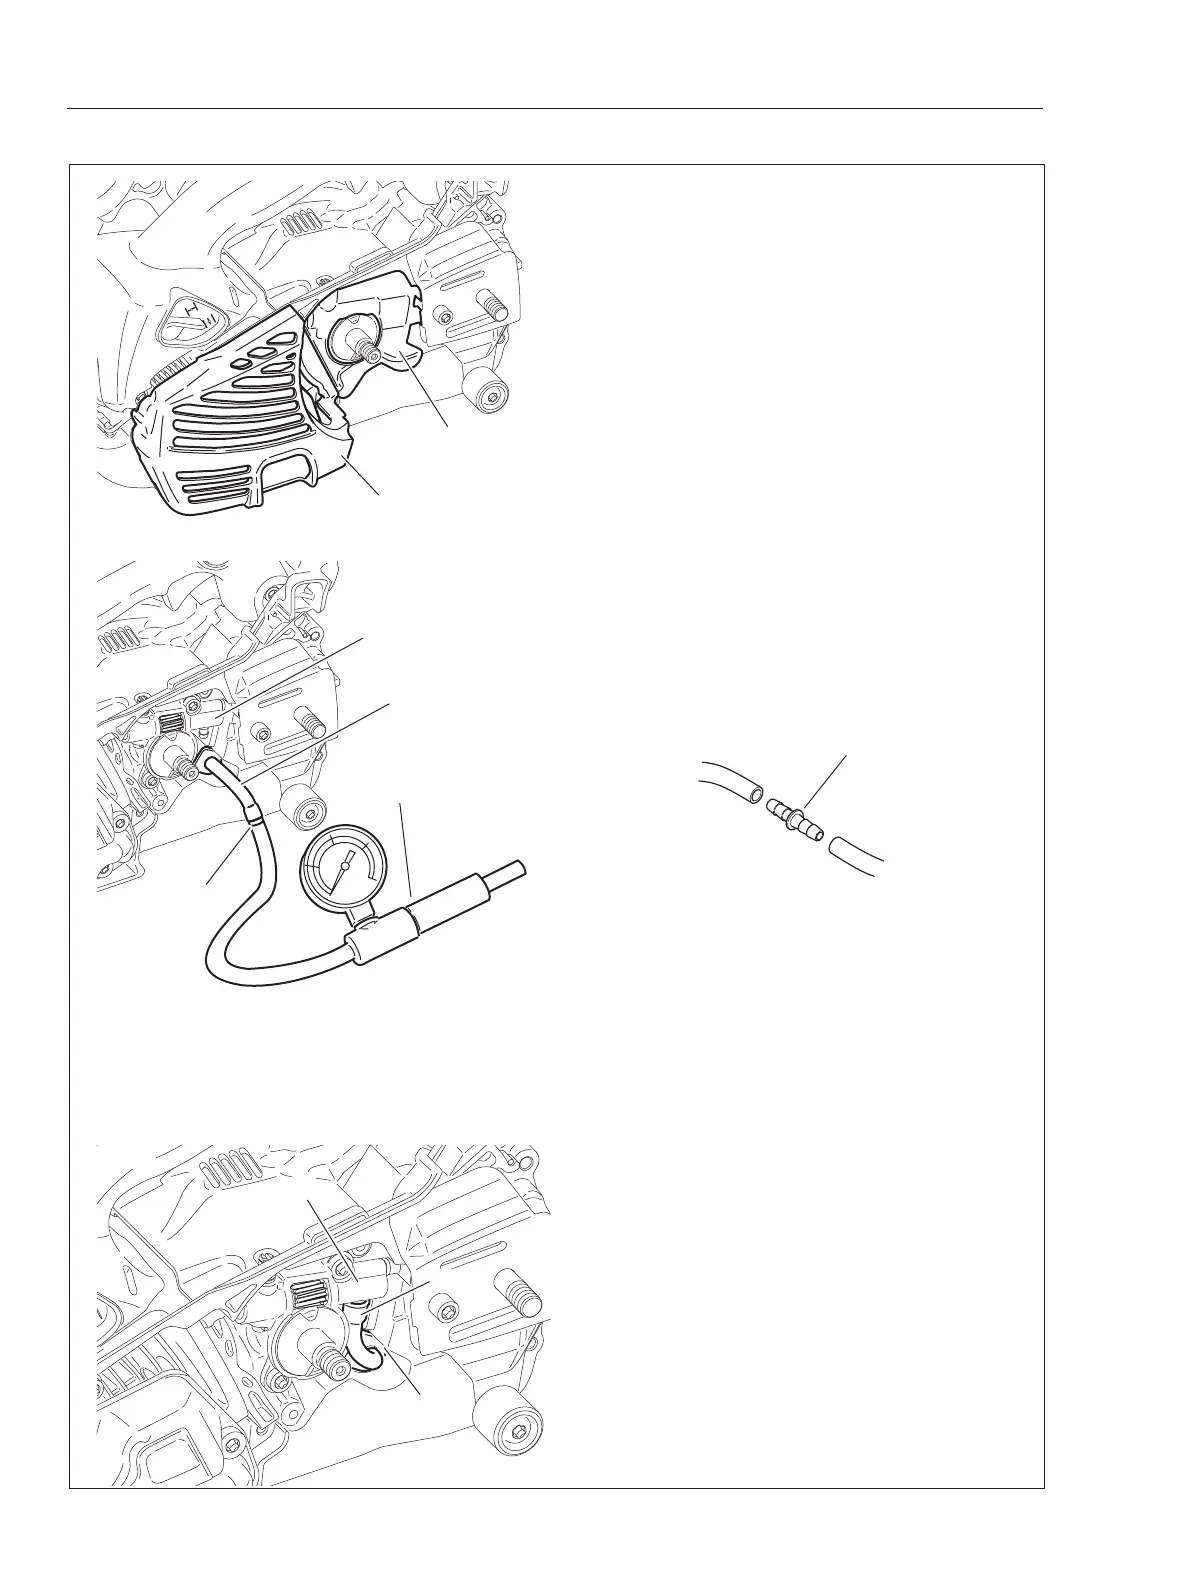
1. Remove sprocket guard, clutch assembly, clutch
plate, clutch drum and needle bearing (Refer to “5-1
Inspecting clutch parts.”).
2. Remove two bolts and muffl er cover (A).
3. Remove oiler cover (B).
4. Disconnect oil line (C) from auto-oiler assembly
(D).
5. Connect pressure tester 897803-30133 (E) to oil
line (C).
NOTE:
To connect pressure tester to oil line (C), it
is recommended to use pipe joint V186-000020 (F).
6. Tighten oil cap and apply pressure approx. 9.8
kPa (0.1kgf/cm
2
) (1.4psi).
7. Pressure should not drop. If the pressure drops,
leakage may occur at oil line, oil cap, oil cap gas-
ket, oil tank vent, or oil tank. Inspect them and
replace defective part(s) with new part(s) as re-
quired.
NOTE:
Remove oil strainer from oil line (C), before
removing oil line (C). (Refer to “7-1 Inspecting oil
cap and strainer” )
{Installing oil line}
8. Install oil line (C) to oil tank and connect oil line
(C) to auto-oiler assembly (D) as shown.
NOTE:
Make sure that grommet (c) of oil line (C) is
set in engine cover.
9. Reassemble removed parts.
E
A
F
D
F
B
C
C
D
c