TelevisGo Page 17/68
Page last update on: 7.39.34
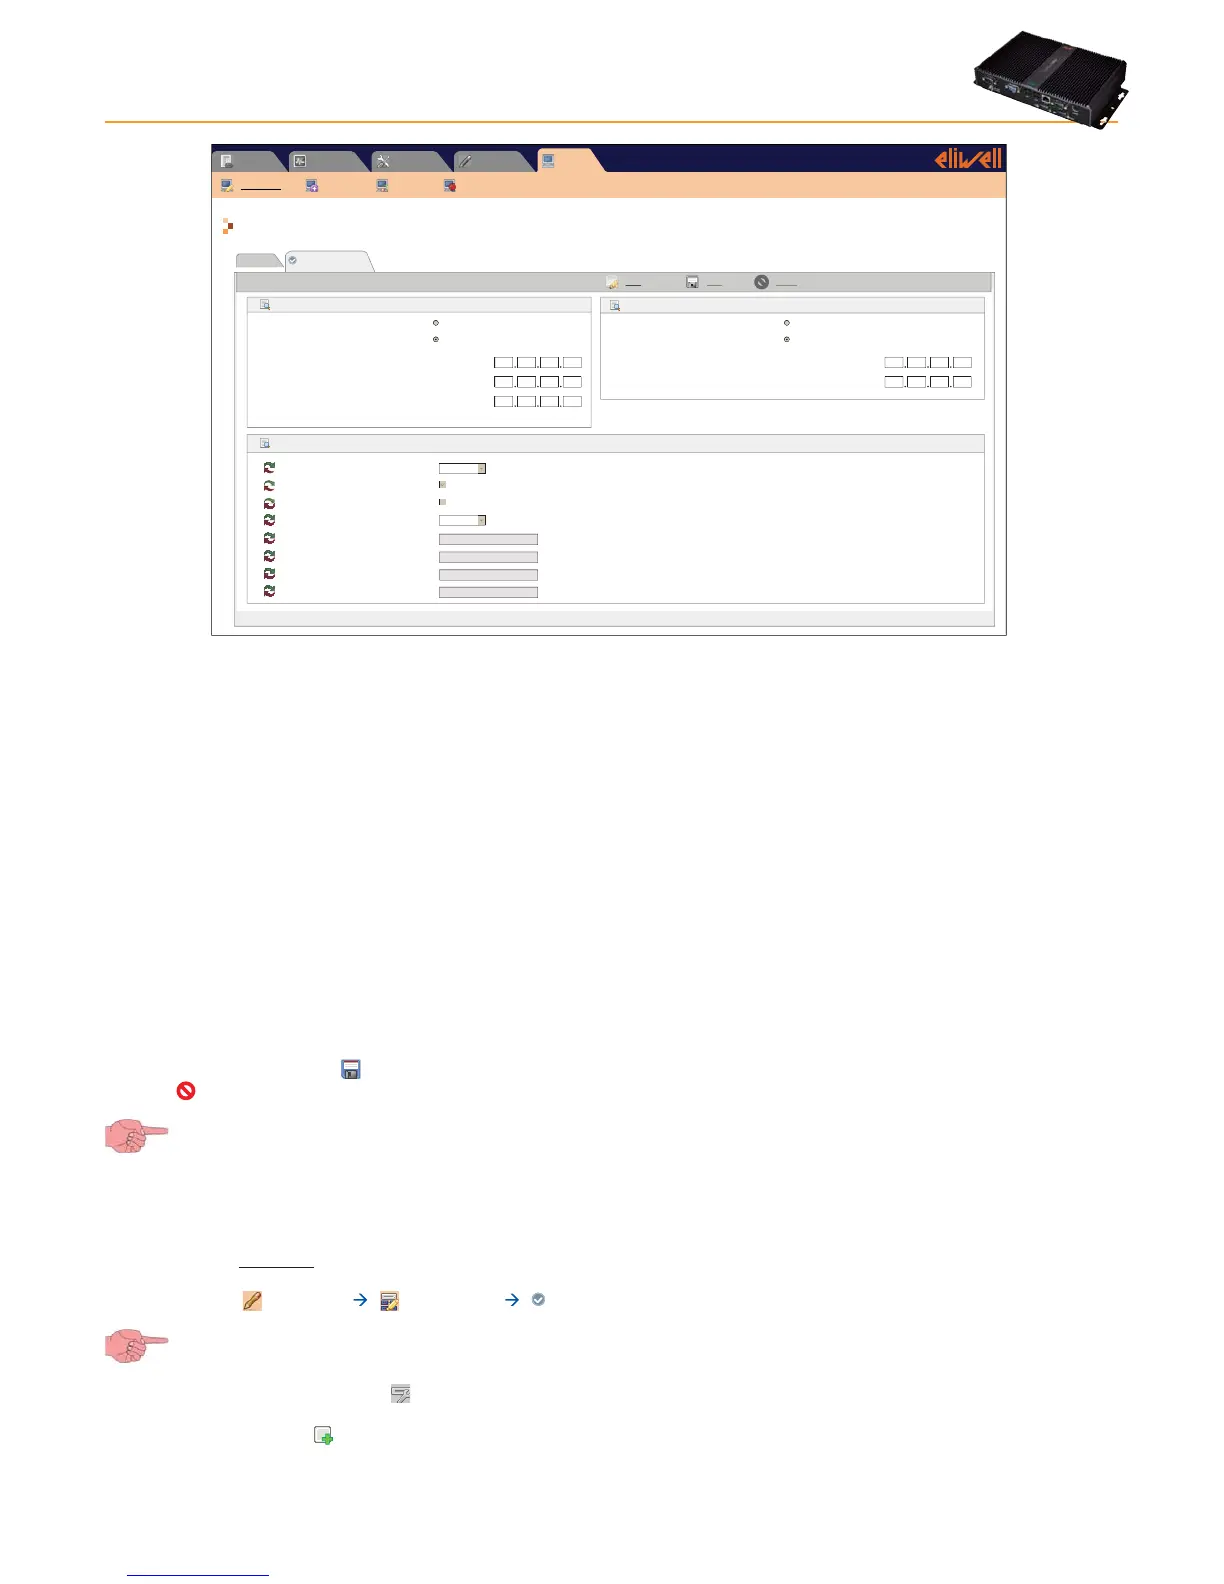
Computer » Information » Network settings
Alarms Computer
Settings
ToolsData
General
Information
Upgrade Reboot Update license
Network settings
IP Address
Obtain an IP address automatically (DHCP)
Use the following IP adress:
IP Address
Edit Save Cancel
Subnet mask
Gateway
DNS
10 39 4 103
255 255 255 0
Obtain the DNS server IP address automatically
Use the following server DNS addresses:
Preferred DNS server:
Alternate DNS server:
10 39 4 15
10 39 4 16
10 39 4 12
:
Proxy Settings
Proxy - SOCKS - Domain resolution
Proxy - Ignore local addresses
Proxy - Enabled
Proxy - Protocol
Proxy - Server address
Proxy - Server port
Proxy - User
Proxy - Password
Native DNS
SOCKS 5
Depending on the network (contact the network administrator for necessary information), enter the following information:
1) IP address: set if the DHCP (dynamic address) or manual IP (static address) is to be used.
• If the automatic IP has been set, when the device is restarted, it will connect using the values received from the network,
which may vary each time.
• If the manual IP has been set, when the device is switched on, it connects using the same values all the time, which must
be saved in the following order: IP address, Subnet mask and Gateway.
2) DNS address: set if the automatic DNS (dynamic address) or manual DNS is to be used.
3) Proxy Configuration: set proxy server parameters (the system must be restarted after setting these parameters):
• SOCKS - Domain name resolution : native DNS, Proxy or DNS via proxy
• Ignore for local addresses: when selected, TelevisGo will not use the proxy server to resolve addresses within its own
sub-network.
• Enable: select if the SOCKS server requires authentication.
• Protocol version: 4, 4a, 5 or HTTP Proxy
• Server address: IP address of SOCKS server
• Server port: SOCKS server access port
• User: user name for SOCKS server authentication
• Password: password for SOCKS server authentication.
To save data entered, click the
icon or Save.
Click the
icon or Cancel to exit without saving the changes.
If you change page without saving, any changes made will be lost (the same as clicking Cancel).
5.2 NETWORK SCAN AND DEVICE NAMING
5.2.1 DEFINING INTERFACES
To define system interfaces, go to:
Settings Interfaces Scan
To access this section, data logging must be suspended (see Data Logging section).
In the new page that opens, click the icon or Manage interfaces.
A window will open in which you can enter/edit interfaces.
To add a network, click the
icon or Add, and a screen with the following options will open: