RRP: Port, application, and encryption blades
91
Removal and Replacement Procedures (RRPs)
RRP: Port, application, and encryption blades
This section describes how to remove and replace port, application,
and encryption blades.
Note: A blade should be removed only when being replaced with another
port, application, or encryption blade, or a filler panel (“RRP: Blade filler
panel”). Any slot that is not occupied by a blade should be occupied by a
filler panel to ensure correct cooling of the chassis and protection from dust.
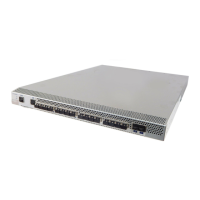
Slots are numbered from 1 through 8, from bottom to top when facing
the port side of the ED-DCX-4S-B. Port, application, and encryption
blades can be installed in slots 1-2 and 7-8.
Time and items
required
The replacement procedure for each blade takes less than 10 minutes.
The following items are required for the blade and filler panel
replacement:
◆ ESD (electrostatic discharge) grounding strap
◆ Workstation computer
◆ Replacement blade or filler panel
◆ Phillips screwdriver
◆ Small form-factor pluggable (SFP) or extended form-factor
pluggable (XFP, PB-48K-10G-6 blade only) transceivers (as
needed)
◆ Optical cables (as needed)
Removing a blade
Note: Follow ESD precautions (“ESD precautions”).
1. Remove the chassis door (“RRP: Chassis door”).
2. Check the power LED, status LED, and port status LED to
identify any possible problems. A failed port or application blade
can be identified by inspecting the LEDs on the front panel of
each blade. See Figure 5 on page 64 to Figure 11 on page 70 for
LED locations.
3. Establish a Telnet or console session.