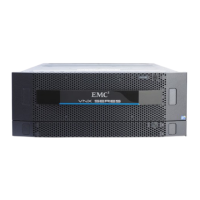
When arranging DAEs in your cabinet, you should consider rack space, I/O load balancing
across the disks, and convenience. For more on racking and cabling options, see your
VNX hardware information guide.
Install the rails for an optional DAE rails
Refer to these tasks to install the adjustable rails for an optional DAE:
l
Install 2U DAE rails on page 23
l
Install 3U DAE rails on page 24
Installing DAEs
Use the following procedures to install any optional DAEs in to the cabinet.
The 4U 60 drive DAE and the 3U 120 drive DAE are not shown because they are not
customer installable.
Install an optional DAE
Refer to these tasks to install an optional DAE into the adjustable rails:
l
Install the 2U DAE on page 36
l
Install the 3U DAE on page 36
Connecting additional DAEs to your VNX system
After installing the additional DAE components into the cabinet, connect these additional
DAEs to the VNX system.
Connect SAS SPE and DAE cables
DAE 0 has already been cabled and powered up.
The VNX8000 supports one SAS I/O module in slot 5 of each SP. A second SAS I/O
module is in slot 10. Each SAS I/O module has 4 ports, thus providing 8 buses for a base
system. The VNX8000 supports up to 2 additional SAS I/O modules.
The DAEs section of the
VNX8000 Hardware Information Guide
contains information on the
stacking and cabling of this storage system.
Each DAE has two Link Control Cards (LCC), designated A or B.
Procedure
1. Locate one pair of cables for each DAE shown in Figure 44 on page 62.
Add additional storage
Installing DAEs 61

 Loading...