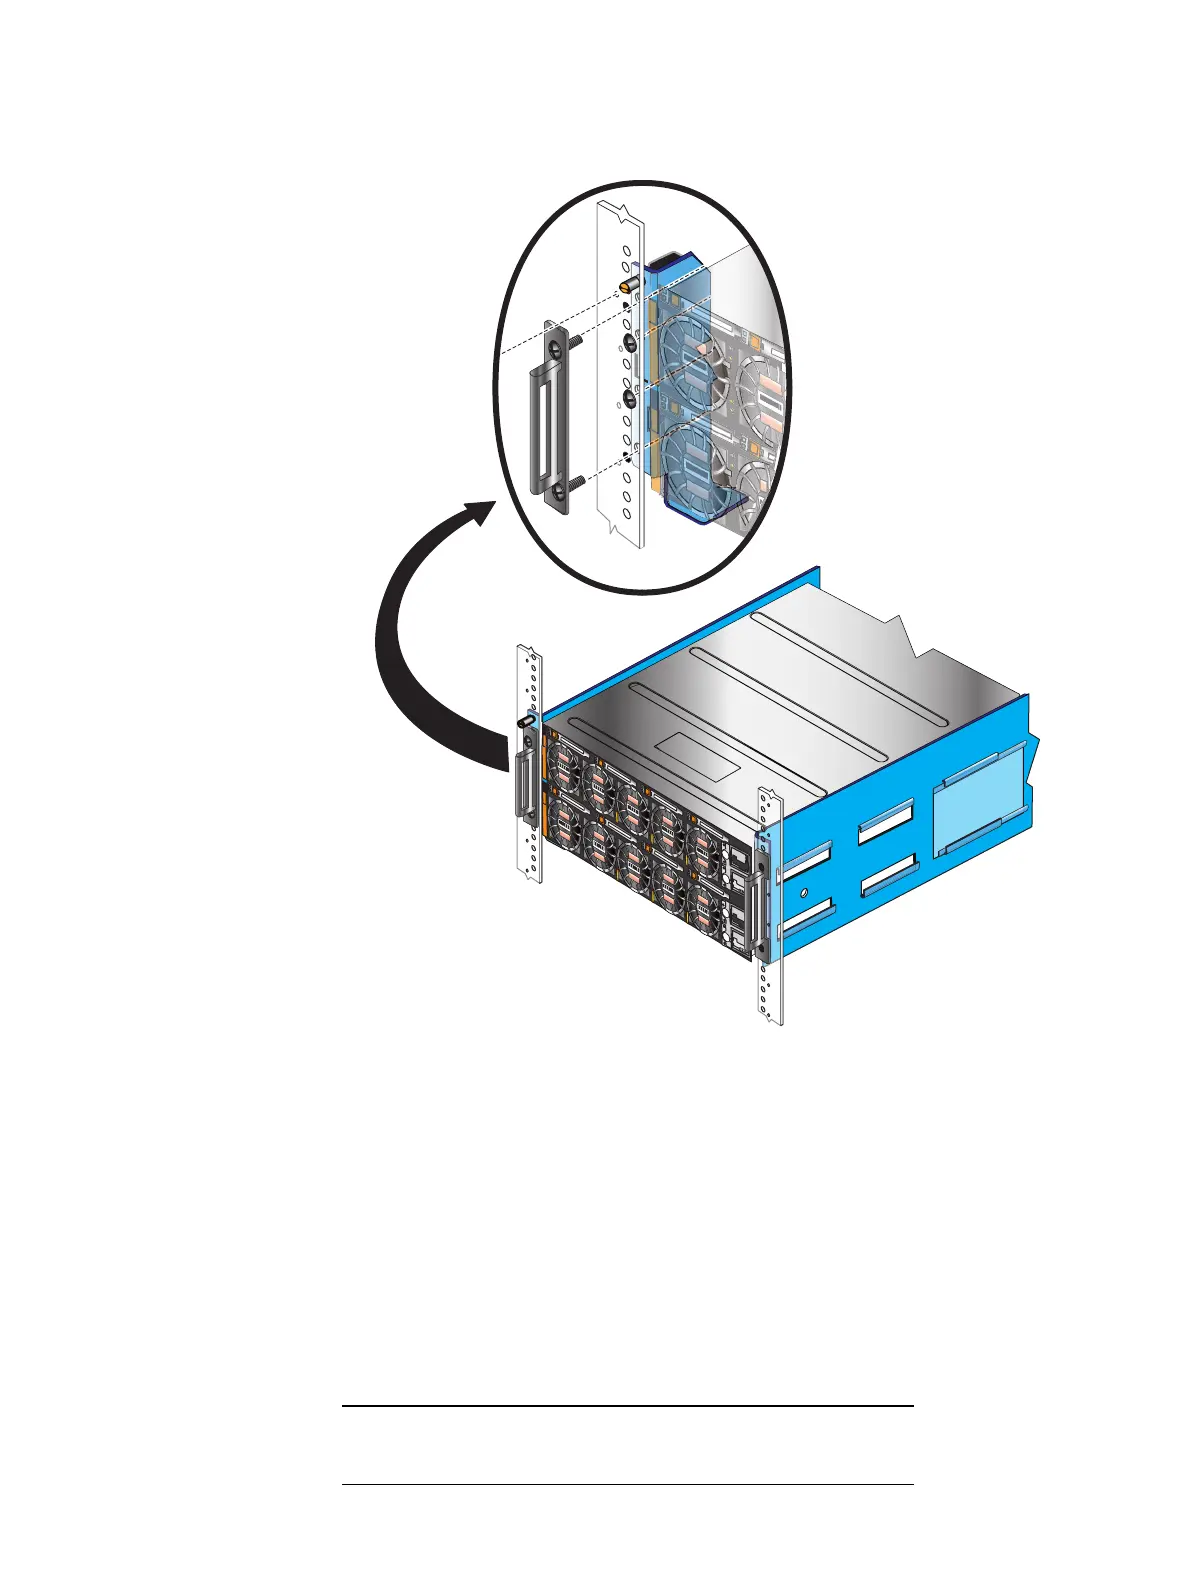
Figure 21 Installing the SPE bezel brackets
2. Repeat the installation of the bezel bracket on the other side of the enclosure.
Installing the DAE 0 standby power supply (SPS)
Repeat the procedure presented in Installing components of the SPE standby power
supply on page 25 to install the DAE 0 SPS into its rails.
Installing disk-array enclosure 0
DAE 0 can be any DAE type supported by VNX: a 3U, 15 3.5'' drive DAE, a 2U, 25 2.5''
drive DAE, a 3U, 120 2.5" drive DAE, or a 4U, 60 2.5" or 3.5" drive DAE. The 3U, 120 2.5"
drive DAE and the 4U, 60 2.5" or 3.5" drive DAE require deep racks and a service
engagement, so they are not included in this section. Identify and ensure that you are
ready to install the DAE with the vault drives, DAE 0, at this time.
DAE 0 has a yellow label on the first four drives or vault drives (0-3).
Assemble components in your cabinet
Installing the DAE 0 standby power supply (SPS) 35
 Loading...