PlasmaQuant MS product family Autosampler ASPQ 3300
125
11.3.2 Replacing the pump tubing
1. Switch off the autosampler at the power switch.
2. Place a tray or an absorbent cloth underneath the connectors of the wash cup.
3. Release the pressure bars at the pump and fold them down.
4. Pull the pump tubing from the connectors on the wash cup.
5. Pull the pump tubing from the connections to the aspiration tubing for the wash
solution and the waste tubing. Remove the pump tubing from the pump.
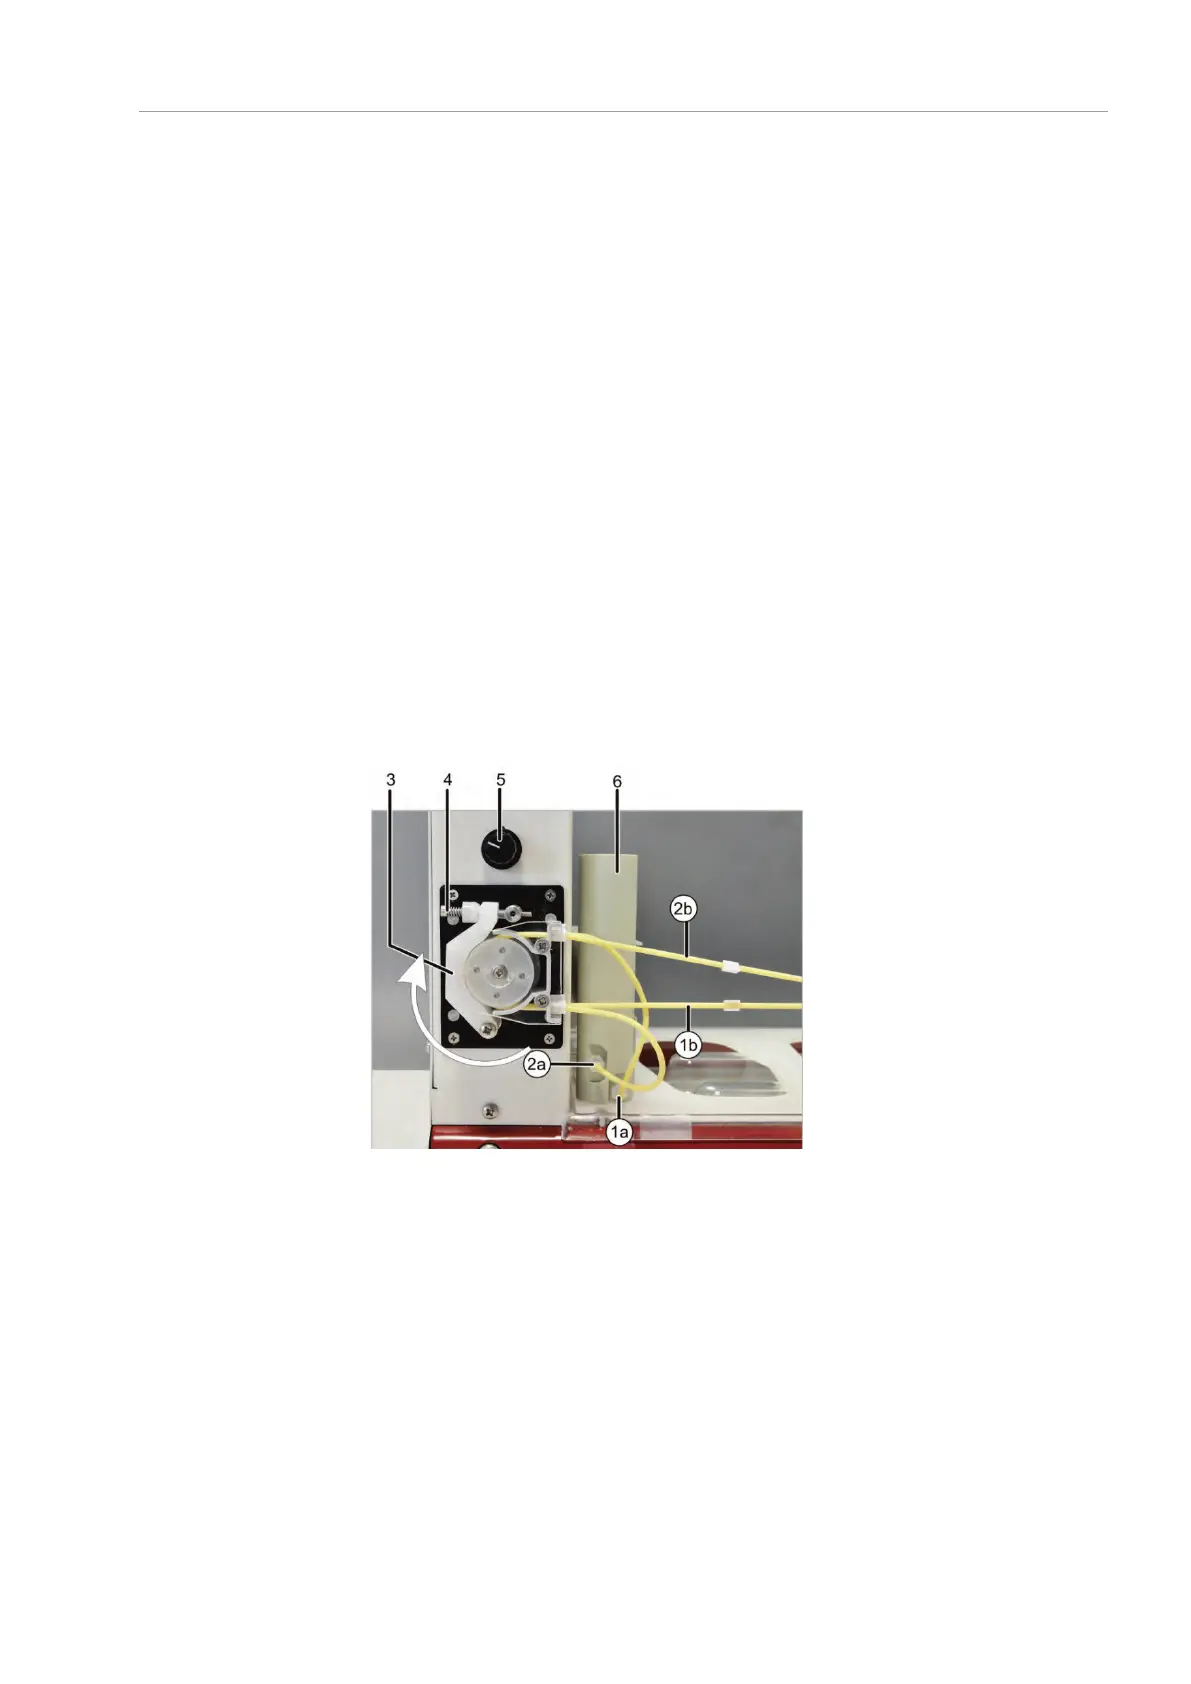
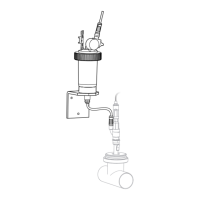
6. Attach the new pump tubing at the lower inlet connector (1a) of the wash cup and
clamp the tubing between two stoppers into the pump with the connection to the
wash cup facing upwards. Connect the other end of the tubing (1b) with the
aspiration tubing for the wash solution.
7. Attach the new waste tubing (2a) at the upper outlet connection of the wash cup
and clamp the tubing between two stoppers into the pump with the connection to
the wash cup facing downwards. Connect the other end of the tubing (2b) with the
waste tubing for the wash solution and place the waste tubing in the waste
container on the floor.
Notice! Note the pump direction! The pump moves in a clockwise direction.
8. Close the pressure bars over the pump tubing.
inlet connector for the pump
tubing
connection to the wash
solution
outlet connector for the waste
tubing
connection to the waste
container
pressure bar
pressure bar screw
Speed controller
wash cup
Fig. 67 Autosampler pump
11.3.3 Clean-up after cup overflow
If the wash cup has overflowed during an analysis run, immediately interrupt the
workflow and clean the device.
1. Stop the workflow immediately.
2. Take up the liquid with cellulose wadding or a cloth. Wipe the surface dry.
3. Ensure that the outlet can be drained, i.e., remove any sharp bends in the draining
tubing or make sure that the draining tubing does not dip into the liquid in the
waste bottle.