EasyManua.ls Logo

Endress+Hauser Proline Promag 50 - User Manual

Endress+Hauser Proline Promag 50
154 pages
Print Icon
To Next Page IconTo Next Page
Loading...
BA046D/06/en/10.03
50097090
Valid as of software version:
V 1.06.XX (amplifier)
V 1.03.XX (communication)
PROline promag 50
Electromagnetic
Flow Measuring System
Operating Instructions

Table of Contents

Other manuals for Endress+Hauser Proline Promag 50

Questions and Answers

  • M
    melissajenningsAug 20, 2025
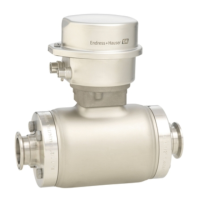
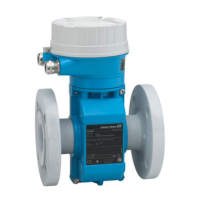
    Why is the measured-value reading fluctuating on my Endress+Hauser Measuring Instruments device when the flow is steady?
    • R
      Rita RobinsonAug 20, 2025
      If the measured-value reading fluctuates on your Endress+Hauser Measuring Instruments device despite a steady flow, here's what you can do: 1. Ensure proper grounding and potential equalization. 2. Check the fluid for any presence of gas bubbles. 3. Increase the value in the "SYSTEM DAMPING" function.
  • J
    jacobtravisAug 22, 2025
    What to do if Endress+Hauser Proline Promag 50 shows reading when fluid is still?
    • O
      orramandaAug 22, 2025
      If your Endress+Hauser Measuring Instruments display shows a measured-value reading even when the fluid is at a standstill and the measuring tube is full, take these steps: 1. Ensure proper grounding and potential equalization. 2. Check the fluid for the presence of gas bubbles. 3. Activate the "LOW FLOW CUTOFF" function by entering or increasing the value for the switching point.
  • S
    scopelandAug 25, 2025
    Why are flow values negative on Endress+Hauser Proline Promag 50 with forward flow?
    • J
      Jessica BurnsAug 25, 2025
      If the flow values on your Endress+Hauser Measuring Instruments are negative, even though the fluid is flowing forwards through the pipe, here's what you can do: 1. For the remote version: switch off the power supply and check the wiring. If necessary, reverse the connections at terminals 41 and 42. 2. Change the setting in the "INSTALLATION DIRECTION SENSOR" function accordingly.
  • J
    Jennifer RichardsonAug 26, 2025
    How to fix measured-value reading on Endress+Hauser Proline Promag 50 when tube is empty?
    • J
      Jeffery AndersonAug 26, 2025
      If your Endress+Hauser Measuring Instruments display shows a measured-value reading even when the measuring tube is empty, consider the following: 1. Perform empty-pipe/full-pipe adjustment and then switch on Empty Pipe detection. 2. For the remote version: Check the terminals of the EPD cable. 3. Fill the measuring tube.
  • A
    awhiteAug 28, 2025
    How to change language on Endress+Hauser Proline Promag 50 display?
    • B
      Brittany HoltAug 28, 2025
      If the display texts on your Endress+Hauser Measuring Instruments are in a foreign language, switch off the power supply. Then, press and hold down both OS buttons while switching the measuring device back on. The display text will appear in English (default) and will be displayed at maximum contrast.
  • M
    Mark MaciasAug 29, 2025
    Why is the current output signal always 4 mA on my Endress+Hauser Proline Promag 50?
    • B
      Brian HessAug 29, 2025
      If the current output signal from your Endress+Hauser Measuring Instruments is consistently 4 mA, regardless of the flow signal, here’s what you should do: 1. Select the "BUS ADDRESS" function and change the setting to "0". 2. If the value for creepage is too high, reduce the value in the "LOW FLOW CUTOFF" function.
  • S
    shawmeredithAug 31, 2025
    What does error 401-463 mean on Endress+Hauser Measuring Instruments?
    • P
      pwaltonAug 31, 2025
      If your Endress+Hauser Measuring Instruments displays error numbers between 401 and 463, it indicates that the measuring tube is partially filled or empty. To resolve this: 1. Check the process conditions of the plant. 2. Fill the measuring tube. If the error is due to EPD calibration not being possible because the fluid's conductivity is either too low or too high, the EPD function cannot be used with fluids of this nature. If the EPD calibration values for empty pipe and full pipe are identical and therefore incorrect, repeat calibration, making sure procedure is correct.
  • H
    Heather MeltonSep 2, 2025
    What to do if Endress+Hauser Proline Promag 50 Measuring Instruments has no display but output signals are present?
    • A
      Angelica Henry MDSep 2, 2025
      If there is no display visible but output signals are present on your Endress+Hauser Measuring Instruments, here’s what you can check: 1. Ensure that the ribbon-cable connector of the display module is correctly plugged into the amplifier board. 2. If the issue persists, the display module or measuring electronics might be defective, and you may need to order spare parts.
  • W
    wgreenSep 4, 2025
    How to troubleshoot no display and output on Endress+Hauser Measuring Instruments?
    • K
      Kevin JohnsonSep 4, 2025
      If there is no display visible and no output signals present on your Endress+Hauser Measuring Instruments, here’s what you can check: 1. Check the supply voltage at terminals 1 and 2. 2. Check the power line fuse. For 85 to 260 V AC, use a 0.8 A slow-blow / 250 V fuse. For 20 to 55 V AC / 16 to 62 V DC, use a 2 A slow-blow / 250 V fuse. 3. If the issue persists, the measuring electronics might be defective, and you may need to order spare parts.
  • T
    timothybarrySep 6, 2025
    Why is there no signal at the output of my Endress+Hauser Measuring Instruments?
    • M
      Michelle OchoaSep 6, 2025
      If a measured value is indicated on your Endress+Hauser Measuring Instruments, but there is no signal at the current or pulse output, the electronics board may be defective, and you may need to order spare parts.

Summary

Safety Instructions

1.1 Designated Use

Specifies the intended application and limitations of the measuring device.

1.2 Installation, Commissioning and Operation

Important notes regarding installation, commissioning, and operation.

1.3 Operational Safety

Guidelines for ensuring safe operation and handling of the device.

Identification

2.1 Device Designation

Details on the naming and components of the Promag 50 system.

2.1.1 Nameplate of the Transmitter

Information found on the transmitter's identification plate.

2.1.2 Nameplate of the Sensor

Information found on the sensor's identification plate.

Installation

3.1 Incoming Acceptance, Transport and Storage

Procedures for receiving, moving, and storing the device.

3.2 Installation Conditions

Environmental and site requirements for installation.

3.2.2 Mounting Location

Recommendations for selecting an appropriate installation site.

3.3 Installation Instructions

Step-by-step procedures for installing sensors.

3.3.1 Installing the Promag W Sensor

Specific instructions for installing the Promag W sensor.

3.3.2 Installing the Promag P Sensor

Specific instructions for installing the Promag P sensor.

3.3.3 Installing the Promag H Sensor

Specific instructions for installing the Promag H sensor.

Wiring

4.1 Connecting the Remote Version

Instructions for connecting remote transmitter and sensor units.

4.1.1 Connecting Promag W; P; H

Wiring details for Promag W, P, and H sensors to transmitters.

4.2 Connecting the Measuring Unit

Procedures for connecting the transmitter unit.

4.2.1 Connecting the Transmitter

Steps for connecting power and signal cables to the transmitter.

4.2.2 Terminal Assignment

Mapping of terminals to functions and outputs.

4.2.3 HART Connection

How to establish a HART communication connection.

4.3 Potential Equalisation

Methods for ensuring equal electrical potential.

4.3.2 Special Cases

Procedures for potential equalisation in non-standard conditions.

Operation

5.1 Display and Operating Elements

Description of the device's display and push buttons.

5.2 Brief Operating Instruction to the Function Matrix

Guide to navigating and using the device's function matrix.

5.2.1 General Notes

Important notes on using the function matrix for configuration.

5.3 Error Messages

Information on interpreting and responding to device errors.

5.4 Communication (HART)

Details on communication via the HART protocol.

5.4.3 Universal; Common Practice HART Commands

List of HART commands supported by the Promag 50.

Commissioning

6.1 Function Check

Final checks before starting the measuring device.

6.2 Commissioning

Procedures for setting up and configuring the device.

6.2.1 Switching on the Measuring Device

Procedure for powering on and initial startup of the device.

6.2.2 “Commissioning” Quick Setup Menu

Step-by-step guide for initial device configuration.

6.2.3 Empty-Pipe;Full-Pipe Adjustment

Procedure for adjusting for empty or full pipe conditions.

Maintenance

Exterior Cleaning

Guidelines for cleaning the exterior of the device.

Seals

Information on periodic replacement of seals, especially for Promag H.

Accessories

Trouble-shooting

9.1 Trouble-shooting Instructions

General guide to diagnosing and resolving device faults.

Check the Display

Troubleshooting steps for display-related issues.

Error Messages on Display

Interpreting and resolving error messages shown on the display.

9.2 System Error Messages

Detailed information on system errors and their remedies.

9.3 Process Error Messages

Detailed information on process errors and their remedies.

9.4 Process Errors Without Messages

Troubleshooting for process errors without displayed messages.

9.5 Response of Outputs to Errors

How device outputs react to different error conditions.

9.7 Removing and Installing Printed Circuit Boards

Procedures for safely removing and installing electronic boards.

9.8 Replacing the Device Fuse

Instructions for replacing the device fuse.

Technical Data

10.1 Technical Data at a Glance

Overview of the device's intended applications and operating conditions.

10.1.1 Application

Overview of the device's intended applications and operating conditions.

10.1.2 Function and System Design

Details on the measuring principle and system components.

10.1.3 Input

Specifications for input signals and measured variables.

10.1.4 Output

Details on output signals, load, and switching output.

10.1.5 Power Supply

Information on electrical connections and supply voltage.

10.1.6 Performance Characteristics

Data on accuracy, repeatability, and measurement error.

10.1.7 Operating Conditions

Environmental requirements and installation restrictions.

10.2 Measuring-Tube Specifications

Specifications for measuring tubes, including diameters.

10.3 Dimensions Wall-mounted Housing

Physical dimensions of the wall-mounted housing.

10.4 Dimensions Promag 50 W

Dimensional data for Promag 50 W models.

10.5 Dimensions Promag 50 P

Dimensional data for Promag 50 P models.

10.7 Dimensions Promag 50 H

Dimensional data for Promag 50 H models.

10.8 Process Connections Promag H (DN 40...100)

Details on process connections for Promag H, DN 40-100.

Endress+Hauser Proline Promag 50 Specifications

General IconGeneral
Device TypeElectromagnetic flowmeter
Housing MaterialAluminum, stainless steel
Measuring PrincipleElectromagnetic
Measurement Range0 to 12 m/s
Accuracy±0.5% of the measured value
Process Temperature-40 to +130 °C
Process PressureUp to 16 bar
Output Signal4 to 20 mA
Digital CommunicationHART, Profibus
Power Supply24 V DC
Degree of ProtectionIP67
Process ConnectionFlange
Lining MaterialPTFE
Electrode MaterialHastelloy
MaterialStainless steel

Related product manuals