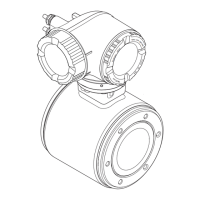
Electrical connection Proline Promag W 800
40 Endress+Hauser
7.4.2 Inserting and connecting the batteries
#
Warning!
Risk of electric shock! Switch off the power supply before opening the device.
"
Caution!
Can damage the electronic of the device!
Only use batteries provided by Endress+Hauser.
1. Open the housing cover.
– Release the four screws with a Phillips head screwdriver.
– Lift the housing cover slightly and tip it to the left.
Two flexible fasteners secure the housing cover to the housing.
2. Remove the battery cover.
– Release the securing screw with a Phillips head screwdriver.
– Turn the battery cover in a slightly clockwise direction to remove it (two guides which
hold the battery cover in position are located on the right-hand side).
3. Insert the batteries.
Place the batteries into the compartment. In doing so, route the battery cables in the
direction of the cable inlet in the battery cover → 24.
If not all the batteries are inserted, the partition plate can be used to prevent any
inserted batteries from becoming dislodged.
A0016648
Fig. 23: Example of a battery arrangement (configuration 5)
B1 Battery connection to back up the power supply for the measuring device
B2 Battery connection to power the measuring device
B3 Battery connection to power the GSM/GPRS module
4. Connect the batteries.
– Insert the battery cables into the appropriate receptacle → 24.
5. Set the DIP switches → 24.
The following options are available:
– Set the DIP switch to ON to switch on the battery power supply.
If battery power supply is switched on, the red CPU LED flashes → 54 and the startup
sequence appears on the onsite display → 53.
– Set the DIP switch to OFF to switch off the battery power supply.
 Loading...