User’s Manual
16
Highlight Use Daylight Saving Time and press the
button. Pressing the button toggles between On and Off.
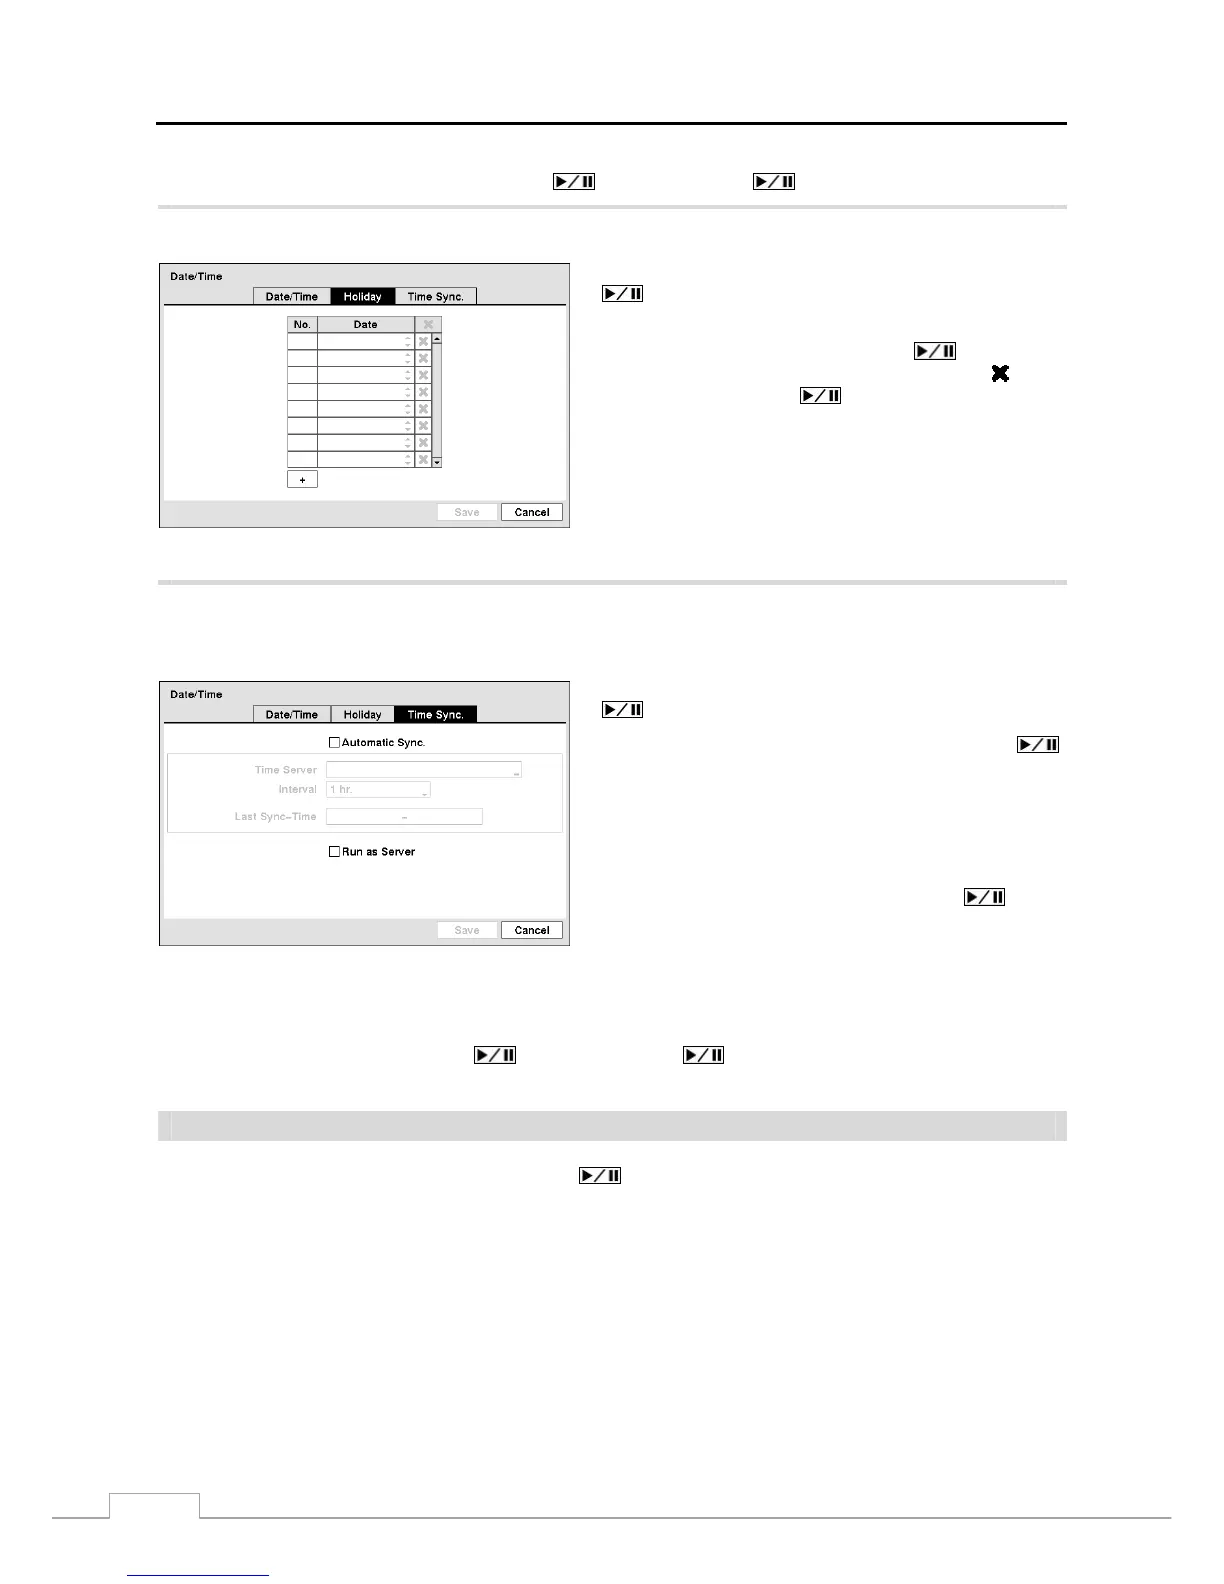
Highlight the Holiday tab, and the Holiday setup screen appears.
You can set up holidays by highlighting
+
and pressing the
button. The current date appears.
Highlight the month and day and change them by using the
Up and Down arrow buttons. Press the
button to add
the date. Dates can be deleted by highlighting the
beside
the date and pressing the
button.
NOTE: Holidays that do not fall on the same date each
year should be updated once the current year’s
holiday has passed.
Figure 11 — Holiday setup screen.
Highlighting the Time Sync. tab causes the Time Sync. screen to display. You can set up time synchronization between
the DVR and standard time servers that are available in most time zones and countries, or between the DVR and another
DVR.
Figure 12 — Time Sync. screen.
Highlight the box beside Automatic Sync. and press the
button. This toggles between On and Off.
Highlight the box beside Time Server and press the
button. A virtual keyboard appears that you can use to enter
the IP address or domain name of the time server.
NOTE: You can use the domain name instead of IP address
if you already set up the DNS Server when
setting up the LAN.
Highlight the box beside Interval and press the button.
Set the time interval for synchronization from 30 minutes to
1 day at various time intervals.
Last Sync-Time displays the last time the DVR was synchronized with the time server.
Highlight Run as Server and press the button. Pressing the button toggles between On and Off. When
it is On, the DVR you are setting up will run as a time server.
Storage
Highlight Storage in the System menu and press the
button. The Storage setup screen appears and displays
information about the DVR’s storage devices.


 To Next Page