POWERED BY
40
SERIESSERIES
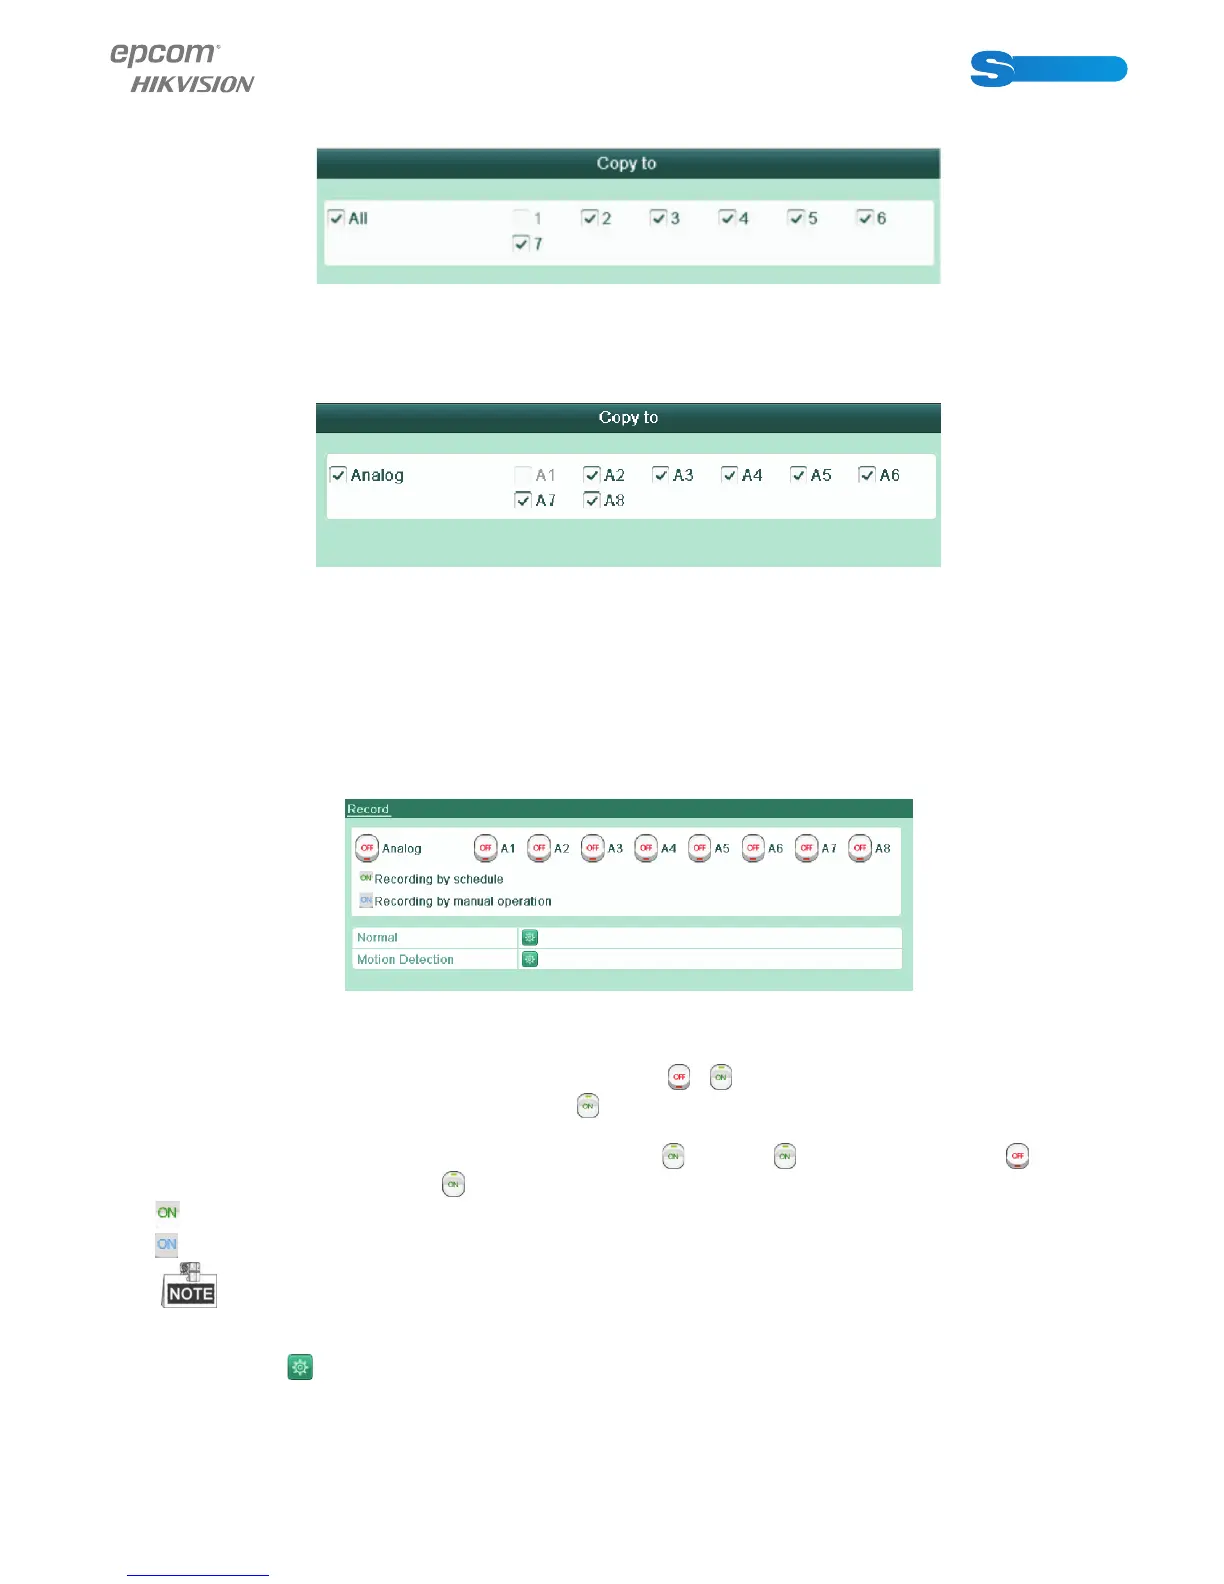
Repeat the above steps3)-6) to schedule motion detection triggered recording for all the week. If the schedule can also
be set to other days, click Copy.
Figure 5.17 Copy Schedule to Other Days
6) Click OK to back to upper level menu.
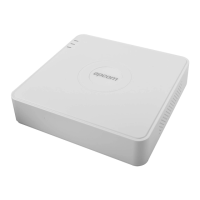
If you can to copy the same schedule settings to other camera (s), click Copy to enter the Copy Camera interface, and then
select the camera (s) you want to copy.
Figure 5.18 Copy Schedule to Other Channels
5.5 Confi guring Manual Record
Purpose:
Follow the steps to set parameters for the man ual record. When using manual record, you need to manually cancel the record. The
manual recording is prior to the scheduled recording.
Steps:
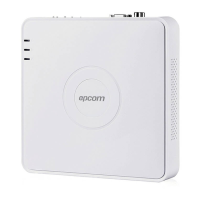
1. Enter the Manual settings interface.
Menu> Manual
Figure 5.24 Manual Record
2. Enable recording for camera (s).
Click the status button beside each camera number to chan ge
to , or you can enable recording for all cameras by
clicking the status bar before Analog to change it to
.
3. Set recording mode to manual.
By default, the camera is enabled with recording by schedule (
). Click the status bar to change it to and click again
to enable the recording to manual (
).
: Recording by schedule.
: recording by manual operation.
After rebooting, all the manual records enabled are canceled.
4. Start all-day normal recording or all-day motion detection recording of all channels.
1) Click
for Normal or Motion Detection.