Installing the Touch Unit
113
f
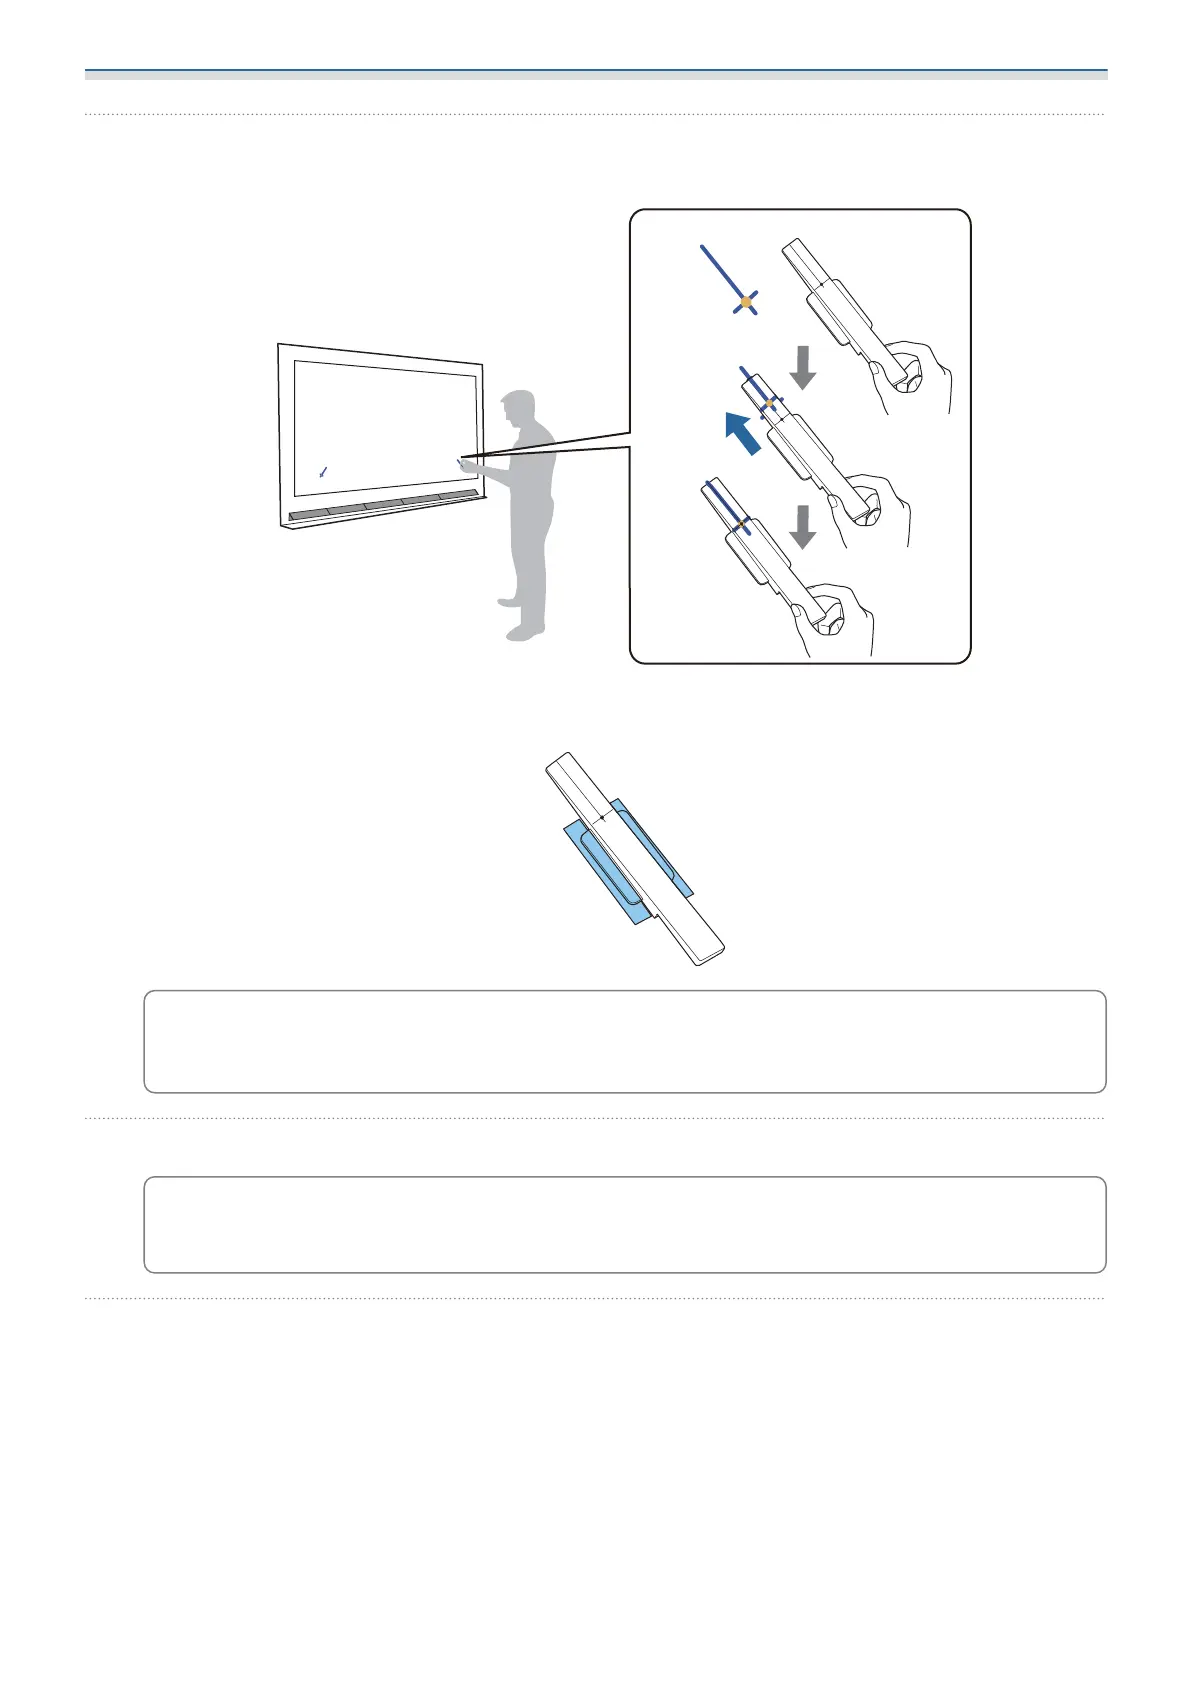
Place the two markers supplied on the marker positions on the projection screen and secure
them
Magnetic screens: Place the base of the markers onto the screen.
Non-magnetic screens: Use the supplied tape to secure the markers as shown below.
c
Do not place anything other than the markers near the projected image during angle
adjustment. If other objects are on the projected image, angle adjustment may not be
performed correctly.
g
Press the [Enter] button to start Touch Unit auto adjustment
c
Auto adjustment may take a few minutes depending on the projection surface.
h
When the message Touch Unit adjustment complete. is displayed, remove the markers
from the projection surface
If you see a message notifying you that auto adjustment has failed, check "When auto adjustment
fails" p.116.