Installing the Wall mount
58
Auto Screen Adjustment
Attach corner markers to the four corners of the projection position to automatically adjust the position of
the image.
Auto Screen Adjustment works correctly under the following conditions.
Projection size: 110 inches or less
Projector direction: Within 3° up, down, left, or right
c
Auto Screen Adjustment may not work properly depending on the surface of the projected screen.
The following conditions are necessary to perform Auto Screen Adjustment.
A flat projection surface
No patterns, dirt, or obstacles on the projection surface
Before performing the Auto Screen Adjustment, set the Screen Type setting first. If you change the
Screen Type after performing Auto Screen Adjustment, the adjustments will be reset.
a
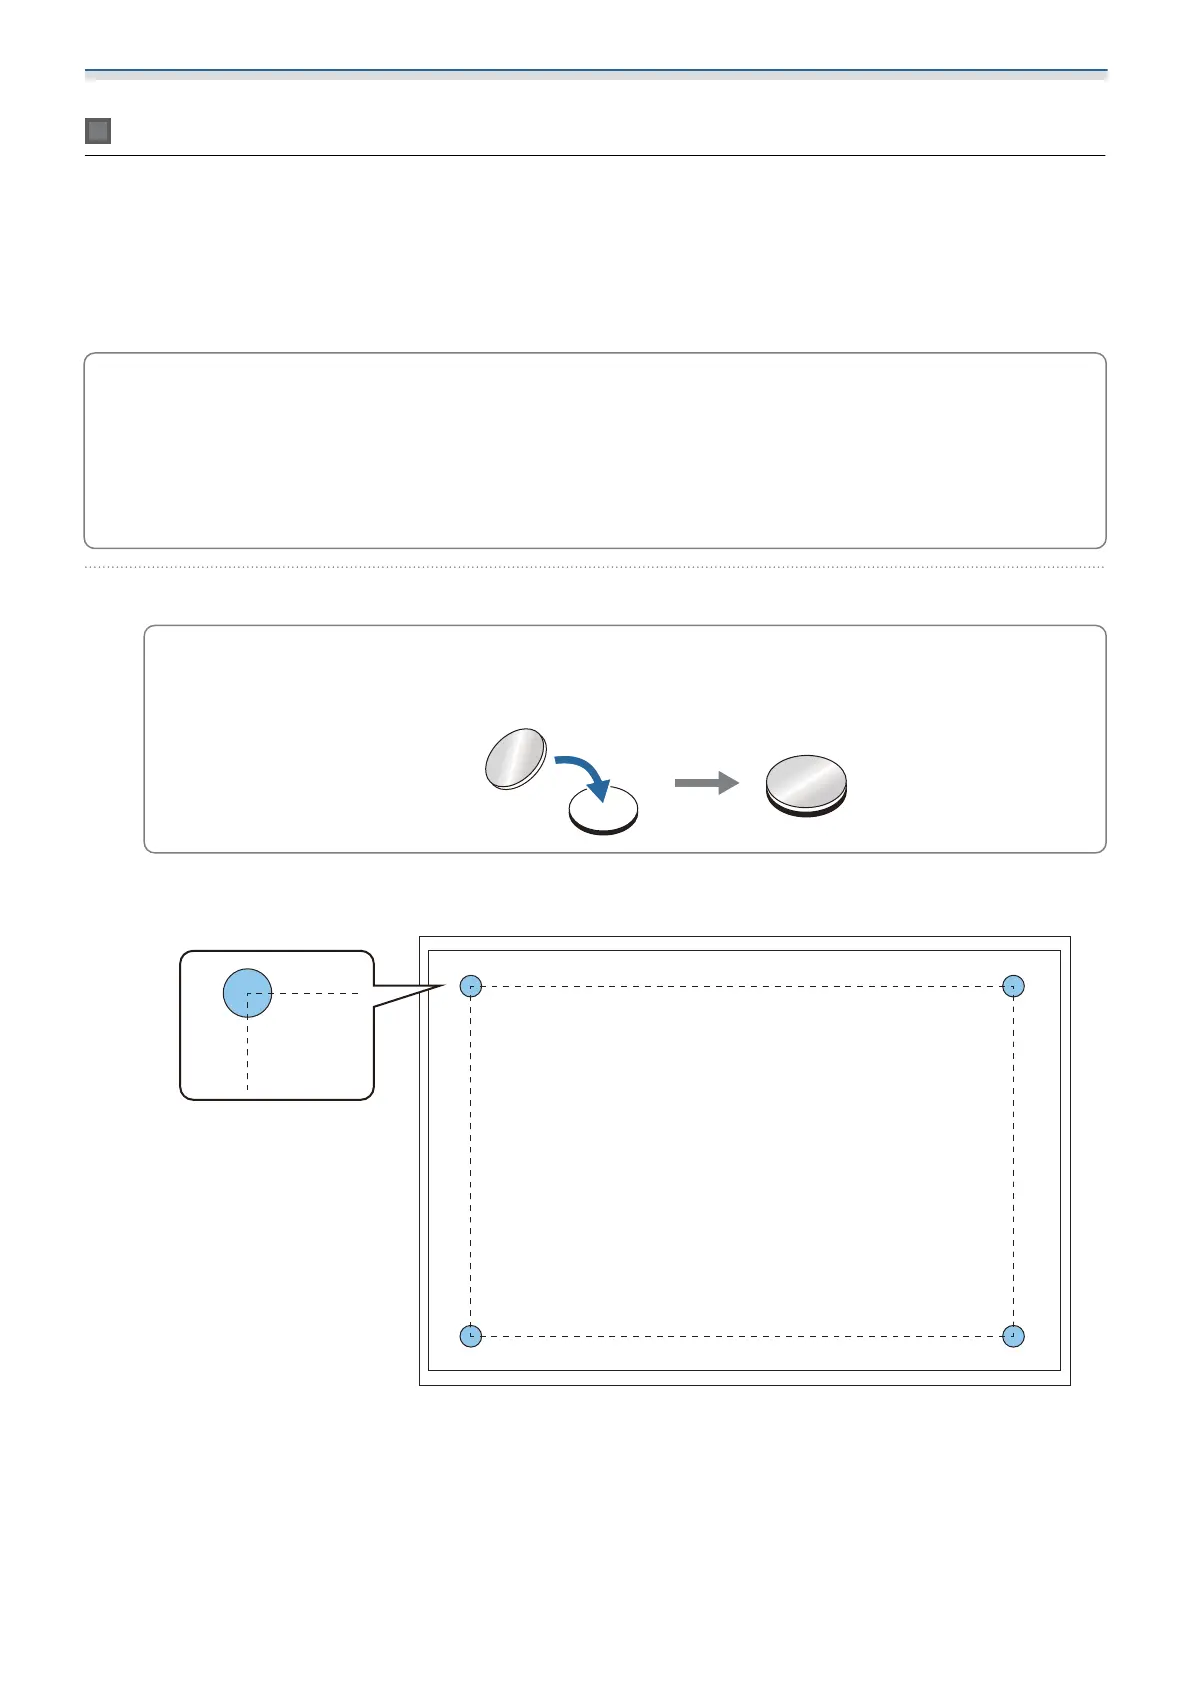
Place the corner markers at the four corners of the position you want to project to
c
Corner markers cannot be placed again. We recommend marking the position where you want
to place the markers in advance.
If you want to replace markers repeatedly, stick them onto the magnetic sheet supplied.
Place the markers so that the corners of the projection position overlap with the center of the corner
markers.