EasyManuals Logo

Epson SCARA ROBOT User Manual

Epson SCARA ROBOT
216 pages
To Next Page IconTo Next Page
To Previous Page IconTo Previous Page
Page #126 background imageLoading...
Page #126 background image
Maintenance 4. Cable
114 G6 Rev.21
W
hen using Table Top mounting type or Ceiling mounting type
(6)-1 Mount the spring for cable protection to
the spring plate with a wire tie.
Spring plate
Wire tie
Spring
(6)-2 Mount the spring plate to the base.
2-M4×10
Spring plate
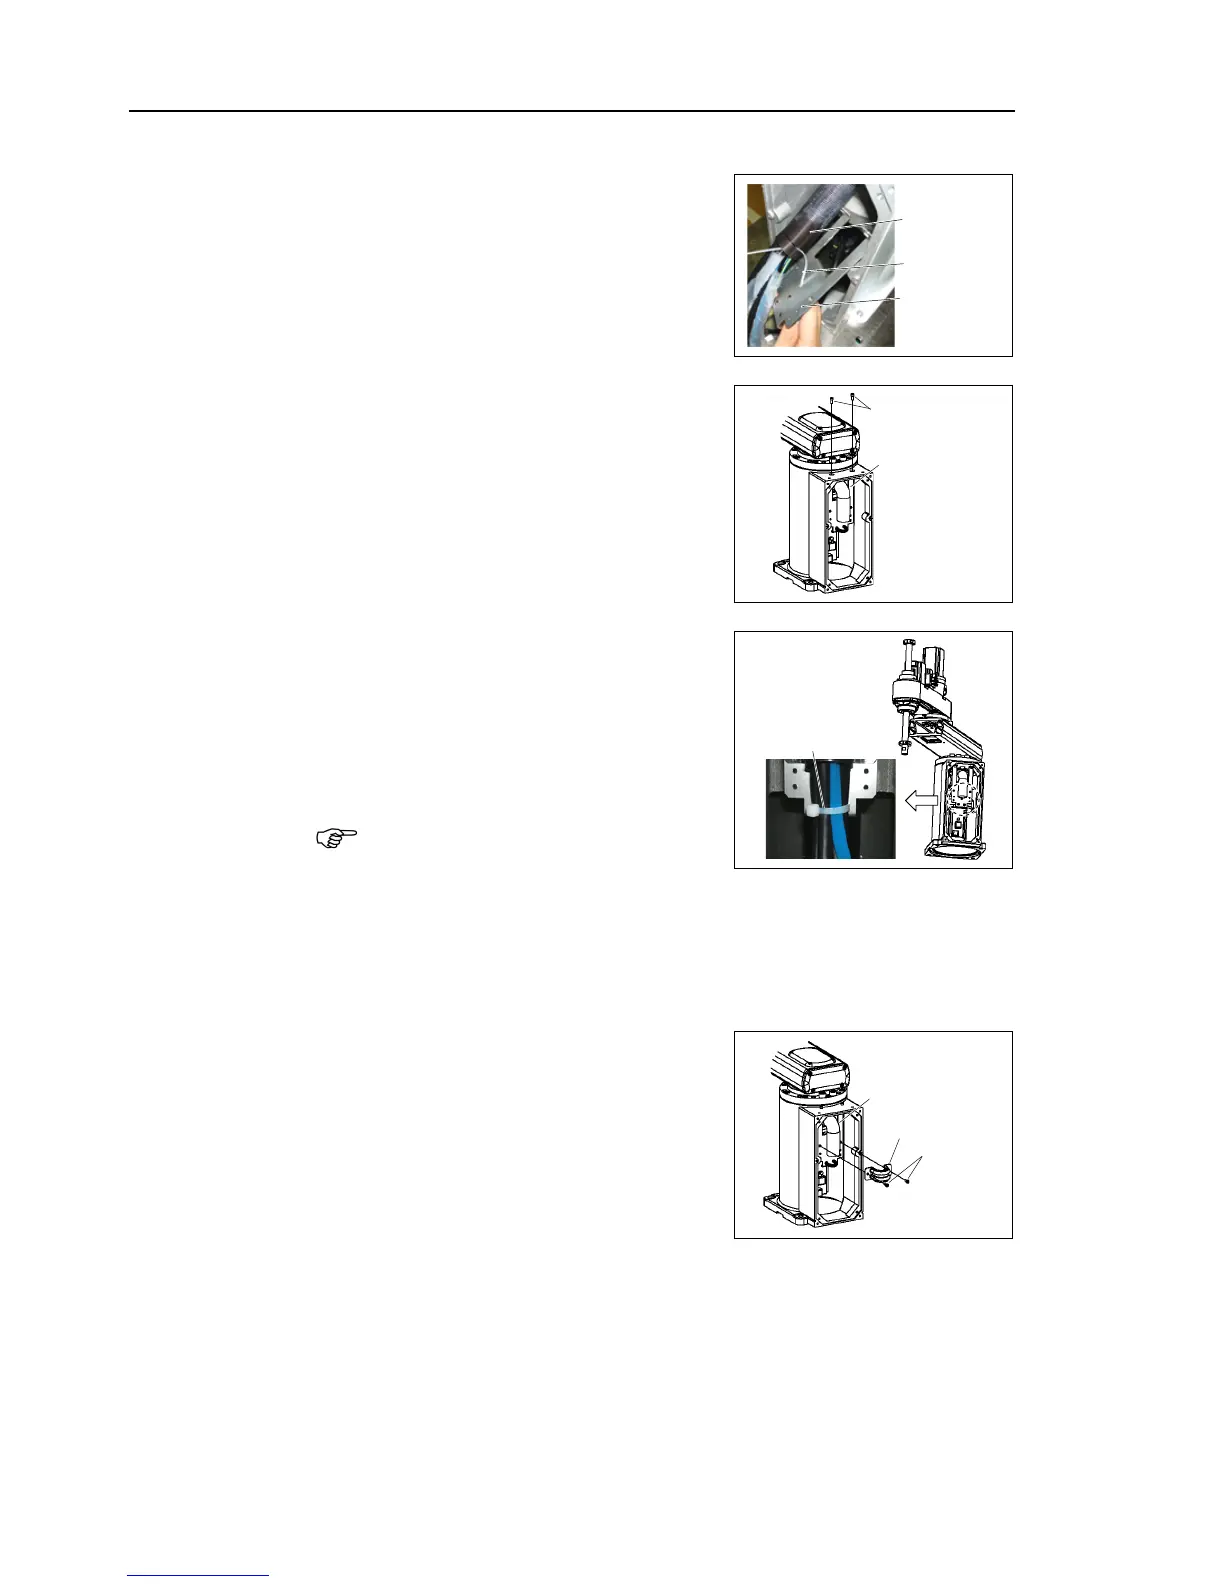
(6)-3 Move Arm #1 to the right or left until
the arm touches the mechanical stop to
make allowance.
Then, band the cables and air tubes
with a wire tie.
If you band the cables and tubes
without allowance, the cables are
pulled and may be disconnected during
the robot operation. Make sure to
make allowance.
Wire tie
(6)-4 Remove the plastic bags on the base
side applied in step (2).
(6)-5 Mount the saddle part to the spring
plate.
2-M4×10
Saddle part
Spring plate
NOTE

Table of Contents

Questions and Answers:

Question and Answer IconNeed help?

Do you have a question about the Epson SCARA ROBOT and is the answer not in the manual?

Epson SCARA ROBOT Specifications

General IconGeneral
TypeSCARA Robot
ApplicationsAssembly, Pick and Place, Dispensing, Packaging
MountingFloor, Wall, Ceiling
Communication InterfaceEthernet, RS-232, USB
Repeatability±0.01 mm to ±0.02 mm

Related product manuals