EPSON Stylus CX4100/CX4200/CX4700/CX4800/DX4200/DX4800/DX4850 Revision A
TROUBLESHOOTING Troubleshooting 117
• White streak/
color unevenness
occurrence
Vertical banding appears against the CR
movement direction. And, it looks like
uneven printing.
[Note]
If the problem is not solved, replace the
CR Motor with a new one.
Adjustment
1. For printing in the Bi-D mode, check if Bi-D Adjustment
has been performed properly.
1. Perform Bi-D Adjustment to eliminate
displacements between the upper and lower
rules. (Refer to Chapter 5 “ADJUSTMENT”.)
Print Head
1. Check if each segment is printed correctly in the Nozzle
Check Pattern.
1. Perform Head Cleaning and check the Nozzle
Check Pattern. (Refer to Chapter 5
“ADJUSTMENT”.)
If the problem is not solved, replace the Print
Head with a new one.
Carriage Unit /
Carriage Guide
Shaft
1. Check if there is not any foreign material on the surface
of the Carriage Guide Shaft.
1. Remove foreign objects from surface of the
Carriage Guide Shaft.
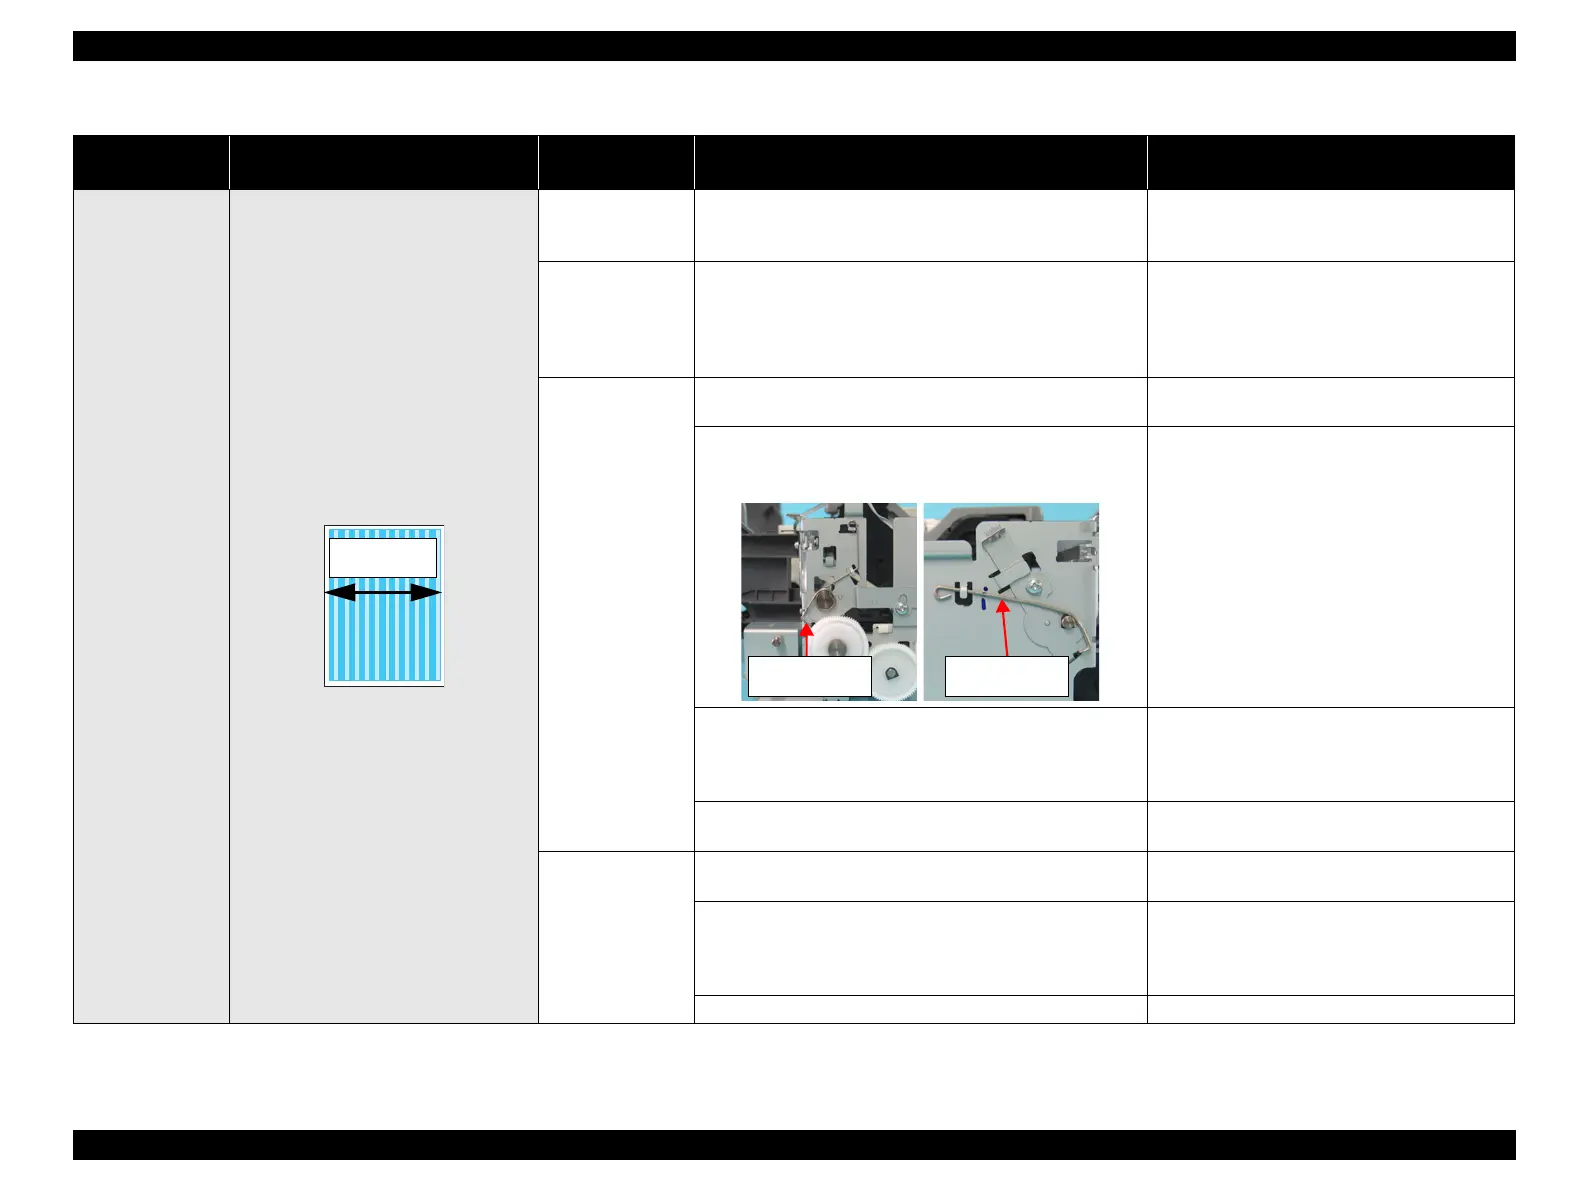
2. Check if the Carriage Guide Shaft is properly secured to
Main Frame by the CR Guide Shaft Torsion Spring and
the CR Guide Shaft Pressing Spring.
2. Reassemble the Carriage Guide Shaft
correctly.
3. Check if the grease is enough on the surface of the
Carriage Guide Shaft.
3. After wiping the grease on the Carriage
Guide Shaft and the Carriage with a dry, soft
cloth, coat it with grease (KEN Grease).
(Refer to Chapter 6 “MAINTENANCE”.)
4. Check if any damage is not observed on the surface of the
Carriage Guide Shaft.
4. Replace the Carriage Guide Shaft with a new
one.
Front Frame
1. Check if there is not any foreign material on the surface
of the Front Frame.
1. Remove foreign matter from the Front Frame.
2. Check if the Front Frame is lubricated with enough
grease.
2. After wiping the grease on the Front Frame
with a dry, soft cloth, coat it with grease
(KEN Grease). (Refer to Chapter 6
“MAINTENANCE”.)
3. Check if the Front Frame has not been deformed. 3. Replace the Front Frame with a new one.
Table 3-22. Check point for the poor printing quality
Print Quality
State
Detailed phenomenon
Defective
unit/part name
Check point Remedy
CR movement
direction
CR Guide Shaft
Torsion Spring
CR Guide Shaft
Pressing Spring
 Loading...


