EPSON Stylus CX4100/CX4200/CX4700/CX4800/DX4200/DX4800/DX4850 Revision A
DISASSEMBLY/ASSEMBLY Printer Section 134
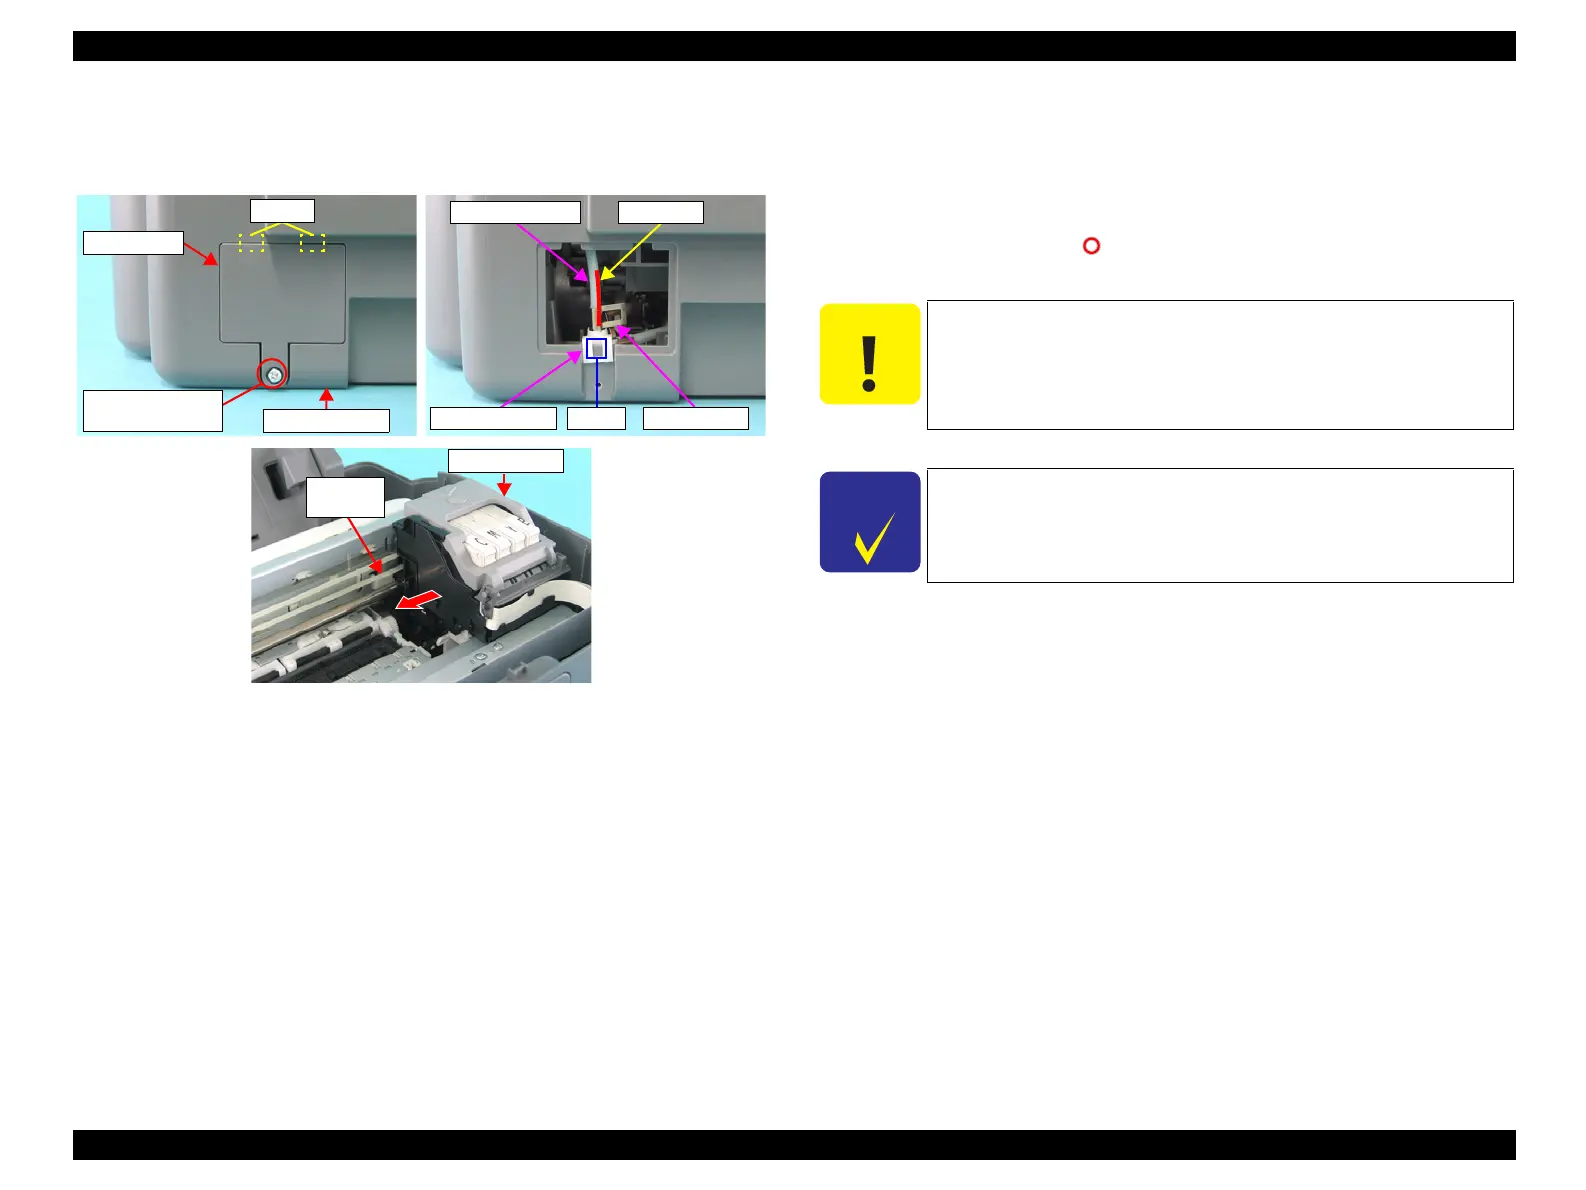
4.4.8 Printer Mechanism
External view (1)
Figure 4-11. Removing Printer Mechanism (1)
Part/Unit that should be removed before removing Printer Mechanism
Document Cover / Paper Support Assy. / Scanner Unit / Panel Unit /
Housing Upper
Removal procedure
1. Remove the screw (x1, ) that secures the Rear Cover, and remove the Rear
Cover.
2. Remove the Eject Ink Joint from the Housing, Lower, grasp the handle of the
Tube Clamp and slide it upwards, and carefully remove the Waste Ink Tube
(of the Ink System Unit side).
3. Release the Carriage Lock with a flathead screwdriver, and move the Carriage
Unit to the center of the printer.
Rear Cover
C.B.P. 3x10 F/Zn
(4±1kgfcm)
Housing, Lower
Tabs
Carriage Unit
Carriage
Lock
Waste Ink Tube
Tube ClumpEject Ink Joint
Red Line
Tab
C A U T I O N
The Waste Ink Tube may be broken when it is removed.
If it breaks, replace the Ink System Unit.
Ink may leak from the Waste Ink Tube. Prepare cleaning rags
beforehand, and be careful not spread ink onto surrounding
area.
C H E C K
P O I N T
When removing the Waste Ink Tube, insert a plastic tweezers or a
similar tool between the rib of the Eject Ink Joint and the Waste
Ink Tube, and pick up the Waste Ink Tube.
 Loading...


