EPSON Stylus CX4100/CX4200/CX4700/CX4800/DX4200/DX4800/DX4850 Revision A
DISASSEMBLY/ASSEMBLY Printer Section 140
External view (2)
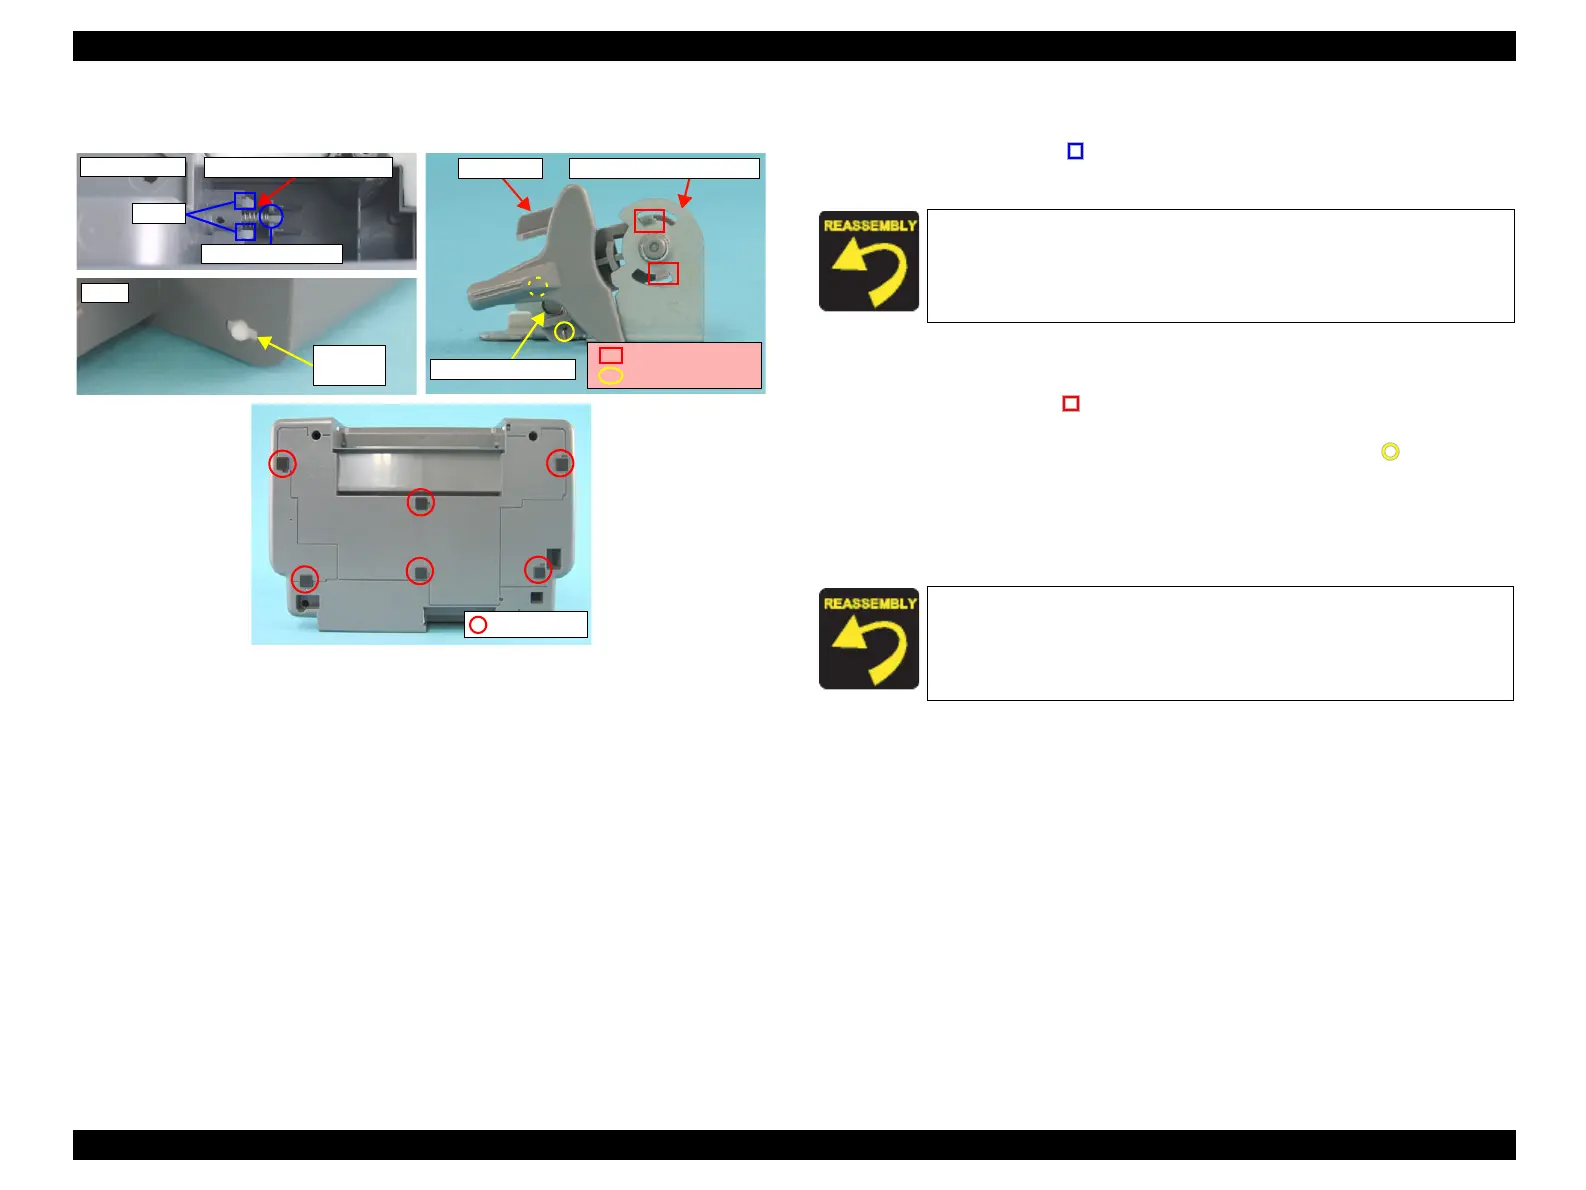
Figure 4-18. Removing Stacker Lock/PG Lever/Rubber Feet
Stacker Lock Removal
1. Remove the tabs (x2, ) that secure the Stacker Lock, and remove the
Stacker Lock and Compression Spring 5.1 from the Housing, Lower.
PG Lever Removal
1. Release the tabs (x2, ) that secure the PG Lever to the PG Lever Mounting
Plate.
2. Remove Torsion Spring 26.1 from the installation holes (x2, ) of the PG
Lever and the PG Lever Mounting Plate, and remove the PG Lever.
Rubber Feet Removal
1. Remove the rubber feet (x6) from the Housing, Lower.
Tabs
Compression Spring 5.1
Shaft and Groove
Inner Surface
Stacker
Lock
Right
PG Lever
Torsion Spring 26.1
Tabs
Installation Holes
PG Lever Mounting Plate
Rubber Feet
Pass the shaft of the Stacker Lock through the groove of the
Housing Lower.
The number of the rubber feet of the model with no card slot
(Stylus CX4100/CX4200/DX4200) differs from the ones of the card
slot model (Stylus CX4700/CX4800/DX4850).
 Loading...


