3-2 Setup Rev. A
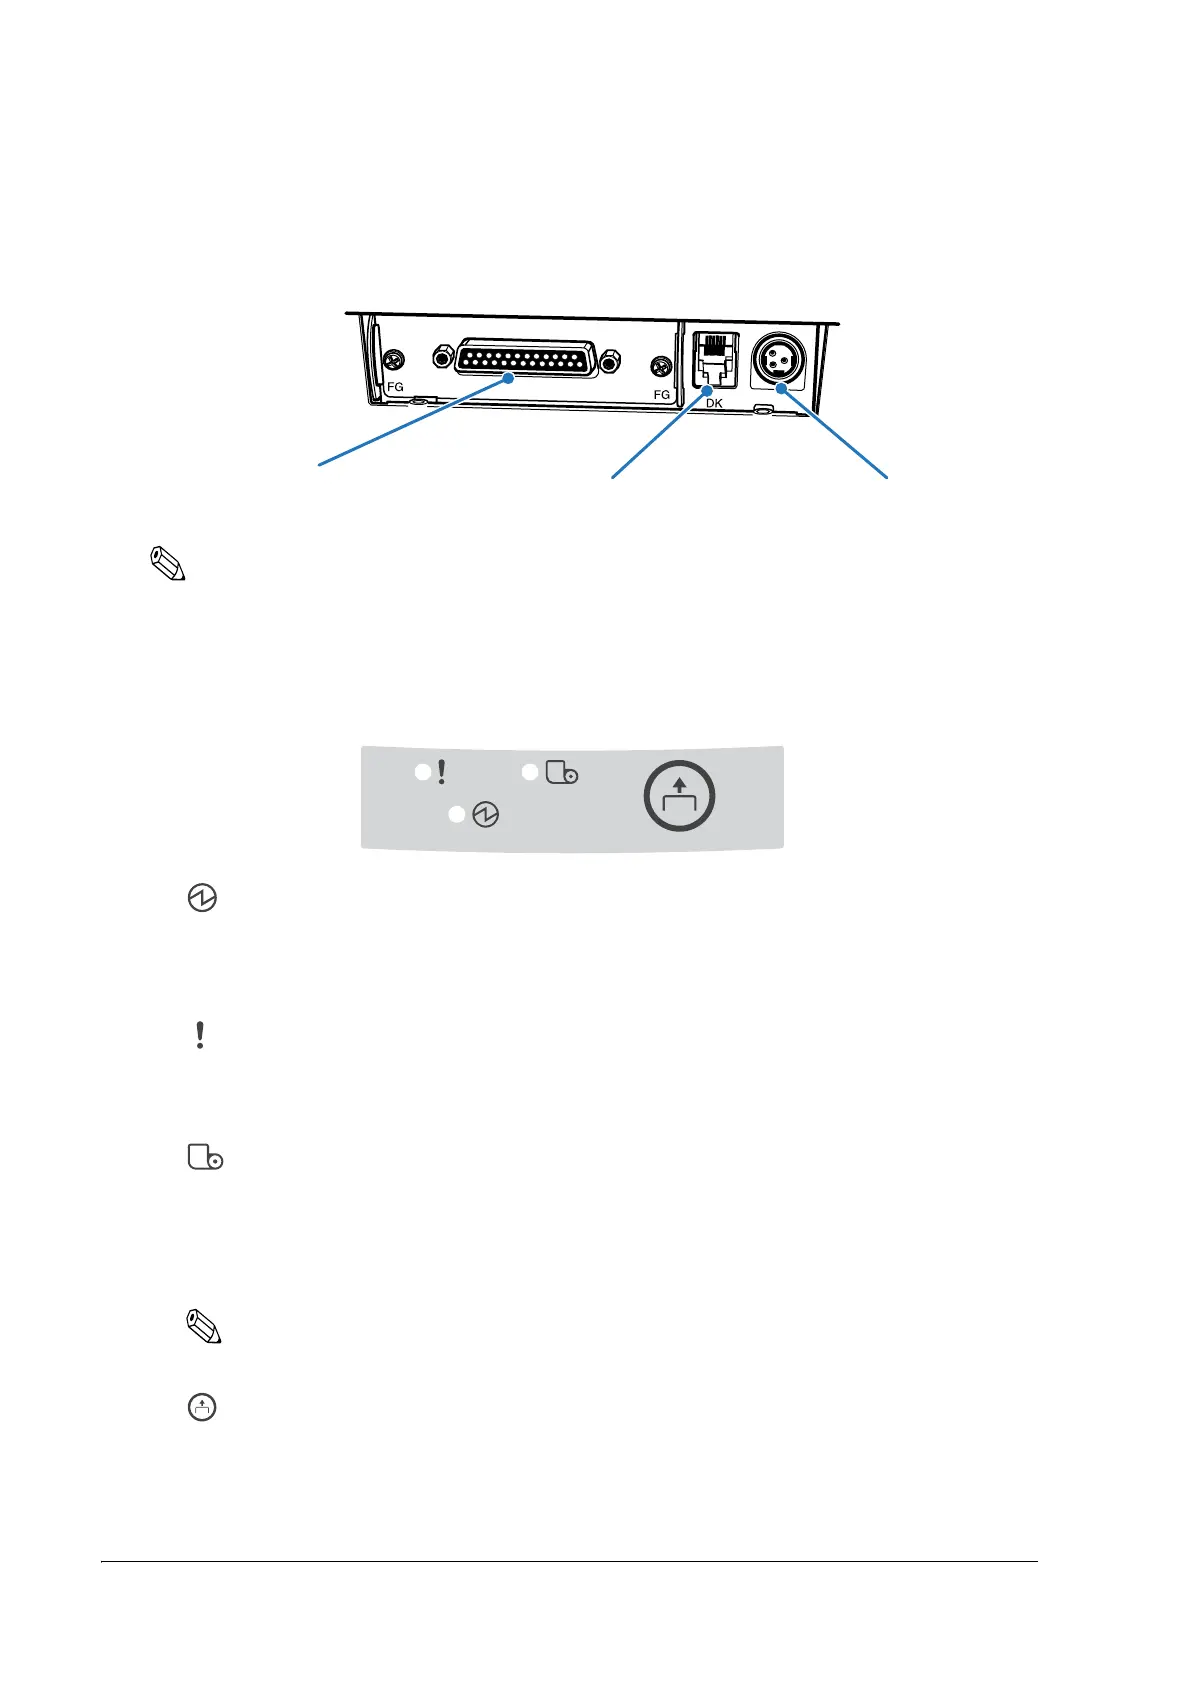
You can connect up to four cables to the printer. They all connect to the connector panel (on the
bottom rear of the printer), which is shown below.
Note:
This illustration shows the serial interface model. The other interface connector looks slightly different.
3.1.2 The Control Panel
The control panel is shown below.
❏
(Power) LED: Indicates whether power is on or off.
❏ (Error) LED: Indicates the error status.
Check to see whether a cover is open if this LED is lit up but not
blinking (offline status). See “LED Blinking Pattern” (page 4-1) if the
LED is blinking (error status).
❏
(Paper out) LED: Indicates the amount of paper remaining.
Note:
See “Adjusting Position of Roll Paper Near End Detector” (page 3-29) for how to set the detector.
❏ (Feed) button: Paper is fed while this button is pressed.
On: Power is on. (Power ON)
Off: Power is off. (Power OFF)
On: The roll paper end or near end(*1) is detected.
Off: Paper is loaded (normal condition).
Flashing: Self-test waiting state for test print (Waiting for the FEED button to be pressed)
interface connector
drawer kick connector
power supply connector

 Loading...


