E8_Aus_rev07 – 2021-02-02
6.2 INSTALLING THE UNIT
Installation is a fundamental operation for the subsequent use and correct functioning of the unit.
CAUTION: the unit MUST be installed by specialised technicians.
After installing the unit, always fill out the installation sheet.
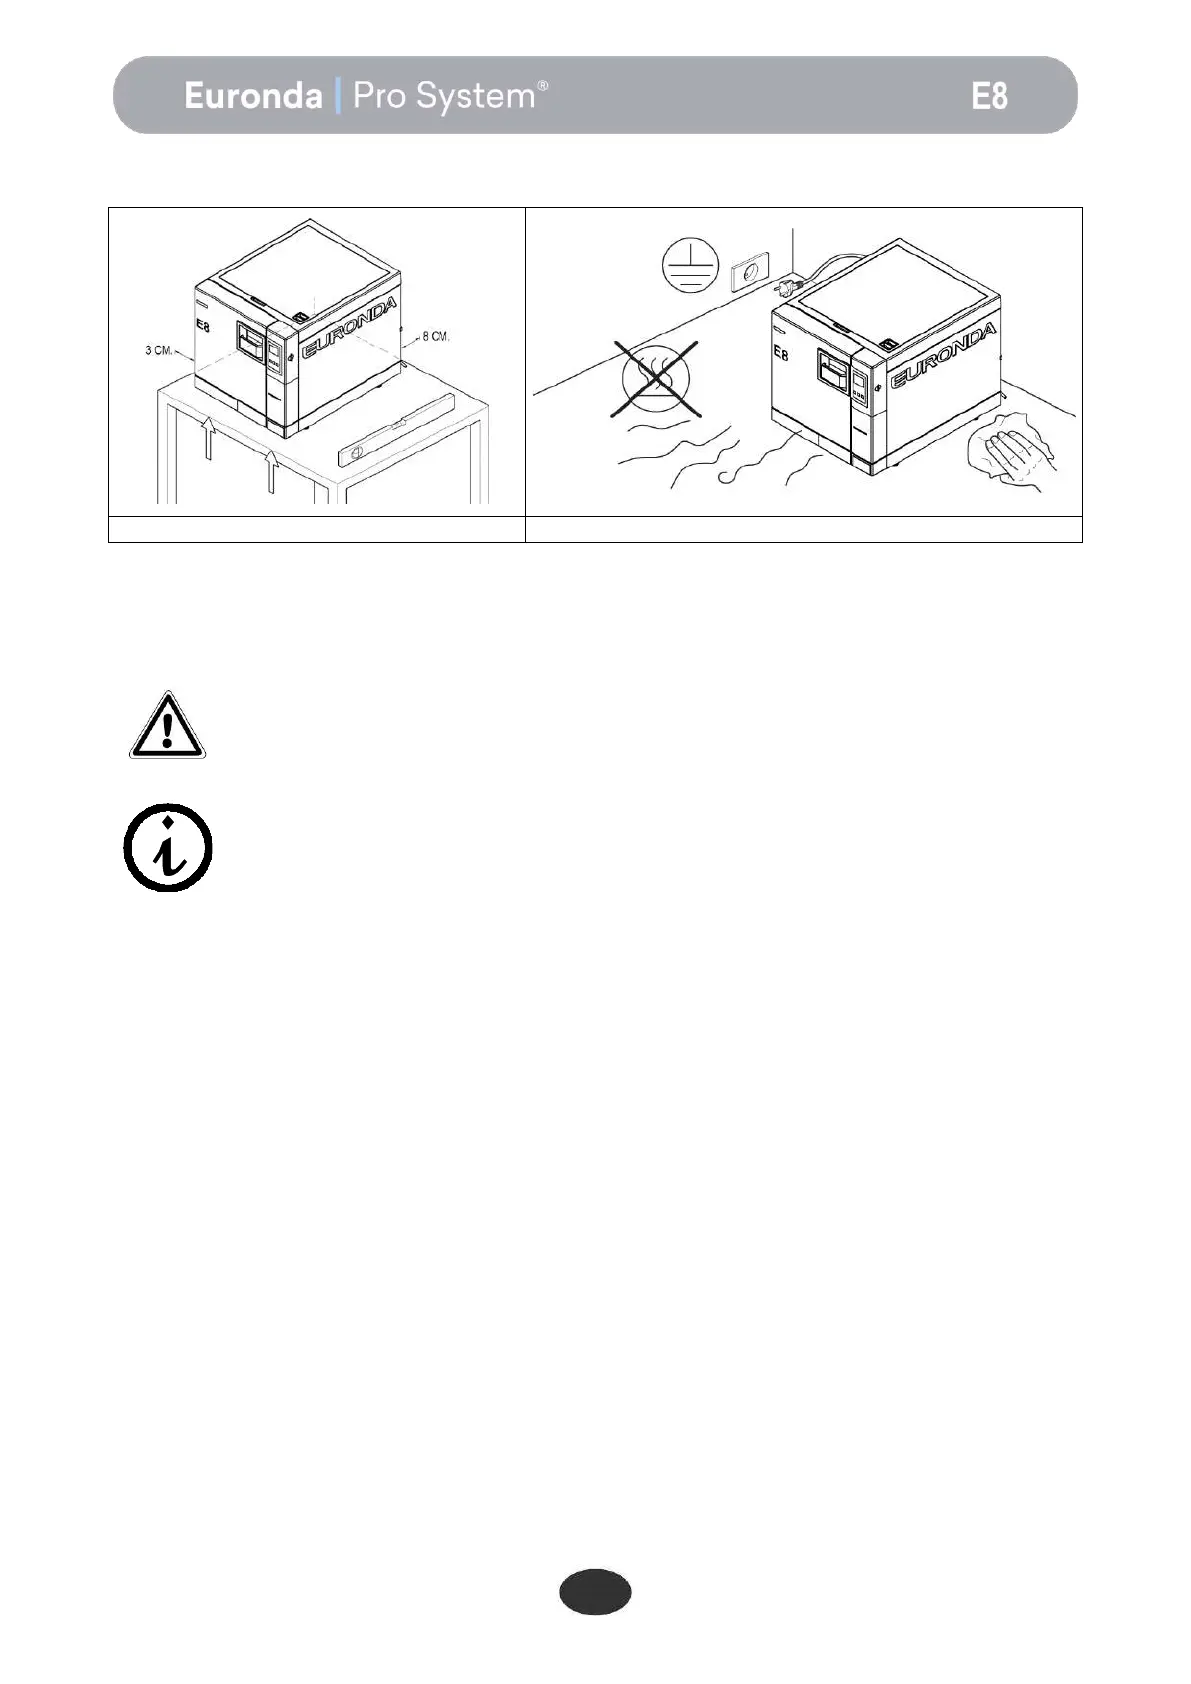
The unit must not be installed in the "patient zone" ref. EN 60601-1.
Machine installation and start-up should be performed with the door open in order to
measure ambient pressure.
This unit has been designed for use in a normal environment (see chap. 5.3 “Technical data”); it is
necessary, however, to follow the instructions given below.
- Before installation, make sure to remove the kit of accessories from inside the unit.
- Install the unit so that the power lead does not kink or become squashed, but has a free run to the socket.
- The unit must be placed so that the plug is accessible.
- Place the unit at a height that will allow the user to inspect the entire sterilization chamber and clean it
with ease.
- Connect the overflow connector (1 of Fig. 5.1.2-1) to allow the autoclave to drain any excess water
formed due to faults.
- Do not place trays, newspapers, containers of liquids, etc. on the unit.
- Do not lean on the door when it is open.
- When emptying the discharge tank directly into the waste pipes, position the unit at a height above the
drains.
Once installed and connected to an electrical power point, the unit is ready to use.