The Harmonizer
®
Programmer’s Manual
© 1999-2008 Eventide, Inc. Page 53 of 97 Release 1.3
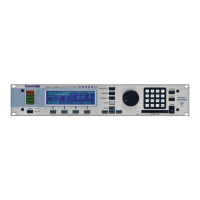
Double click on the hmonitor monitor and change
the specifiers as shown to the right.
• Audio and mod signals range from -1 to +1. In
this case, the LFO’s output is only varying from
zero to +1 and so we set the minimum and maximum on
the monitor accordingly.
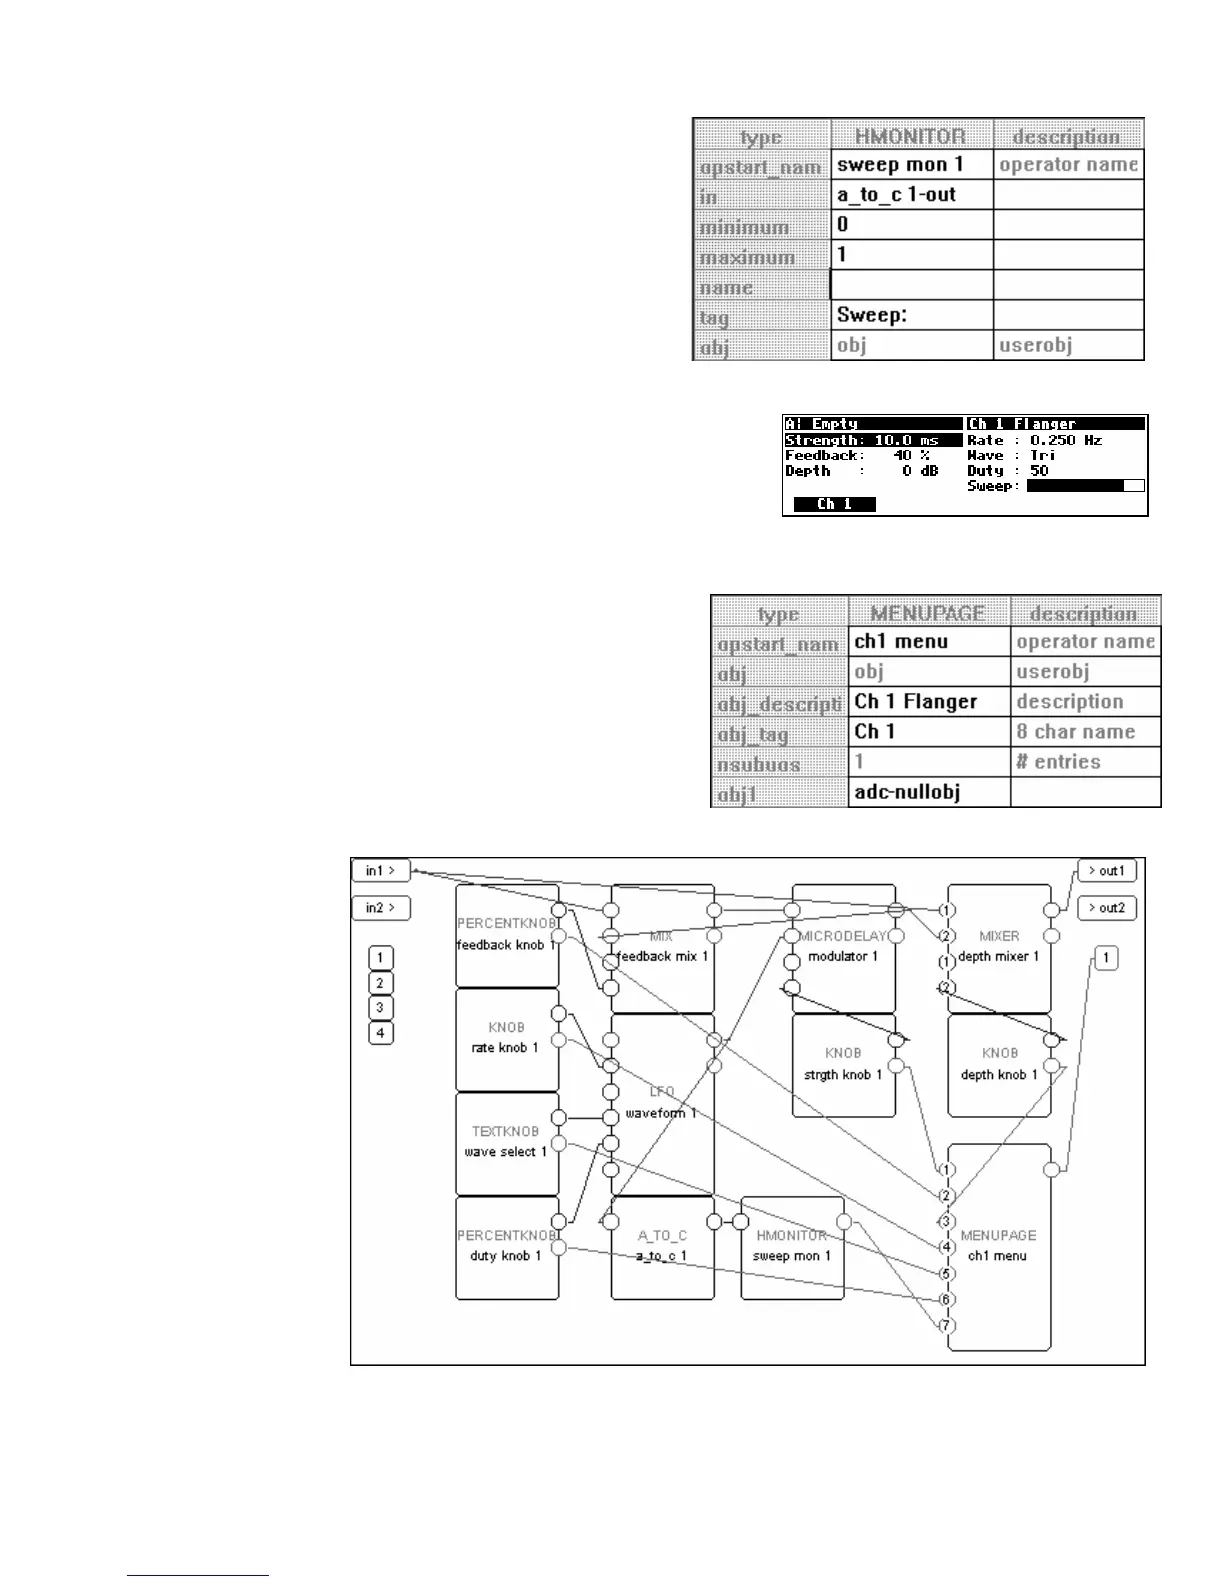
Constructing the Menu Page
OK, the hard stuff is over. All of the elements are there, we just
need to place them on a menu page. To the right is a sneak
peak at what we will end up with. Notice that the parameters on
the right side of the menu page pertain to the modulation rate
and shape, while the parameters on the left side of the menu
page pertain to everything else. This is a good, functional arrangement.
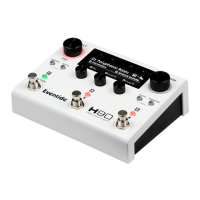
Add a menupage module from the “Interface” group
and connect its userobject output to the head module.
Then double click on the menupage module and
change the specifiers as shown to the right.
• The description “Ch 1 Flanger” will be displayed in the
upper right corner of the Harmonizer’s display.
• The 8 char name will be used on the menu page’s SOFT
KEY
.
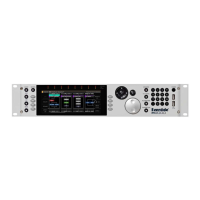
Now we’re ready
to connect the
userobject outputs
from the various
“parameter
adjusters” to the
menupage
module. The order
that we connect
them is the order
they will appear on
the menu page.
We’ll connect
them in the order
shown to the right:
1. strgth knob 1
2. feedback knob 1
3. depth knob 1
4. rate knob 1
5. wave select 1
6. duty knob 1
7. sweep mon 1