The Harmonizer
®
Programmer’s Manual
© 1999-2008 Eventide, Inc. Page 71 of 97 Release 1.3
The right-most SOFT KEY provides display mode control.
When this key is pressed, the display mode will change to the
next mode in this order: aud only, aud+ctrl, ctrlonly, misc,
aud only, aud+ctrl, etc. The right-most SOFT KEY’s label will
change to indicate the current mode. Upon entering the Patch
Editor area, the right-most
SOFT KEY is in the aud only mode, and only the audio path is visible.
Control signals (and modules that contain only control inputs or outputs) are hidden. Note: most
modules that have audio inputs or outputs also have control inputs or outputs.
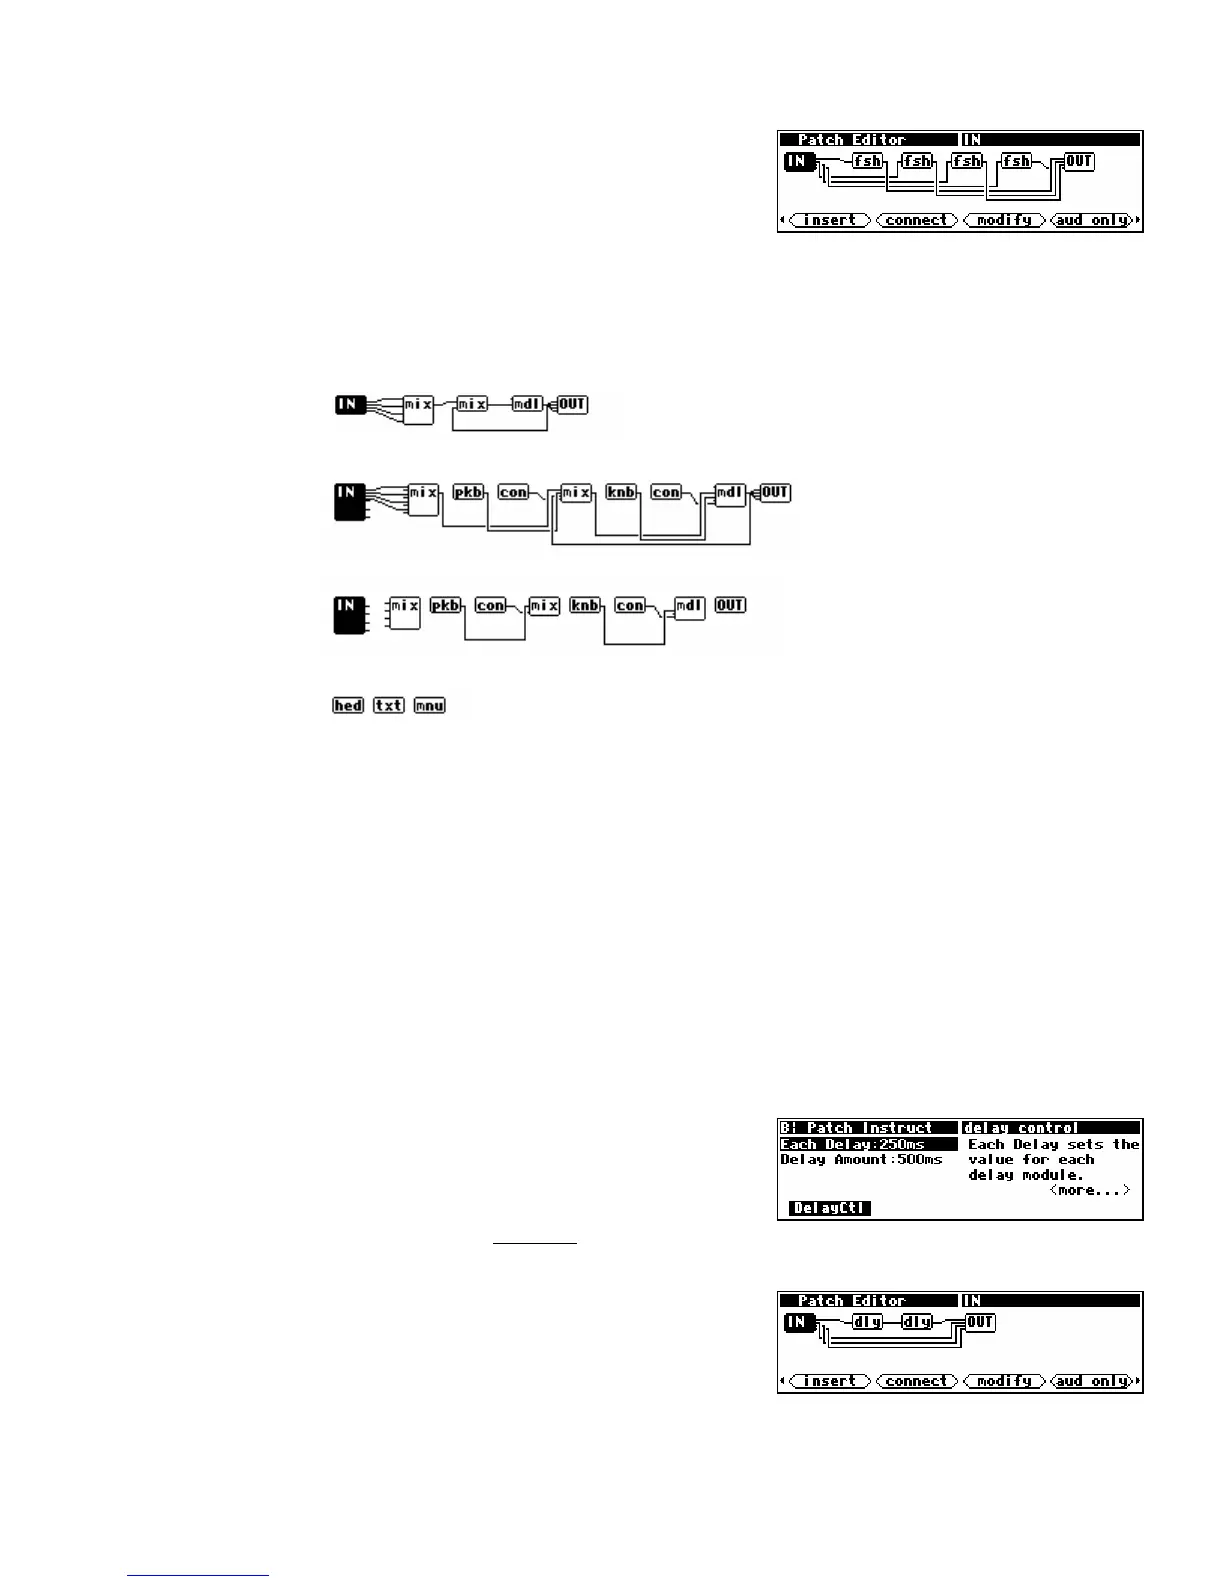
The following images are composite pictures of a simple program in all 4 display modes.
<aud only>
<aud+ctrl>
<ctrlonly>
<misc>
By comparing these different pictures, we can determine which of the wires in the aud+ctrl picture
carry audio signals and which carry control signals. The misc display mode will be discussed later.
Connect Modules
<connect>
Pressing the <connect> SOFT KEY starts a process that will connect a module output to a suitable input.
The Patch Editor will prompt for a starting input or output and then will prompt for a complementary
destination. The Patch Editor automatically limits the available destinations to legal selections. For
example, if a connection is started from a control input, only control outputs will be offered. Similarly,
if a connection is started from a mod output, only audio/mod inputs will be offered. To cancel a
connect, press the PATCH key.
To illustrate, load the program
Patch Instruct from the
“Programming” bank. This program consists of a pair of
delay modules, connected in series between DSP input 1 and
DSP output 1. The remaining DSP inputs and outputs are
“hardwired” one to the other. Press and hold
the PARAMETER
key to see what this “patch” looks like.
As you can see, there are two delay modules.