Operation
–Pushthetopofthebuttontoraisethedeck.
–Pushthebottomofthebuttontolowerthe
deck.
•96inchDecks:
–Pushthetopofbuttontoraisethecenterdeck
andfolduptheouterwings.
–Pushthebottomofbuttontolowerthecenter
deckandouterwings.
Pre-Start
Fillfueltankonlevelground.SeeFuel
RecommendationsintheSpecicationssectionfor
additionaldieselinformation.
DoNotoverllfueltank.Fillthefueltanktothe
bottomofthellerneck.Theemptyspaceinthetank
allowsfueltoexpand.Overllingmayresultinfuel
leakageordamagetotheengineoremissionsystem.
Makesureyouunderstandthecontrols,their
locations,theirfunctions,andtheirsafety
requirements.
RefertotheMaintenancesectionandperformallthe
necessaryinspectionandmaintenancesteps.
OperatingInstructions
RaisetheRolloverProtectionSystem
(ROPS)
Important:Therollbarisanintegraland
effectivesafetydevice.Keeptherollbarinthe
raisedandlockedpositionwhenoperatingthe
mower.Lowertherollbartemporarilyonlywhen
absolutelynecessary.
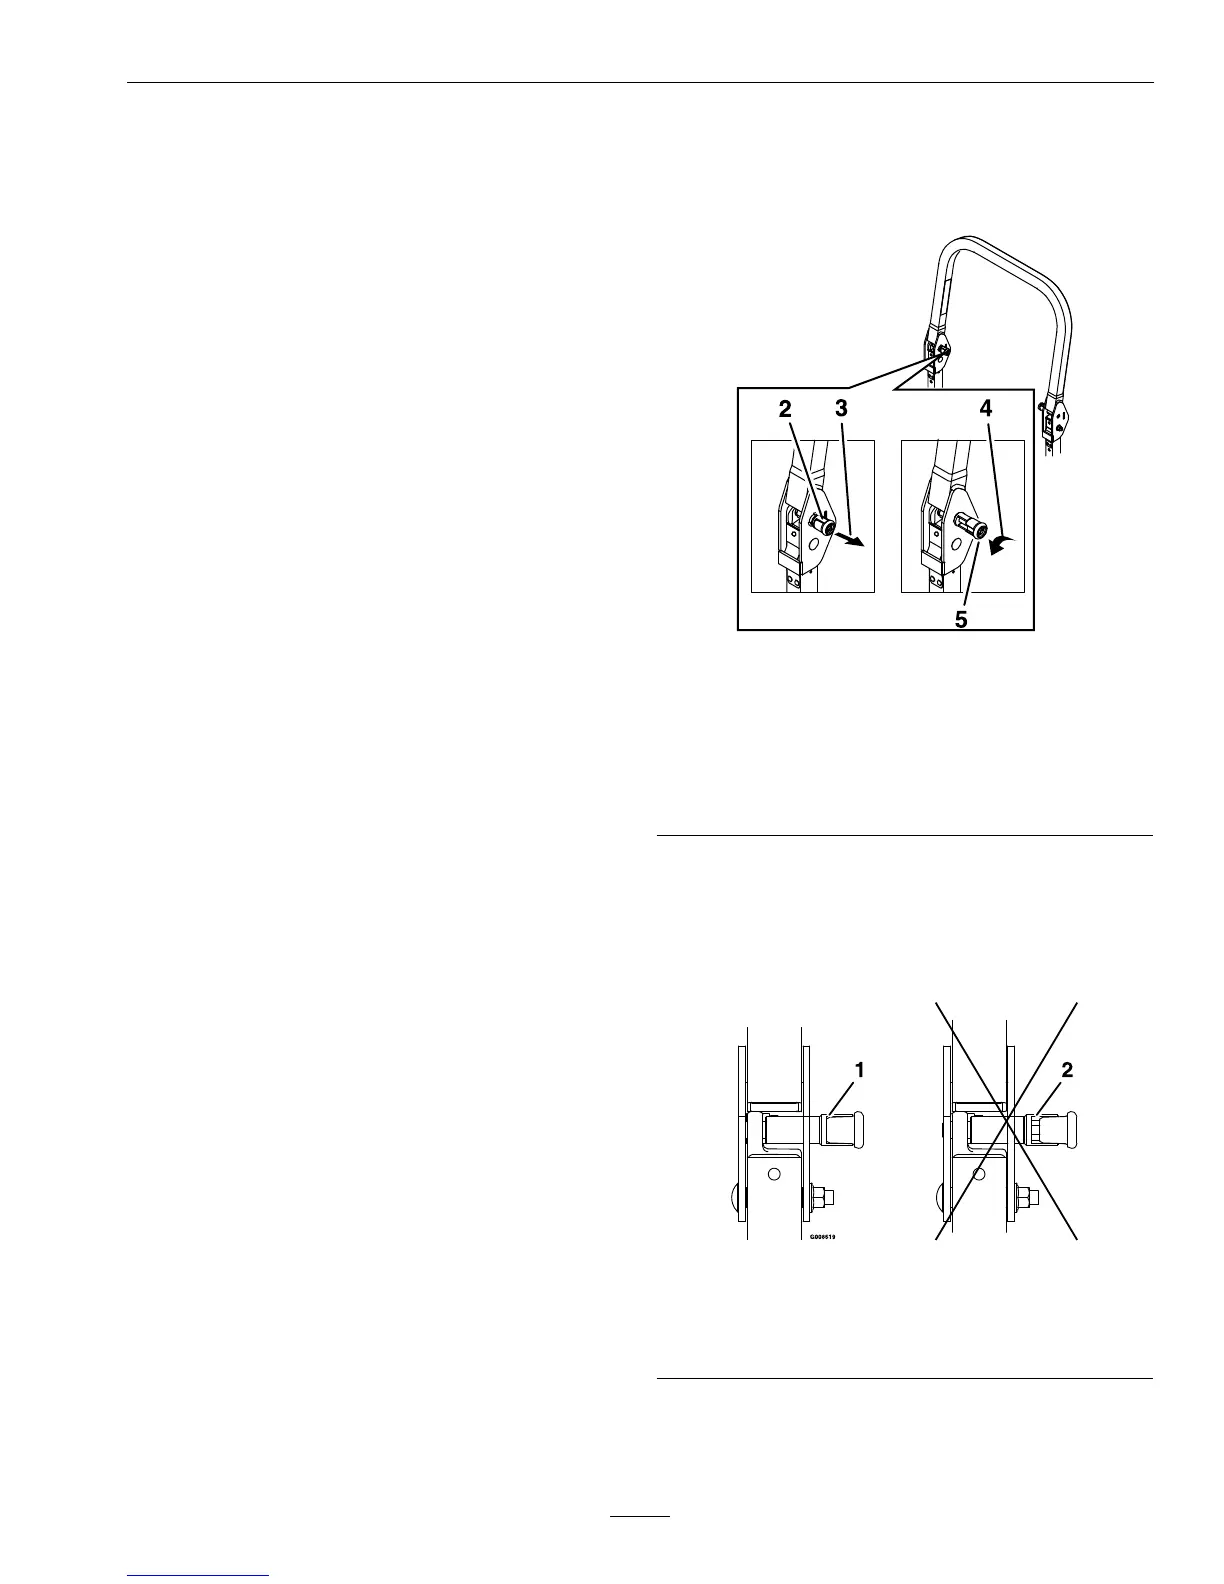
1.Theknobmustbecompletelylatchedwiththe
tabsinterlockingasshowninFigure10tolock
therollbarintheraised,operateposition.
2.Applyforwardpressuretotheupperhoopofthe
rollbar.
3.Pulltheknobandrotate90°toholdinthe
unlatchedpositiontolowertherollbar.
4.Toreturntotheoperateposition,raisetheroll
bar,andthenrotateknobs90°sothatthetabs
interlockpartially.Applyforwardpressuretothe
rollbarupperhoopandobservethattheknobs
returntothecompletelylatchedposition.
Important:Alwaysusetheseatbeltwith
therollbarintheoperate(raised)position.
Ensurethattherearpartoftheseatissecured
withtheseatlatch.
g225804
Figure10
1.Rollbarupperhoop
2.Knobin“latched”position
3.Pullknobtounlatch
4.Rotate90°toholdunlatched
5.Knobin“unlatched”position
5.Makesuretheknobsarefullyengagedwiththe
rollbarintheraisedposition.Theupperhoopof
therollbarmayneedtobepushedforwardor
pulledrearwardtogetbothknobsfullyengaged
(seeFigure11).
g008619
Figure11
1.Engaged2.Partiallyengaged—Do
NotoperatewithROPS
inthiscondition.
Important:Alwaysusetheseatbeltwith
therollbarintheoperate(raised)position.
29

 Loading...