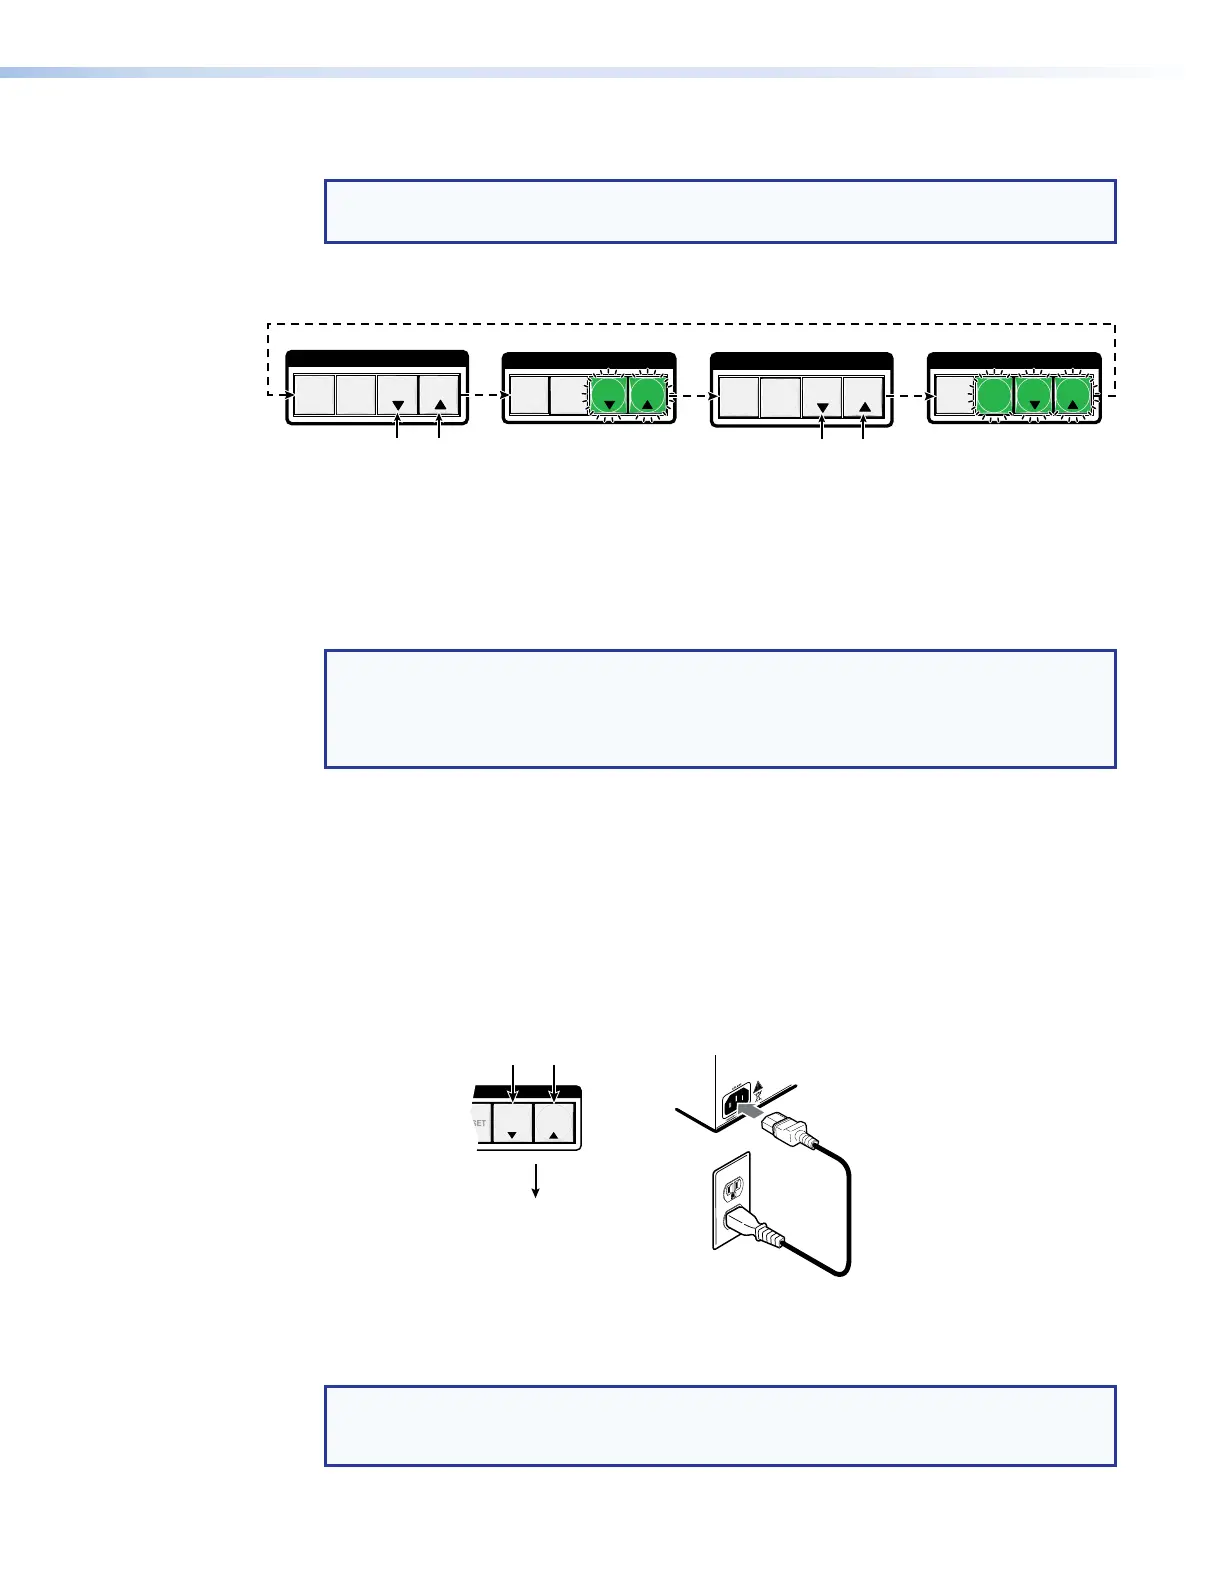
Selecting Lock mode 2 or toggling between mode 2 and mode 1
NOTE: If the switcher is in Lock mode 0 or mode 1, this procedure selects mode 2.
If the switcher is in Lock mode 2, this procedure selects mode 1.
Toggle the lock on and off by pressing and holding the Vies button and the Esc button
simultaneously for approximately 2 seconds (see figure 48).
C O N T R O L
ESCVIEW
PRESET
ENTER
C O N T R O L
ESCVIEW
PRESET
ENTER
C O N T R O L
ESCVIEW
PRESET
ENTER
C O N T R O L
ESCVIEW
PRESET
ENTER
Press and hold for
2 seconds.
Lock mode 1
Lock mode 2
Press and hold for
Figure 48. Toggle Front Panel Lock Between Mode 2 and Mode 1
Performing a System Reset from the Front Panel
The front panel reset is identical to issuing the
E
ZXXX
}
SIS command defined on
page 111. A system reset performs the following functions:
NOTES:
• System reset does not reset the Internet protocol (IP) settings or replace
user-installed firmware.
• This function resets not only the switcher, but any connected endpoints.
• Clears all ties and presets
• Clears all mutes
• Disables all RS-232 output inserts
• Resets all input audio levels to unity gain (0 dB)
• Sets all output volume levels to 100% (0 dB of attenuation)
Reset the switcher to the factory default settings by pressing and holding the View button
and Esc button simultaneously while you apply AC power to the switcher (see figure 49).
CONTROL
VIEW
ESC
Press and hold the buttons
simultaneously while you
apply power to the switcher.
Release the buttons.
Power
The switcher flashes
the button indicators
and then turns them off.
Continue to hold the View and Esc
buttons until all input and output buttons
return to unlit and the Video and Audio
buttons light.
Figure 49. System Reset
NOTE: If background illumination was turned on before the reset, all buttons are unlit
after the reset. But, when you cycle power, background illumination returns to the
condition that you previously selected.
XTP II CrossPoint 1600, 3200, and 6400 Switchers • Operation 63