7 Modification
80 Festo – MPAL-VI-EN – 2017-07a – English
7.3.2 Dismounting
1. Loosen electrical and pneumatic connections.
2. Remove valve terminal from the mounting surface èChap. 8.
3. Place valve terminal on a flat working surface.
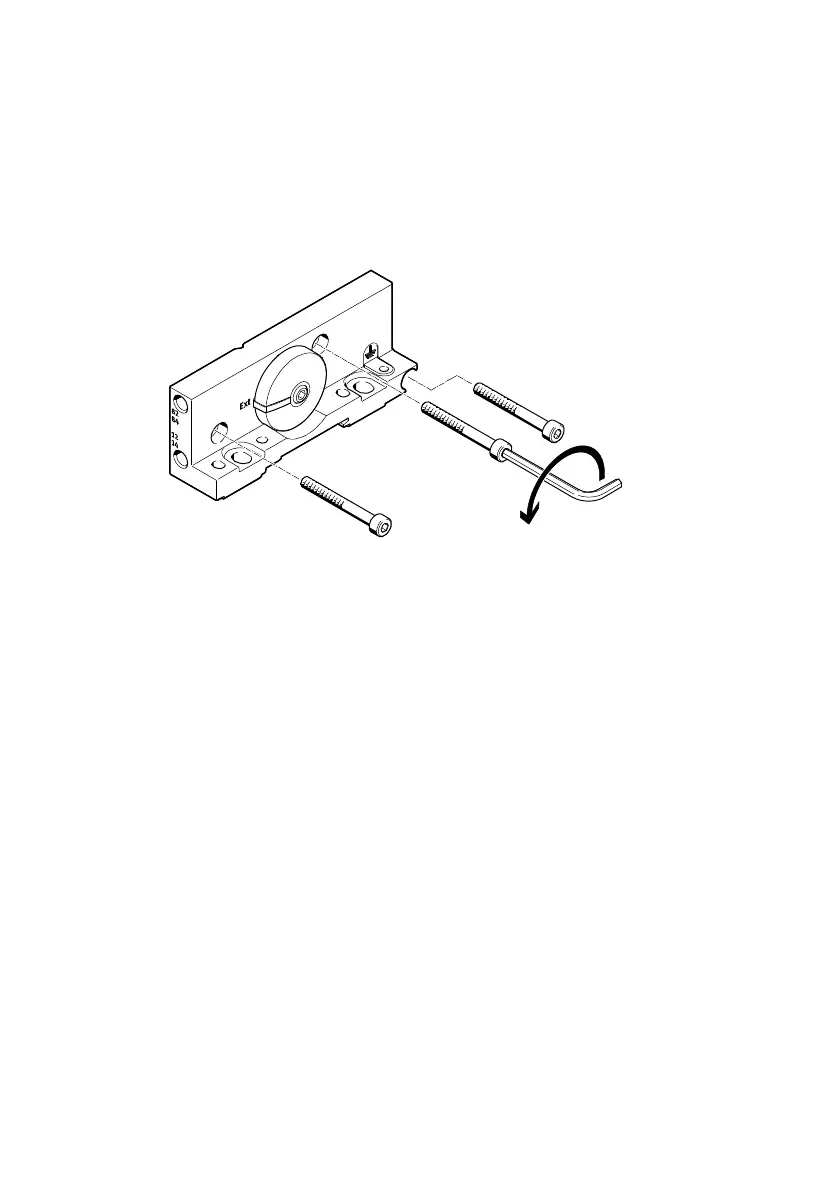
4. Loosen the 3 screws of the tie rod on the right end plate èFig. 7.2.
– Allen key, size 2.5
Fig. 7.2 Loosen the tie rod screws on the right end plate
5. Remove the 3 tie rod screws. The loose sub-bases are now only held together by the electrical inter
linking module.
6. Pull off the components to the right of the components to be replaced or extended.
7. Remove the component to be replaced.
8. Brace against the threaded rods in the end plate.
– Open-ended wrench, size 5
9. Loosen the threaded sleeves from the threaded rods on the tie rod.
– Allen key, size 4
7.3.3 Mounting
1. Check the cord seals at the joints in the sub-bases for damage.
2. Replace damaged cord seals.
3. Screw in the extension pieces of the tie rods between the threaded rods and threaded sleeves
è Fig. 7.1.
Where a valve terminal is to be extended with several components, arrange the extension compon
ents in a row and screw them in.
4. Check that all 3 tie rods are of the same length.
5. Tighten the 3 tie rods into the left end plate.
 Loading...