5.10.2 Programming Menu
1. To access the programming menu, set the function switch to any position to switch
the meter on, and then press and hold the IGM button for > 3 seconds. The menu
should now show a display, similar to the one in Fig. 5-11.
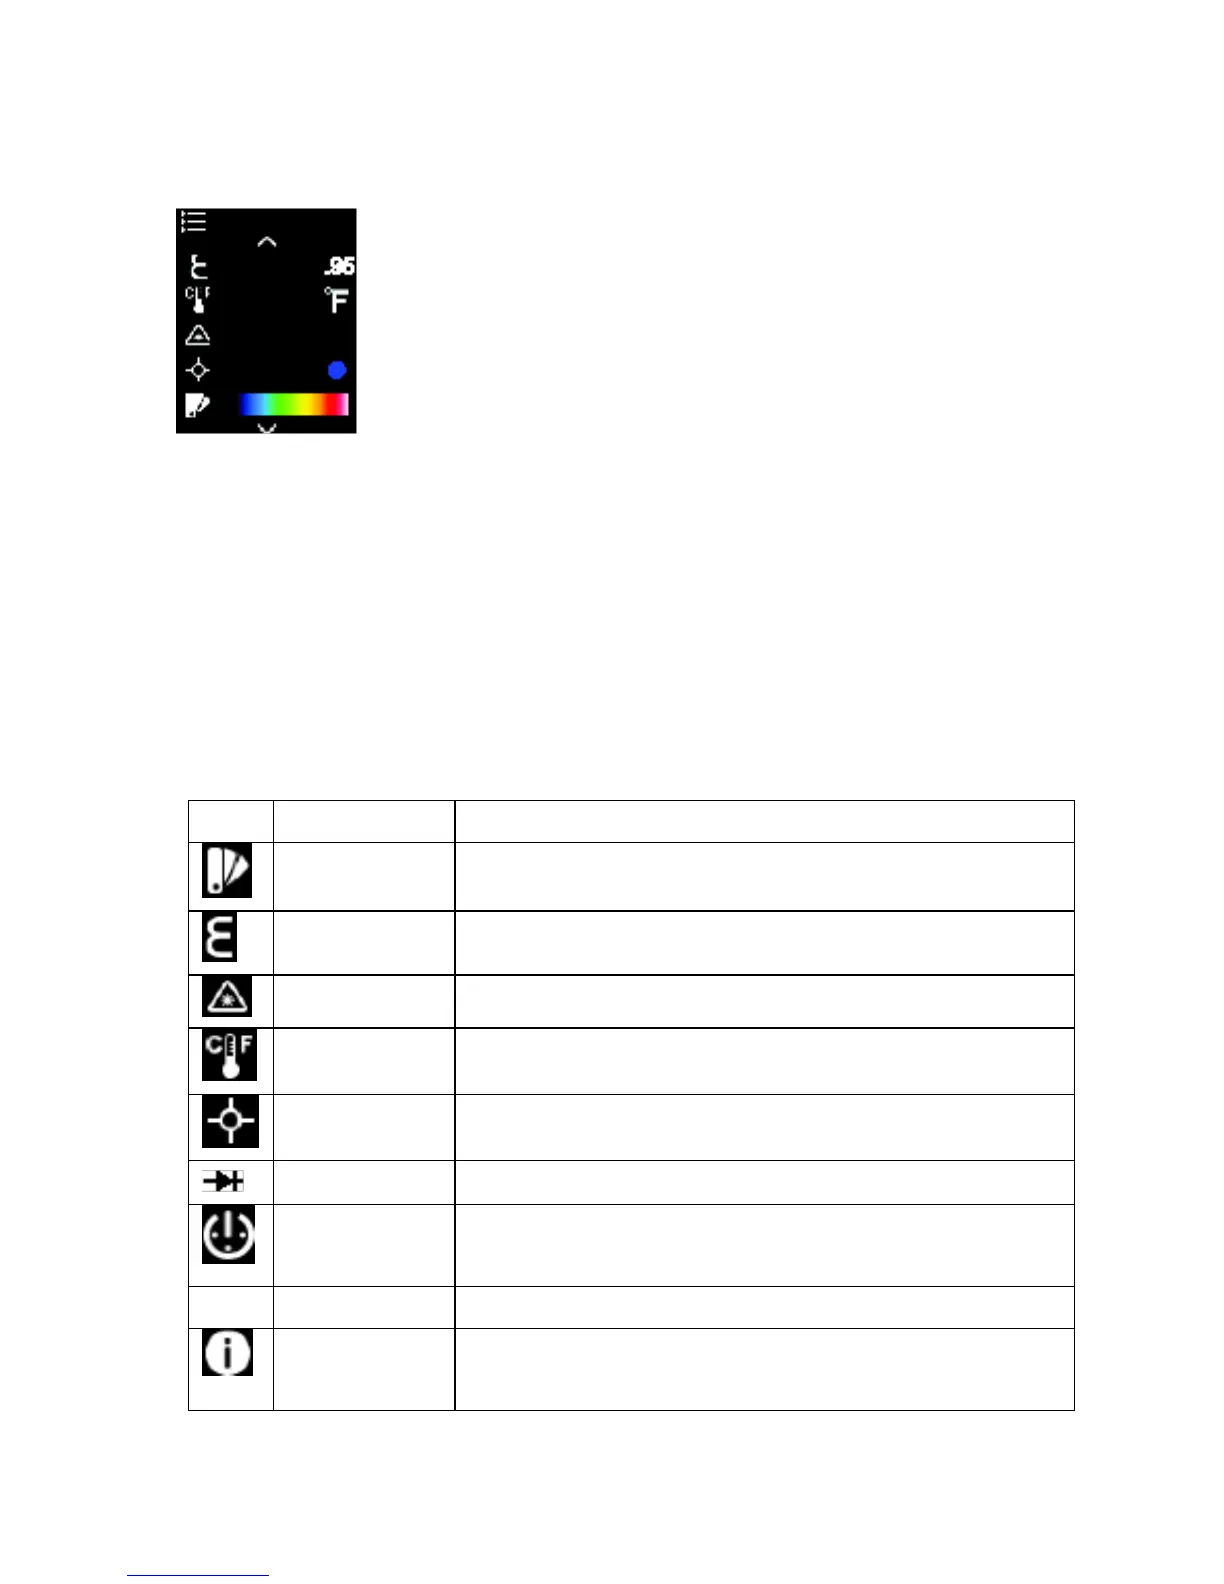
Figure 5.11 Programming menu example
2. The menu icons are located on the left side of the display and their settings are
shown on the right side. Use the up and down arrow buttons to scroll the parameter
list.
3. When a parameter is highlighted, press the OK button to either toggle the setting (if
it is a parameter with two options: Laser ON/OFF, Temperature units C/F, Cross hairs
ON/OFF, Diode mode SMART/CLASSIC) or to open the parameter for editing (for
parameters with 3 or more selection options: Color Palette, Emissivity, APO). For
details on each, refer to the following paragraphs.
4. Once programming is complete, press the IGM button momentarily to exit the
thermal imaging mode.
Figure 5.12 Programming menu ICON descriptions
Presets: 0.30, 0.60, 0.80, 0.95 (and custom)
OFF, 1, 2, 5, or 10 minutes