Integrated Network Analyzer
Using the Analyzer
11
Connecting the External Battery
Note
The external battery can be connected or removed with the analyzer
powered on.
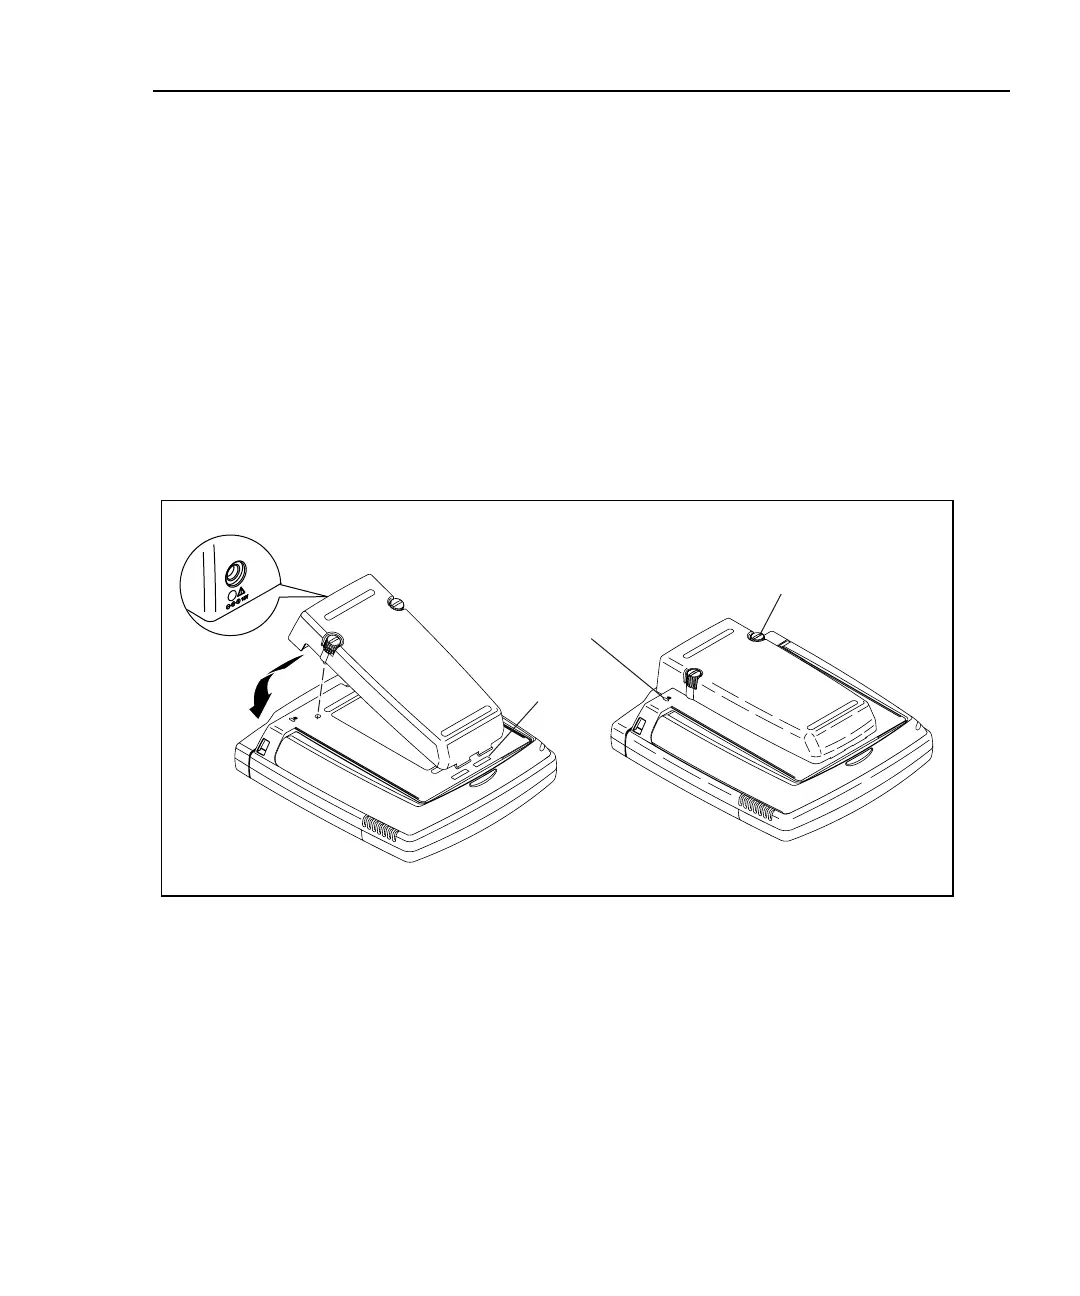
The external battery is connected to the back of the analyzer as shown in Figure 4.
First, slide the external battery tabs into the tab slots on the bottom of the back of
the analyzer. Next, press the battery firmly against the analyzer, and turn the
thumb screws clockwise until finger tight.
Note
Take care to align the battery tabs into the slots. Do not force the
external battery connection. If the thumb screws do not engage,
remove the external battery and try again.
Thumb screws
Tabs
Kensington
slot
Charger jack and status LED on battery
ahq07f.eps
Figure 4. Installing the external battery and Charger Jack Location
 Loading...