104
MR-8HD/CD Owner’s Manual (Track editing)
5) Rotate the [MENU/ENTER] knob to select
"Erase Track = *", and press the [MENU/ENTER]
knob.
The currently selected option flashes and you
can now select the desired option by rotating
the [MENU/ENTER] knob. The available options
are:
• 1 through 8 (mono track)
• 1/2, 3/4, 5/6 and 7/8 (stereo tracks)
<Note>:
If you want to cancel the erase op-
eration, move the cursor to "
[CANCEL]
" on
the screen, and press the [
MENU/ENTER
] knob.
6) Rotate the [MENU/ENTER] knob to select the
desired option, and press the [MENU/ENTER]
knob.
“Erase Track = *” is now highlighted on the
screen.
7) Rotate the [MENU/ENTER] knob to move the
cursor to "[ENTER]" on the screen, and press the
[MENU/ENTER] knob.
The display shows "Please Wait", immediately
followed by "Completed" when the MR-8HD/
CD completes erasing.
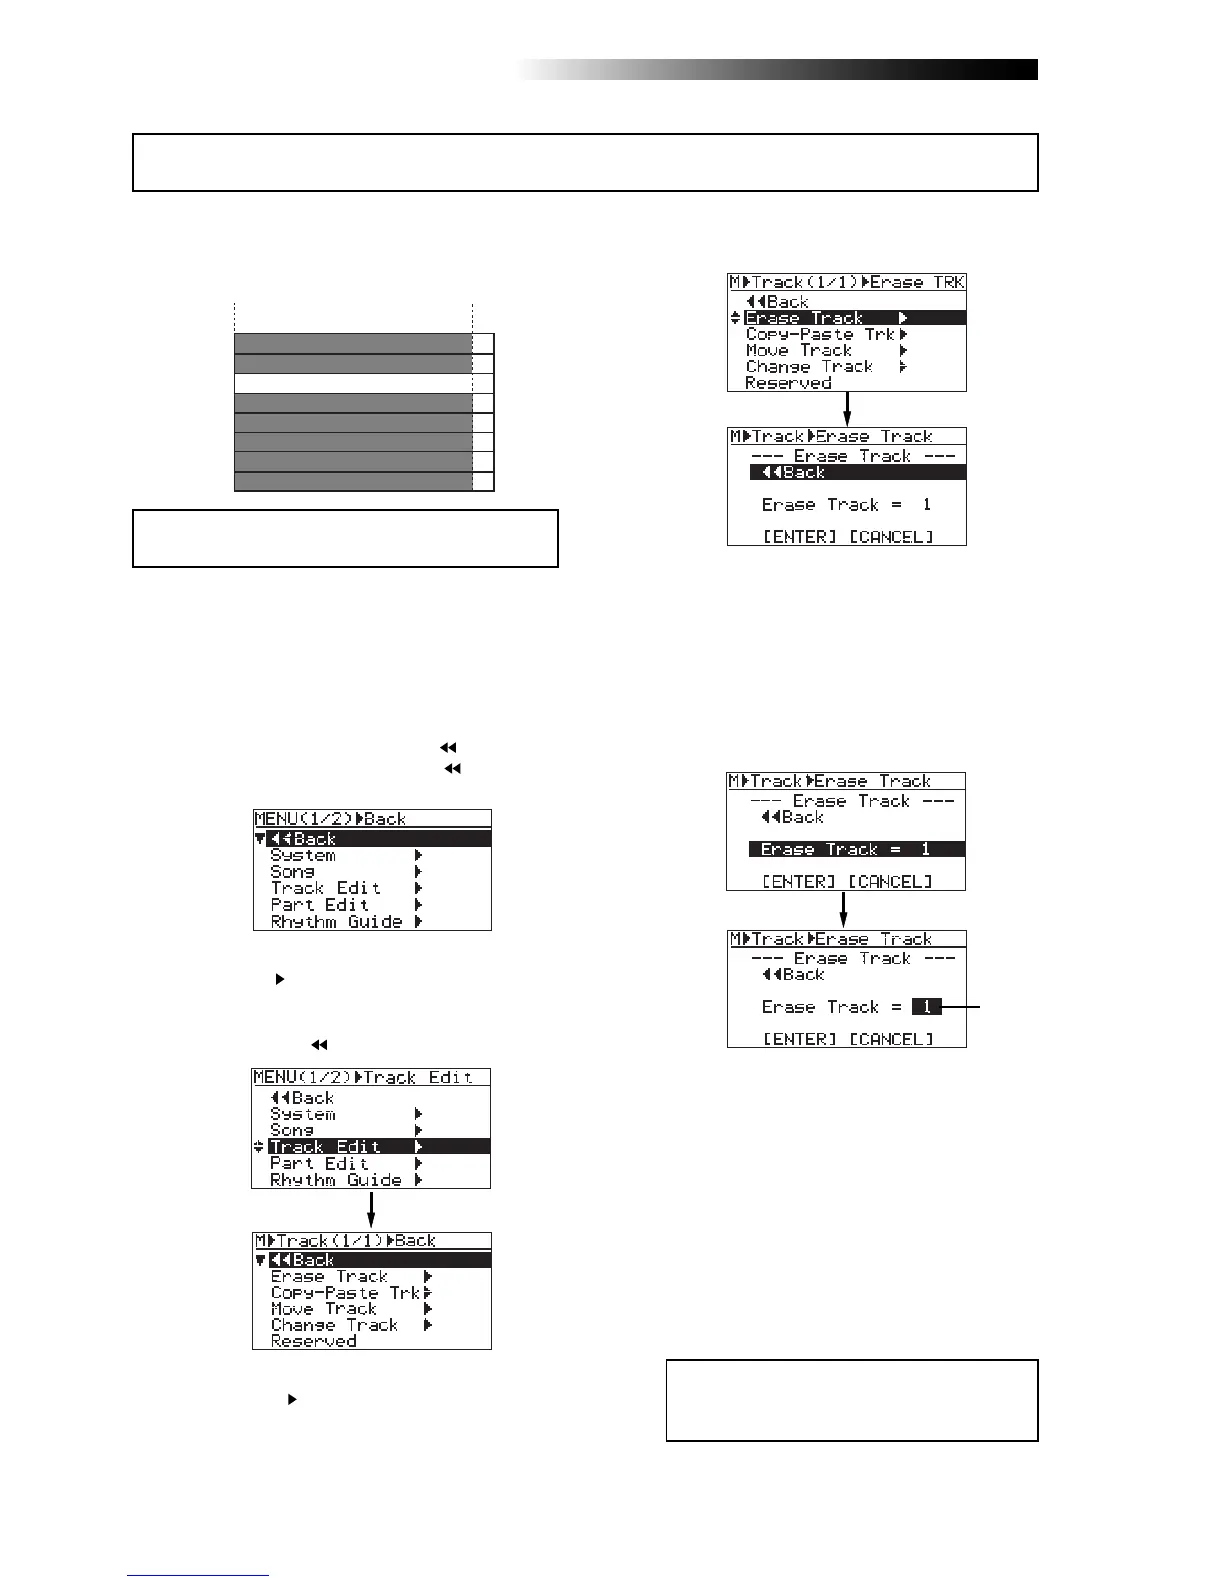
You can erase whole data (from ABS ZERO to REC END) of the desired track(s) of the song cur-
rently loaded.
1) Load the song you want to edit.
2) While the recorder is stopped, press the
[MENU/ENTER] knob to enter the menu mode.
The display now shows the first page of the
menu selection screen, where "
Back" is
highlighted initially (selecting "
Back"
returns to the previous screen).
TRK 1
TRK 2
TRK 3
TRK 4
TRK 5
TRK 6
TRK 7
TRK 8
Silent
ABS ZERO
REC END
4) Rotate the [MENU/ENTER] knob to select
"Erase Track
", and press the [MENU/ENTER]
knob.
The display now shows the screen for
selecting the track(s) to be erased.
<Note>:
You cannot erase track data of a song pro-
tected.
3) Rotate the [MENU/ENTER] knob to select
"Track Edit
", and press the [MENU/ENTER]
knob.
The display now shows the track edit menu
screen, where "
Back" is highlighted.
Erasing track data
Flashing