113
MR-8HD/CD Owner’s Manual (Part editing)
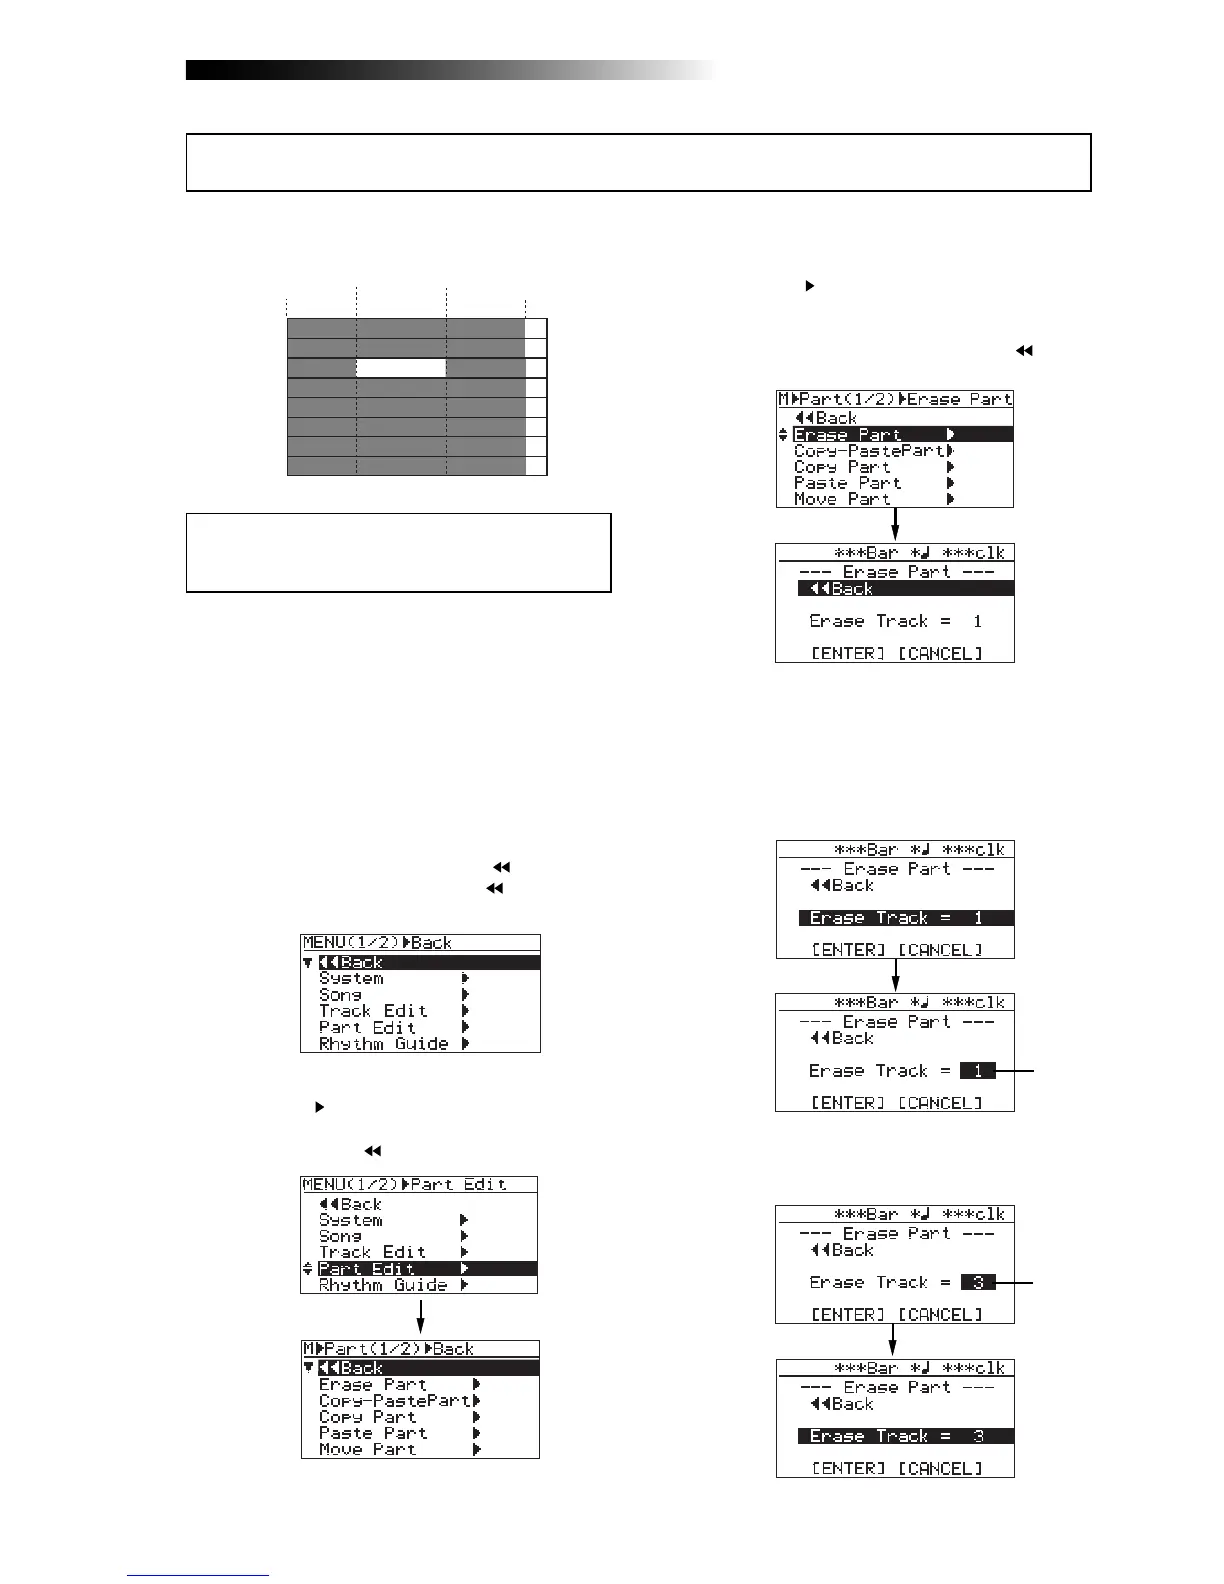
TRK 1
TRK 2
TRK 3
TRK 4
TRK 5
TRK 6
TRK 7
TRK 8
Silent
LOCATE A
point
LOCATE B
point
REC END
ABS ZERO
<Note>:
You cannot erase the part(s) of a song
which is protected. Release the song protection
before erasing the part(s).
1) Load the song you want to edit.
2) Set the LOCATE A and LOCATE B points (see
page 49).
You can check the part(s) by playing back the
recorder between the LOCATE A and LOCATE
B points (see page 44).
3) While the recorder is stopped, press the
[MENU/ENTER] knob to enter the menu mode.
The display now shows the first page of the
menu selection screen, where "
Back" is
highlighted initially (selecting "
Back" returns
to the previous screen).
4) Rotate the [MENU/ENTER] knob to select
"Part Edit
", and press the [MENU/ENTER] knob.
The display now shows the part edit menu
screen, where "
Back" is highlighted.
5) Rotate the [MENU/ENTER] knob to select
"Erase Part
", and press the [MENU/ENTER] knob.
The display now shows the screen for
selecting a track or tracks of which you want
to erase the part(s). On the screen, "
Back"
is initially highlighted.
6) Rotate the [MENU/ENTER] knob to select "Erase
Track = *", and press the [MENU/ENTER] knob.
The current option starts flashing and you can
now select the desired track(s) by rotating the
[MENU/ENTER] knob. The available options are:
• 1 through 8 (mono track)
• 1/2, 3/4, 5/6 and 7/8 (stereo tracks)
7) Rotate the [MENU/ENTER] knob to select the
desired option, and press the [MENU/ENTER] knob.
The display returns to the previous screen.
You can erase the part(s) on the selected track(s) of the current song.
Erasing the part(s)
Flashing
Flashing