4.1.7 Charging Station contacts (Robomow side) replacement
Required tools: Pliers Procedure duration: 10 minutes
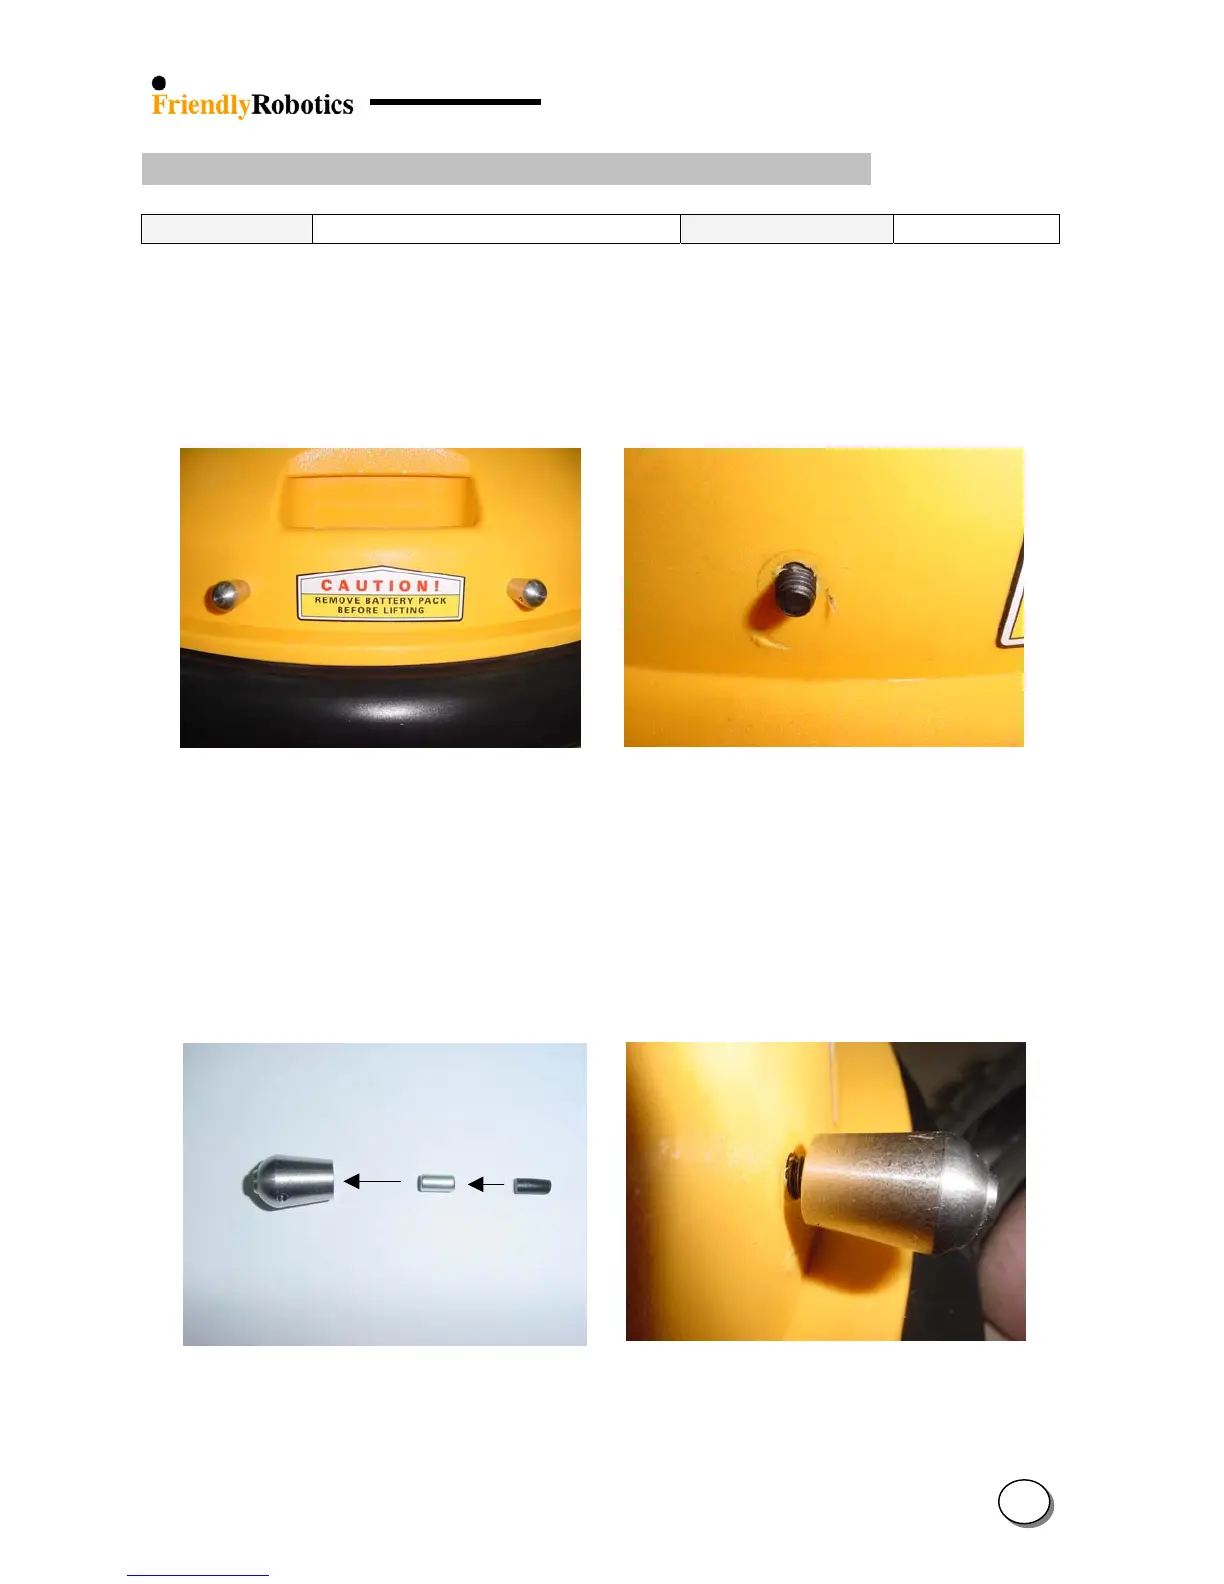
A. Remove the Power Pack from the Robomow.
B. Identify the two contacts on the Robomow front cover and unscrew them by hand or using
pliers, as illustrated in Figure 4.1.7.1 below.
C. After removing the contacts you will see the screw end (coming from the inner side of the
Robomow, as illustrated in Figure 4.1.7.2.
Figure 4.1.7.1 Figure 4.1.7.2
Charging contacts (RL side) Screw – after removing the contact
D. Replace the contact with a new one. Confirm the magnet and the rubber are inserted into the
contact in the right order (first the magnet then the rubber), as illustrated in Figure 4.1.7.3
below.
E. Screw the 2 contacts back to their place tightly – cover the contact with a piece of cloth to
protect it from scratches when using pliers.
Contact Ma
net Rubber
Figure 4.1.7.3 Figure 4.1.7.4
Insert the magnet and rubber Screw the contact back to its place
into the contact as shown in the Figure
4
10