4.1.2 Operating lamp replacement (LMP0004A)
Required tools: Flat screwdriver Procedure duration: 5 minutes
A. Remove the Power Pack from the Robomow.
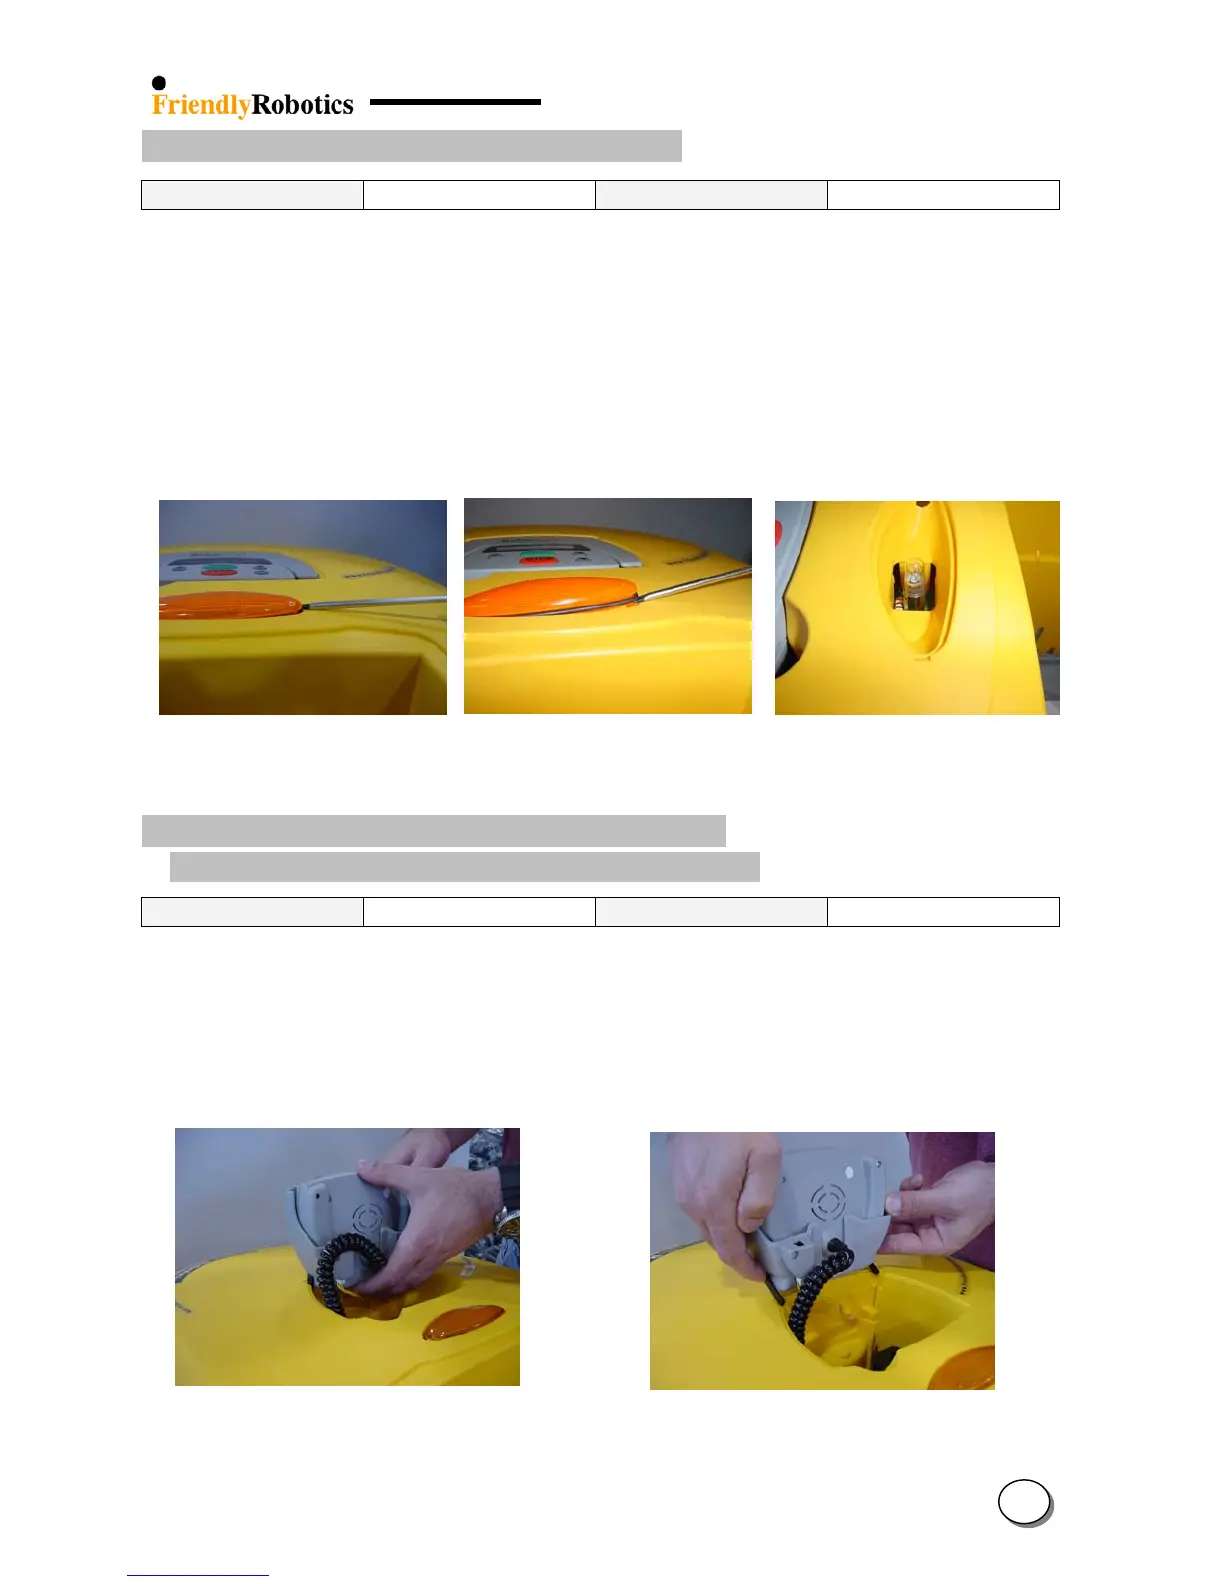
B. Insert the screwdriver into the notch of the lamp cover and lift, as illustrated in Figure 4.1.2.1.
Be cautious not to pinch or damage the seal ring.
C. Repeat step B on the other side of the cover.
D. Gently re-insert the screwdriver under the seal ring and continue lifting the lamp cover, as
illustrated in Figure 4.1.2.2
E. Remove the burnt lamp and replace with a new 24V 14W lamp (Figure 4.1.2.3).
F. Return the lamp cover and complete the General Test as outlined in section 5.1.
Figure 4.1.2.1 Figure 4.1.2.2 Figure 4.1.2.3
Initial lifting of the cover Screwdriver under the seal ring Operating lamp
4.1.3 Manual Controller (MSB0118A) Replacement
M. Con. Holder Assembly (MSB0105B) Replacement
Required tools: None Procedure duration: 5 minutes
A. Remove the Power Pack from the Robomow.
B. Lift the M. Con. Holder or the Manual Controller to an upright position, in its holder.
C. Grab the holder and pull it straight up, as illustrated in Figure 4.1.3.1
D. Once the two black pivots are released from the yellow cover place a finger on each one and
pull the assembly completely out of its place, as illustrated in Figure 4.1.3.2
Figure 4.1.3.1 Figure 4.1.3.2
Holding the M. Controller for removal Releasing the controller from its place
4
4