4.4.3 Docking Board replacement
Required tools: Philips screwdriver Procedure duration: 15 minutes
A. Remove the Robomow from the Charging Station.
B. Disconnect the Power Supply from the wall socket.
C. Remove the cover and disconnect the Power Supply from the Docking Board, as explained in
section 4.4.2.
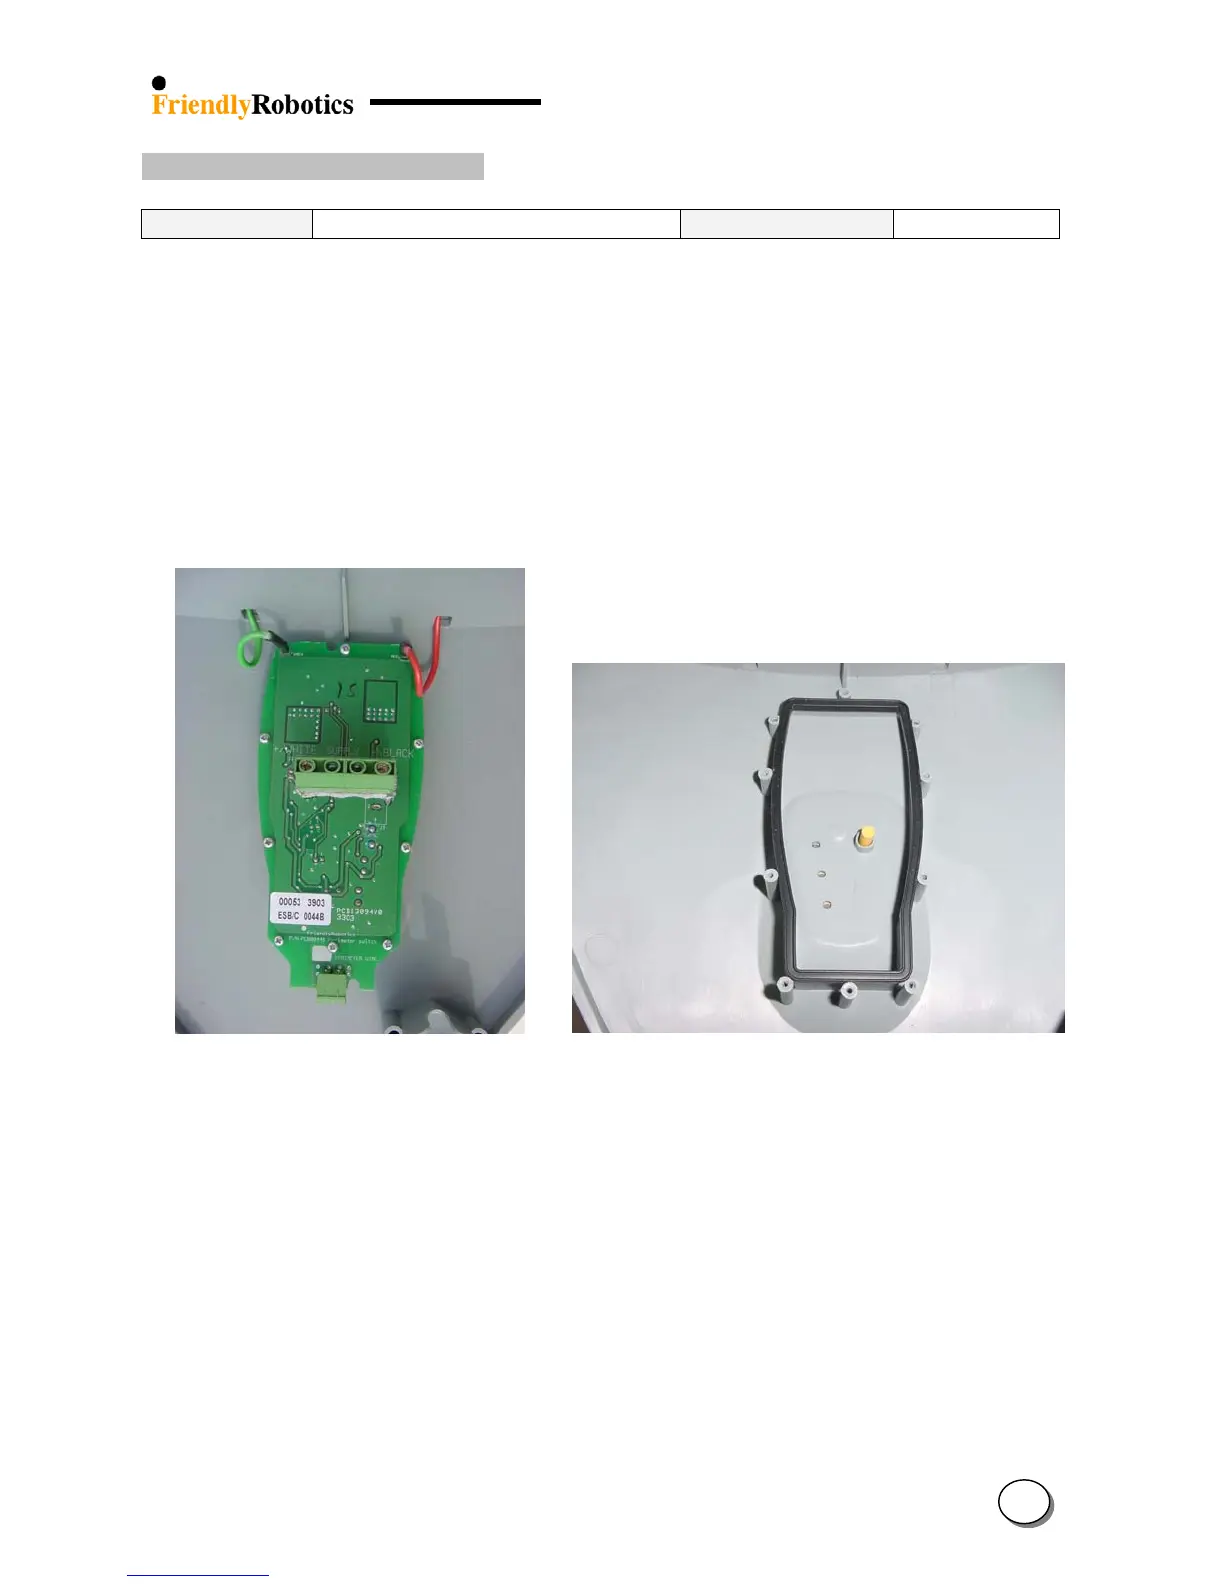
D. Open the 8 screws on the Docking Board, as illustrated in Figure 4.4.3.1.
E. Remove the faulty board and replace it with a new one. Lay the cover on its back and confirm
the push button is in its place and in the right direction (flat surface towards the docking
board) and that the docking board seal is properly seated in its place on the gray plastic edge,
as illustrated in Figure 4.4.3.2 below.
Figure 4.4.3.1 Figure 4.4.3.2
Docking board 8 screws Proper position of the push button and the seal
F. Place the board on the seal so the 8 holes on the board are exactly above the counter-holes in
the cover and tighten the 8 screws.
G. Repeat steps F to H, as explained in section 4.4.2.
4
53