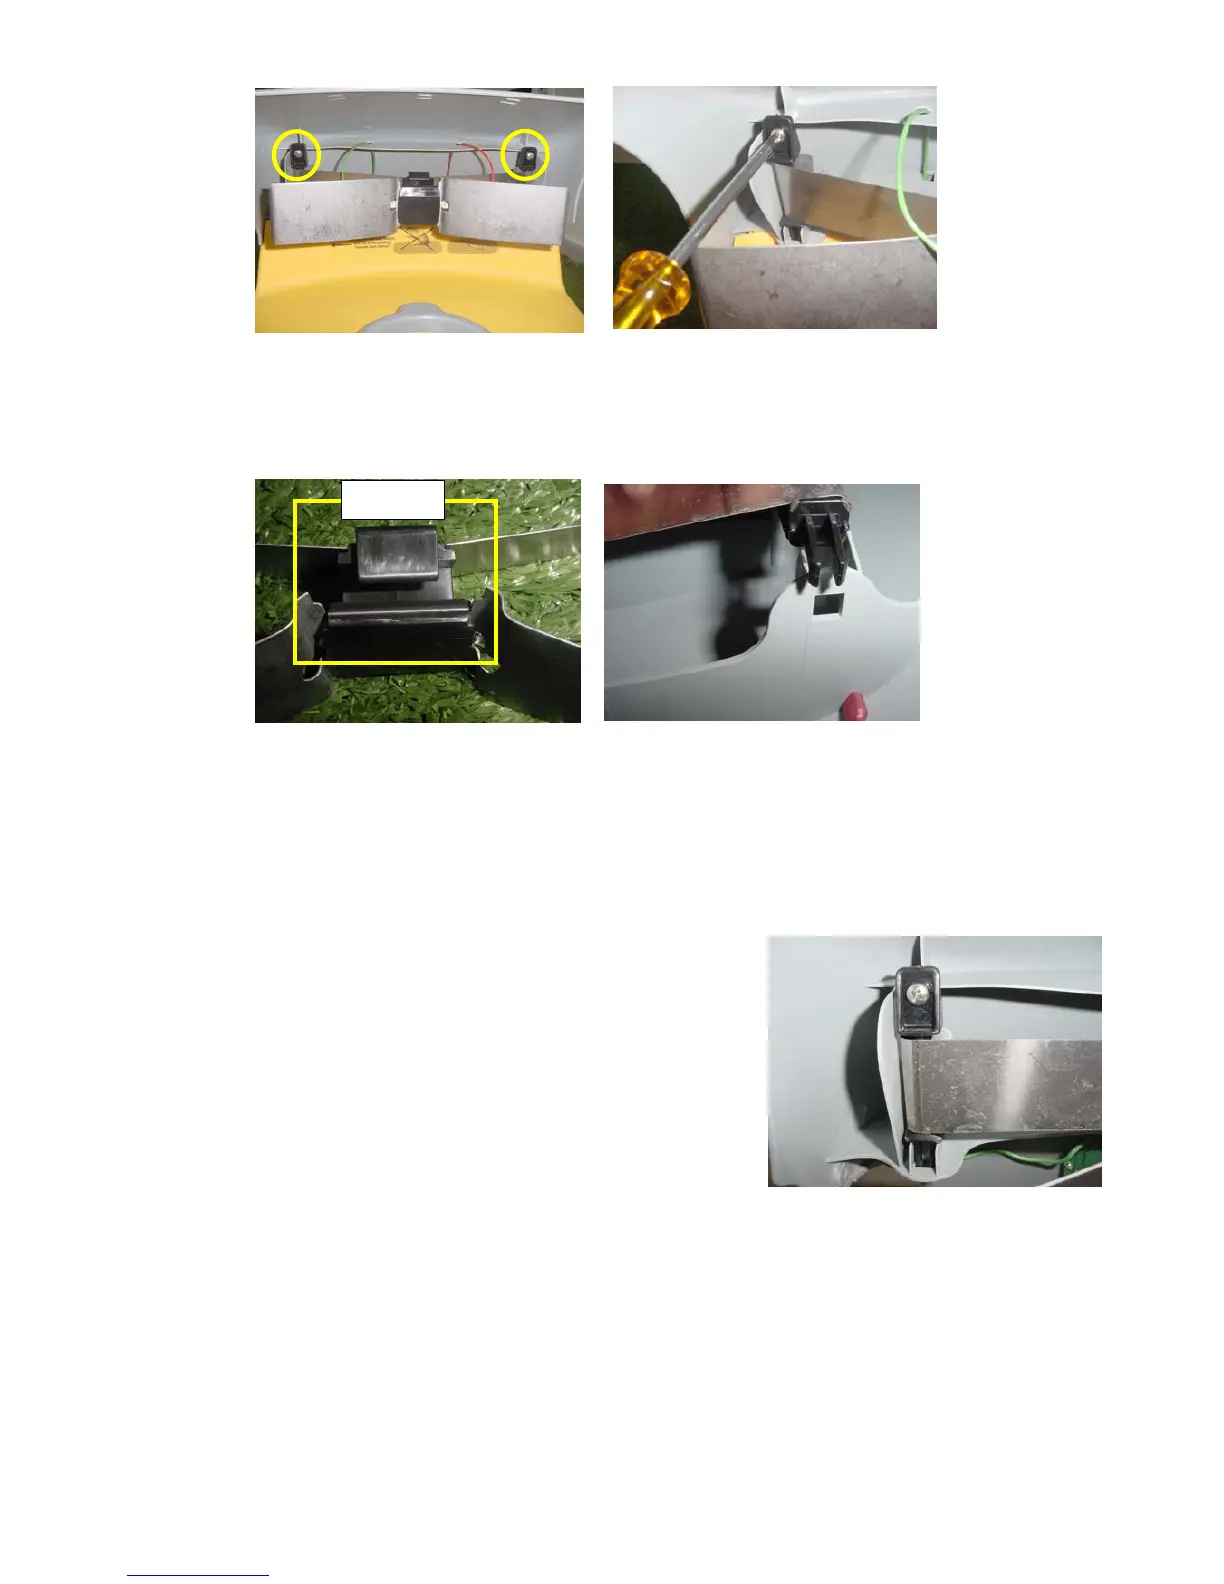
Figure 2
Opening the contacts screws
E. Replace the docking contact assembly with a new one, when the topside direction is as shown in Figure 3.
Place the contacts holder above the aperture in the cover, as illustrated in Figure 4 below.
Top Side
Figure 3 Figure 4
Top side direction of the contacts Align the contact holder against
the aperture assembly
F. Confirm the holder is placed in the apertures and tighten the screws. Ensure the contacts assembly is
properly placed as illustrated in Figure 5.
G. Connect the contacts cables (Red and
Green) back to the taps as illustrated in
Figure 1 above (confirm the Red is
connected to the RH side and the Green to
the LH side).
H. Connect the Power supply to the wall socket
and switch on the Docking Station board to
check the functionality of the Docking
Station.
Figure 5
Final position of the contacts
z Page 2