46
2-step mode - Welding: pull back and hold the torch trigger
- End of welding: release the torch trigger
IMPORTANT! To work in 2-step mode after 2-step mode has been selected, the SPt setup
parameter must be set to "OFF" and the special spot welding indicator on the control panel
must not light up.
Spot welding If a value has been set for the SPt setup parameter, 2-step mode will have the function of
spot welding mode. The special spot welding indicator on the control panel lights up.
- Welding: briefly pull back the torch trigger
The welding time corresponds to the value set for the SPt setup parameter.
- To end the welding process prematurely: pull the torch trigger back again
When using a pedal remote control unit, the spot welding time starts when the pedal re-
mote control is operated. The power cannot be controlled using the pedal remote control
unit.
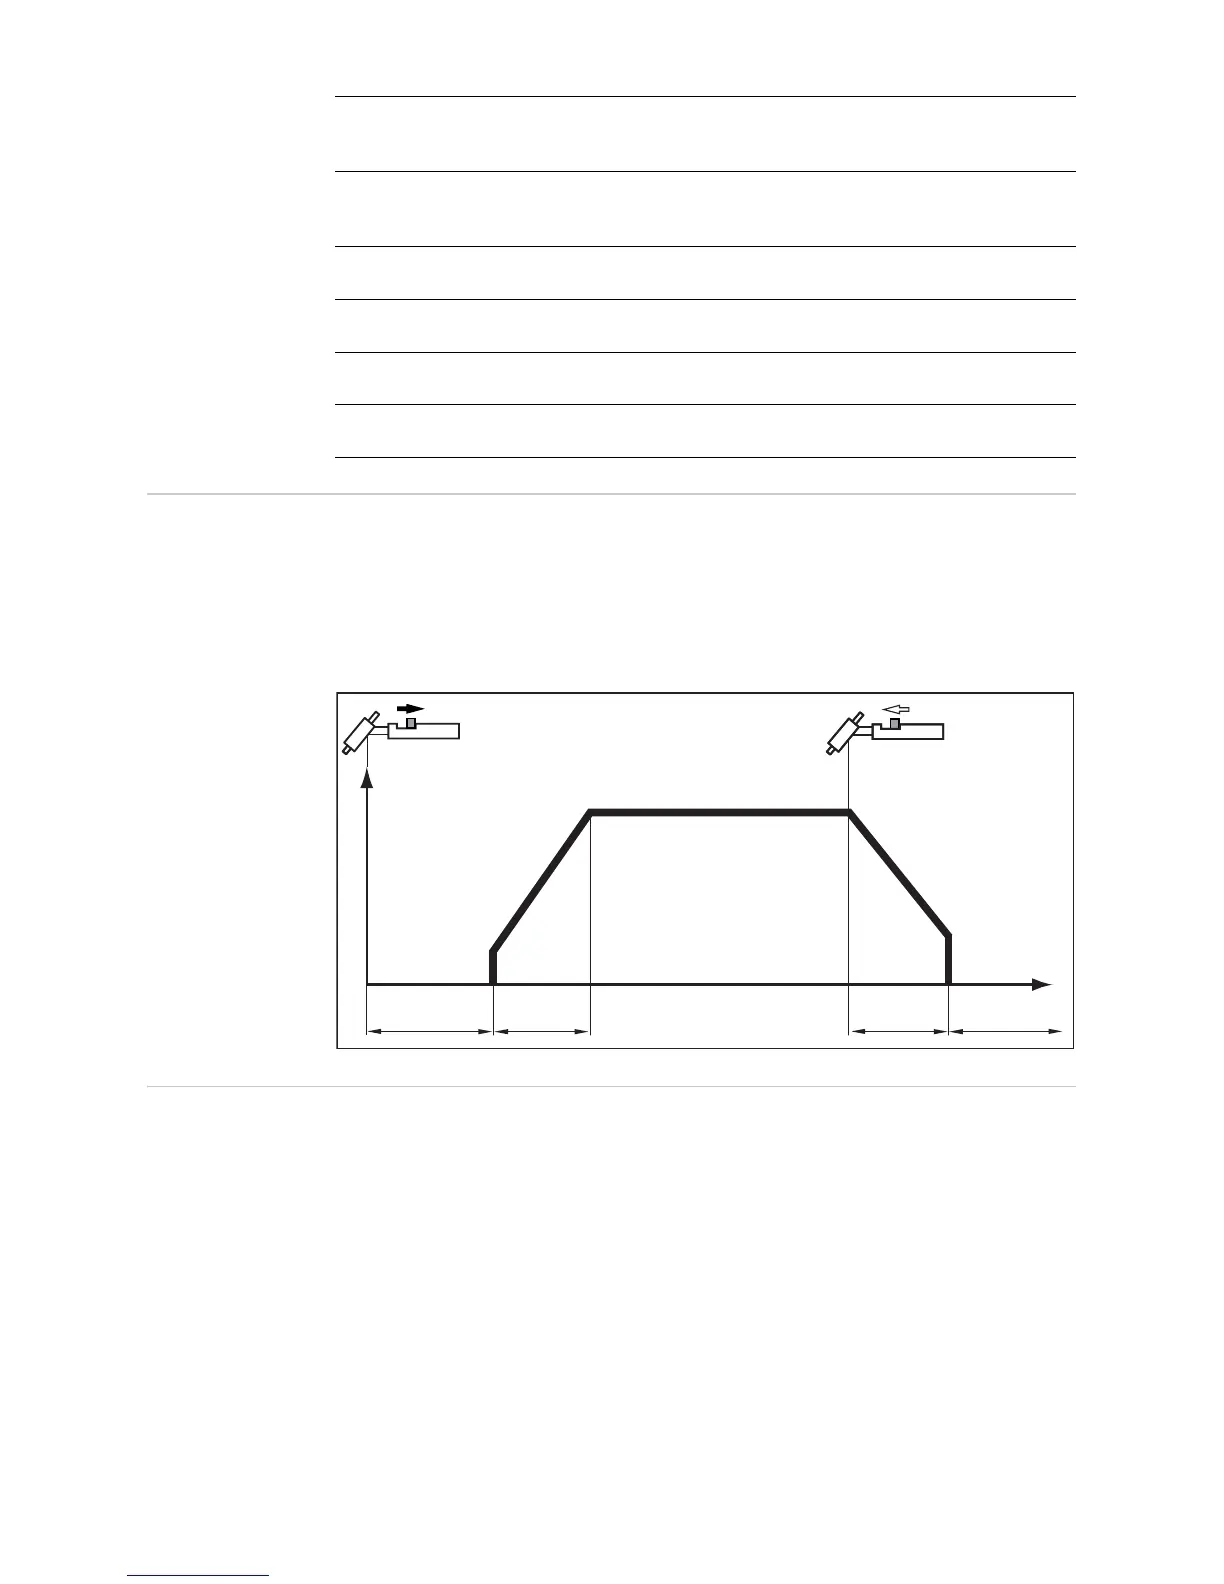
t
down
Downslope phase: the welding current is continuously lowered until it reaches the end-
crater current
I
E
End current phase: to prevent any local overheating of the base material due to heat
build-ups towards the end of welding. This eliminates any risk of weld drop-through.
t
E
End current time
SPt
Spot welding time
G-H
Gas post-flow time at maximum welding current
G-L
Gas post-flow time at minimum welding current

 Loading...