4 Scan
152
Scan
4
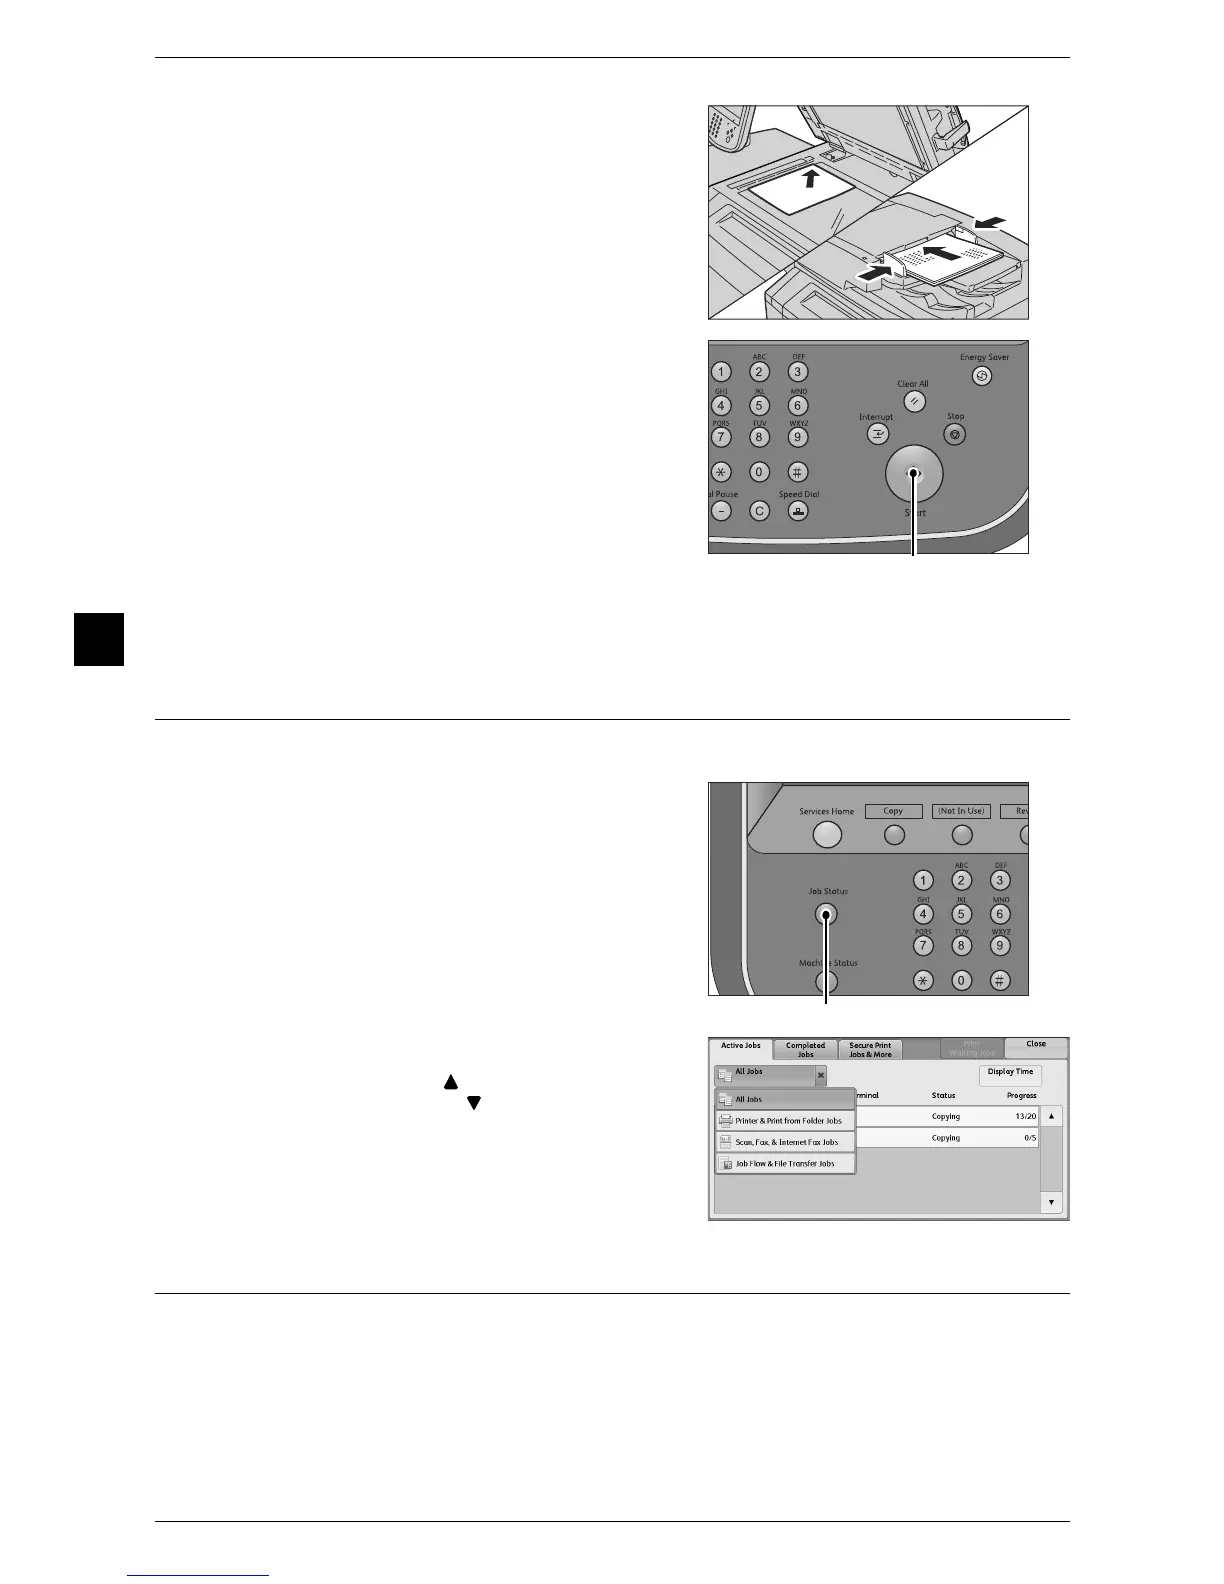
3 Load the next document.
4 Press the <Start> button.
If you have more documents, repeat steps 3
and 4.
5 When all documents have been scanned, select [Last Original].
Step 4 Confirming the Scan Job in Job Status
The following describes how to confirm the status of a scan job.
1 Press the <Job Status> button.
2 Confirm the job status.
Note • Select [ ] to return to the previous
screen or [ ] to move to the next screen.
Step 5 Saving the Scanned Data
The scanned documents will be stored in a destination file server specified by the job
template.
For more information, refer to the Network Controller user documentation.
 Loading...