CHAPTER 3: Replacing notebook components
100
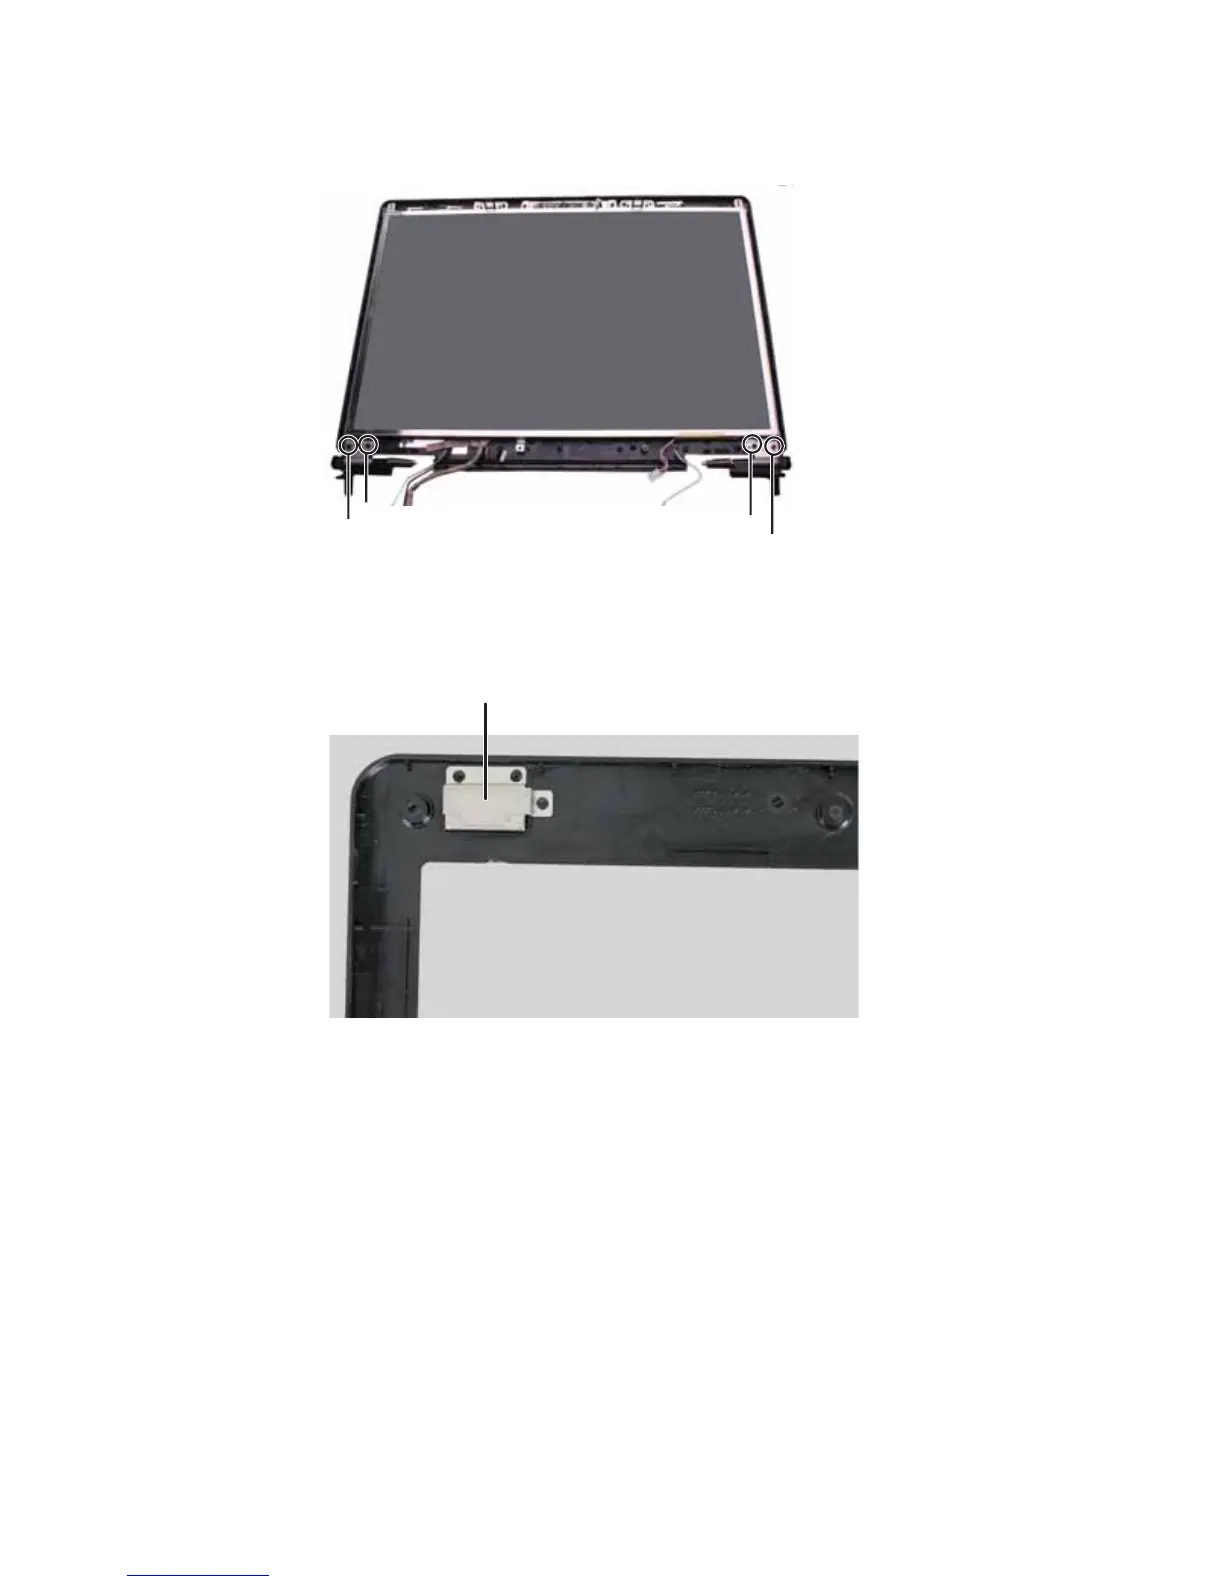
9 Remove the screws that secure the LCD panel to the LCD panel lid.
10 Carefully raise each of the bottom corners of the LCD panel and replace the old
hinges with new hinges.
11 Replace the screws that were removed in Step 9.
12 Make sure that the magnet has remained in the magnet bracket.
13 Press the LCD panel front and back together. Press the two halves together in several
places until they click in place. You should find no loose spots or spots where the
two halves do not meet.
14 Replace the LCD panel assembly screws removed in Step 7.
15 Replace the rubber inserts removed in Step 6.
16 Replace the LCD assembly by following the steps in “Replacing the LCD assembly”
on page 91.
17 Replace the keyboard by following the steps in “Replacing the keyboard” on
page 79.
18 Replace the keyboard cover by following the steps in “Replacing the keyboard
cover” on page 76.
19 Turn the notebook over so the bottom is facing up.
20 Reconnect the antenna wires to the wireless card by following the steps in
“Replacing the IEEE 802.11 wireless card” on page 63.
Screw
Screw
Screw
Screw
Magnet bracket and magnet